Configuring POS Messages
Use Employees > POS messages to configure POS Messages in Back Office so the employees can receive important updates on the POS at the start of a shift and the message remains visible until a designated expiration date. Additionally, you must enable the user role permission 'POS Messages' in Back Office. You can create, schedule, and manage messages for an individual store or all stores. For example, you can send a message to all employees that a regional manager will arrive at the store tomorrow.
To configure POS Messages:
- Log in to Back Office using Company View (ALL STORES).
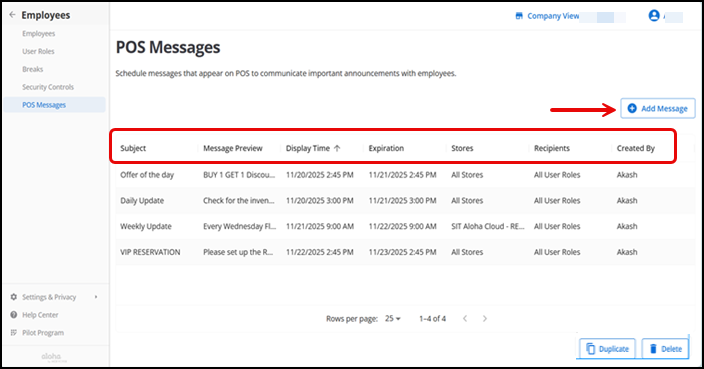
- Select Employees > POS messages. The POS messages screen displays all existing messages in a table format with a Subject, Message Preview, Display Time, Expiration, Stores, Recipients, and Created By.
NOTE: The message preview in the data grid is truncated to fit the column width. You must tap the message to view the full content.
- Click Add Message. The POS Message details screen appears.
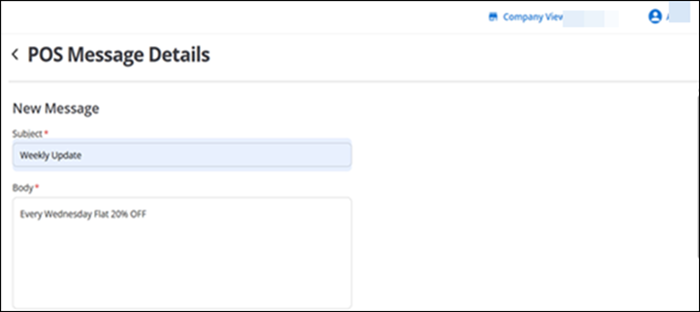
- Enter a Subject (serves as the message title).
- Enter the message content (up to 500-characters).
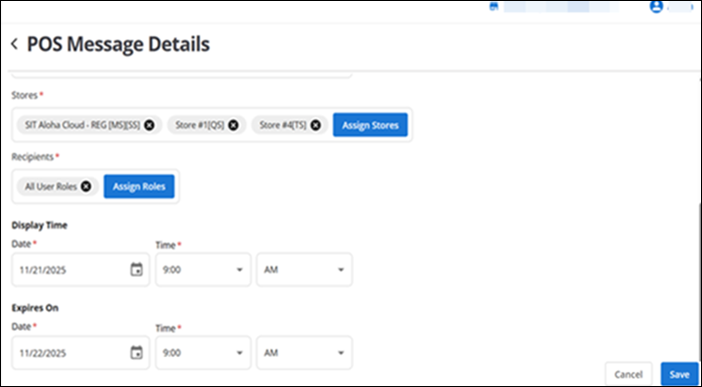
- Click Assign stores to select the desired stores for which to receive the message, or select All stores and click Done.
- Click Assign Roles to select the user roles (Jobs) for which to receive the message, such as cashier or bartender, or select All User Roles, then click Done.
- Select a start date and time for the message to appear on the POS. Select a time in 15-minute increments from the drop-down list.
- Select an end date and time for the message to expire.
Note: By default, the display time is set to the next available 15-minute interval. For example, if the current time is 9:55 AM, the display time is set to 10:00 AM on the same day. Additionally, the expiration date and time defaults to 24 hours after the display time, although you can adjust it manually.
- Click Save Message.
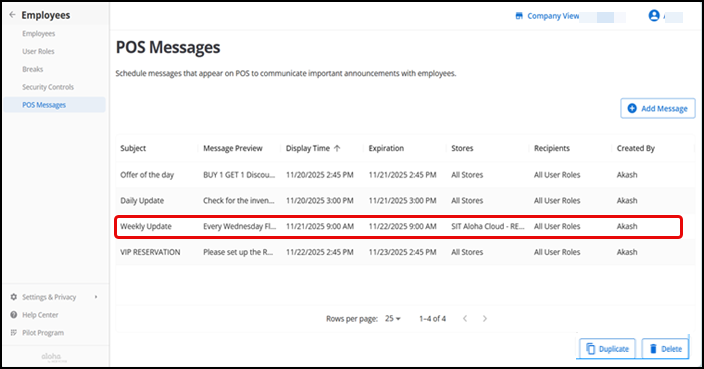
The configured message appears on the POS messages screen.
- Click Duplicate to copy an existing message and modify the details.
- Click Delete to remove a message permanently.