Using the kitchen display system
When a cashier taps Save (TS), Send (TS), Pay, or moves away from the order entry screen on the POS, the order routes to the kitchen display system in the same way it routes to kitchen printers. As kitchen staff prepare items, they bump individual items or entire orders from the Active screen to the Bumped screen. Kitchen staff interact with the touchscreen interface in a variety of ways.
Note: Kitchen Display is compatible with your Restaurant POS and requires an in-store server to operate.
Viewing active screen
To view customer details on a delivery order, long press on the order header to expand the order.
Viewing void item screen
Viewing void ticket screen
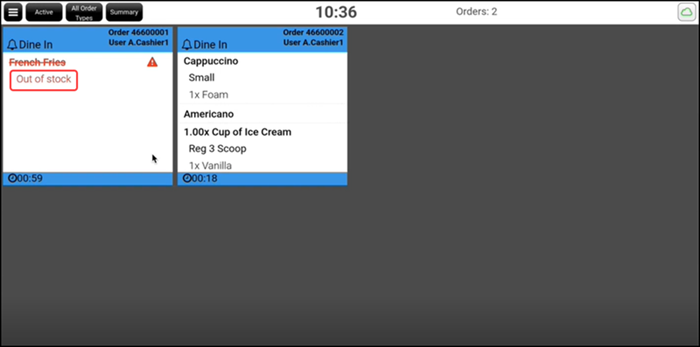
Viewing item marked as out of stock
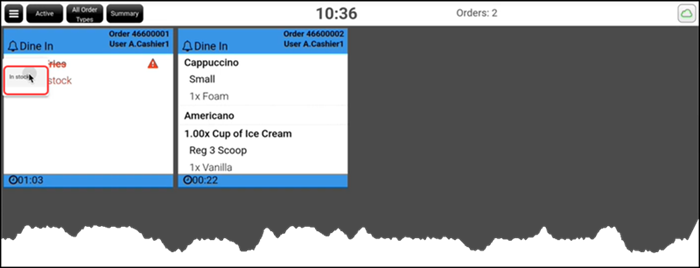
Viewing item marked as in stock
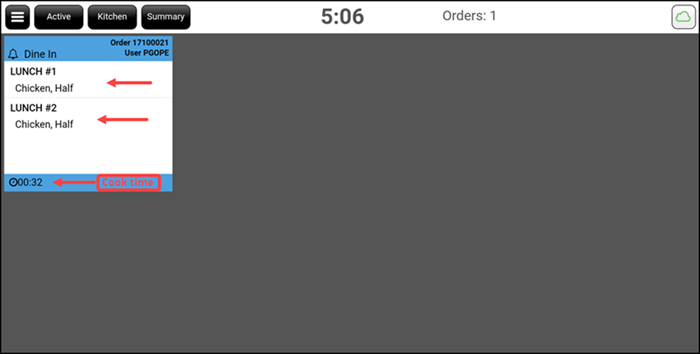
Viewing item cook times
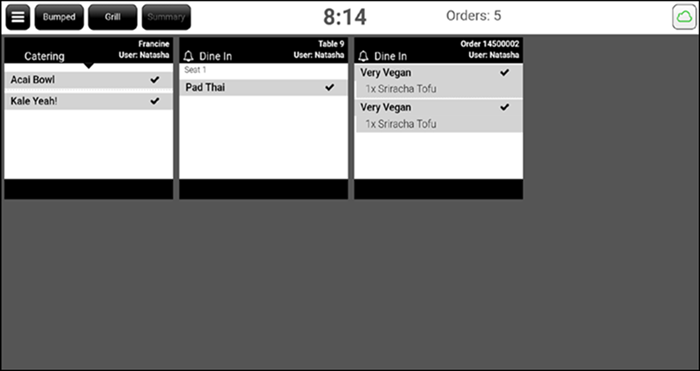
Viewing bumped screen
Viewing summary screen
Viewing refired items
Viewing rushed orders
Viewing color codes of items, categories, modifiers and modifier groups
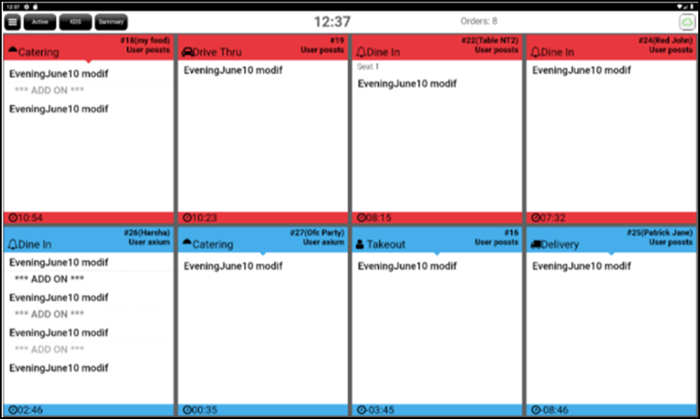
Kitchen display color indicators
- Blue: New orders
- Yellow: Aged orders that have passed the first threshold time set in Back Office.
- Red: Old orders that have passed the second threshold time set in the Back Office.
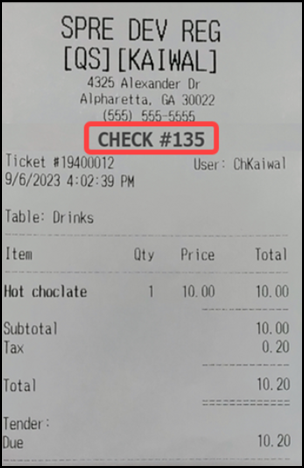
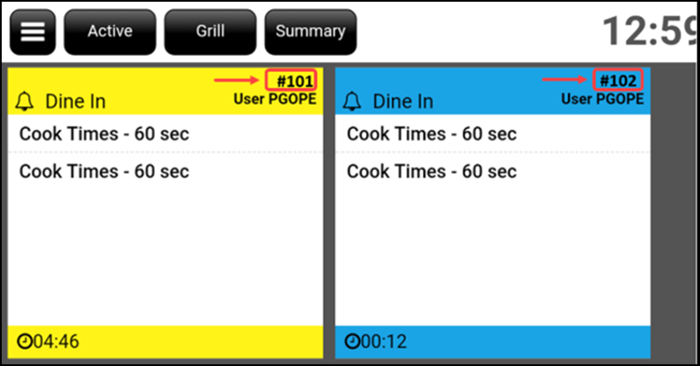
Viewing check sequence numbers
Viewing item kitchen name

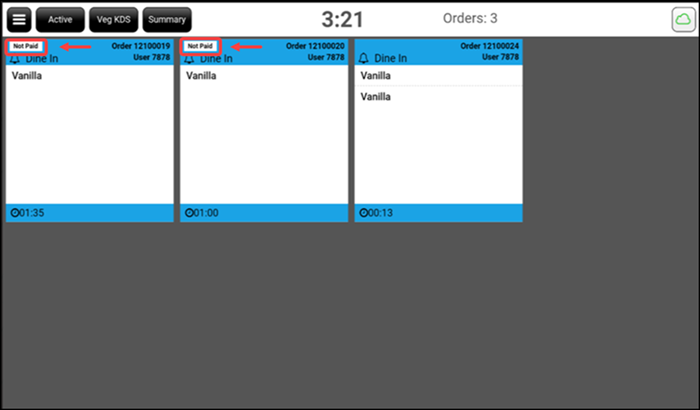
Viewing payment status indicator
Large Order Display: — Large orders might span across two spaces. If they do, the ticket image on the display shows a perforated edge indicating the order continues across two cells.
Additional Items Ordered: — If more items are sent to the kitchen after the first batch of items was already sent to the kitchen, the additional items are shown inside the same "routed order" but each additional batch of items is separated from the previous items by small separator saying "ADD-ON".
Bumping Items: — Once an item is prepared, you can single tap the item to bump it from the kitchen display and mark it as prepared and store the device that it was prepared on. Items can be un-bumped from the Bumped screen.
Bumping Orders: — Once an order is prepared, you can single tap the order to bump it from the kitchen display and mark it as prepared and store the device that it was prepared on. Orders can be un-bumped from the Bumped screen.
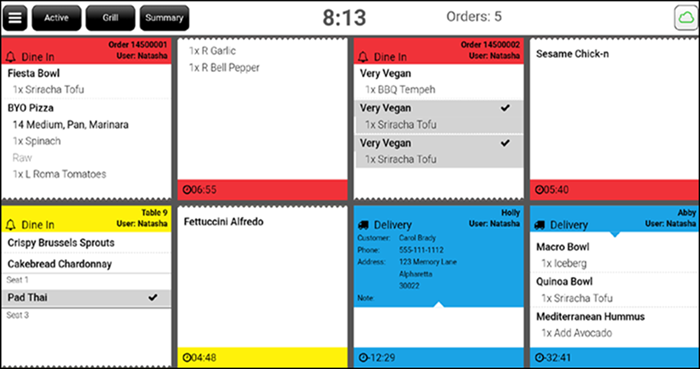
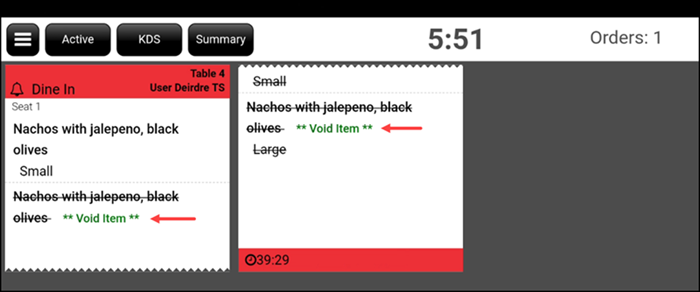
Voided Orders: — Items or orders that are voided after a ticket is tendered or sent to a kitchen (Kitchen Printer, Kitchen EXPO and KDS). A strike-through line appears on voided items or the entire order on the kitchen chit. Also, VOID TICKET text appears on the kitchen chit and flashes on the KDS. You must still bump voided items and orders from the device.
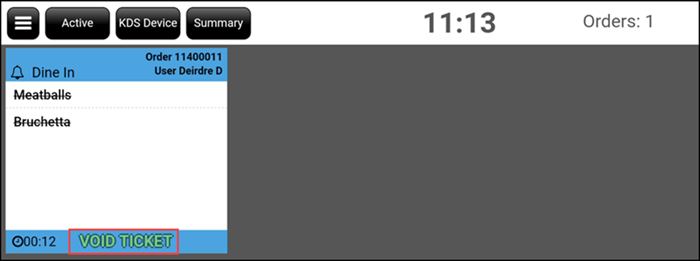
86'ing Items: — Allows you to mark item availability status such as In Stock/Out of Stock by swiping on the item. A strike-through line appears on the unavailable item or the entire order and shows the status as Out of stock.
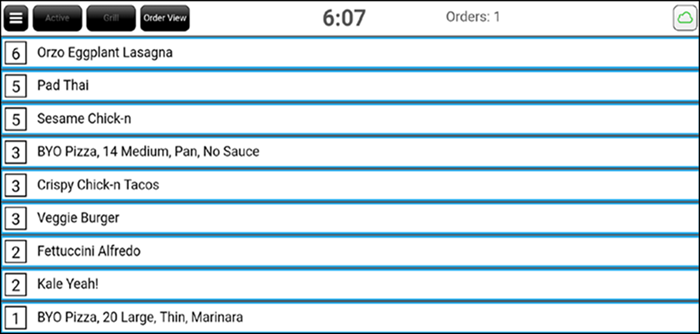
Cook Times: — Allows you to view the total time it takes to complete the cooking of each item. An item with the longest cooking time appears on the KDS first, followed by the items that take lesser time to cook.
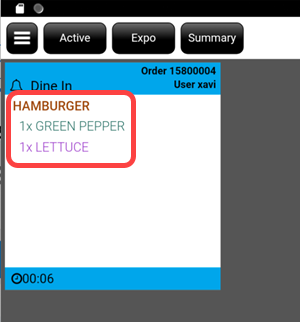
Color Coding: — Allows you to differentiate between menu items, such as the item size, by assigning a different color to each item. This helps in assigning and identifying the items and modifiers that are sent to multiple prep stations.
Check sequence number: — Used for tracking/identifying orders in the kitchen and at the front counter for calling out/displaying check numbers to guests.
Item kitchen name: — Allows you to define a kitchen name to appear on a KDS (Kitchen Display System), providing the ability to abbreviate menu item names and support language translations. The kitchen name also replaces the item name that prints on the kitchen printers. The POS system and online ordering site show the kitchen name assigned to an item.
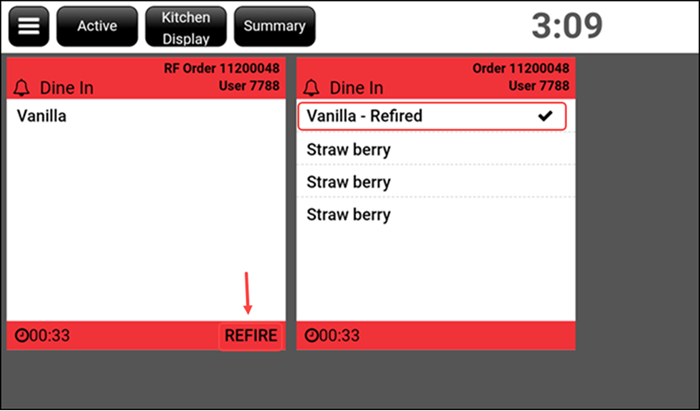
Refiring Items: — Once an order is closed/bumped, you must long press the desired item to refire it to the kitchen from the EXPO screen.
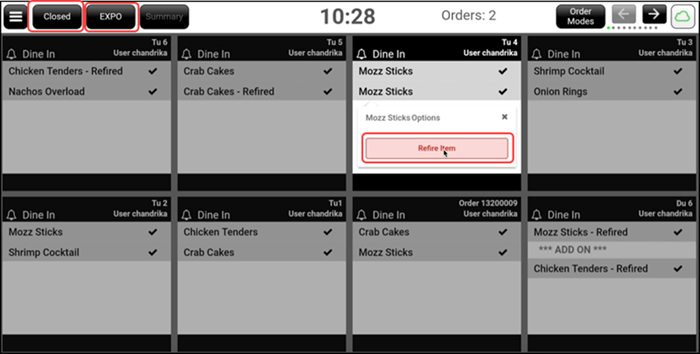
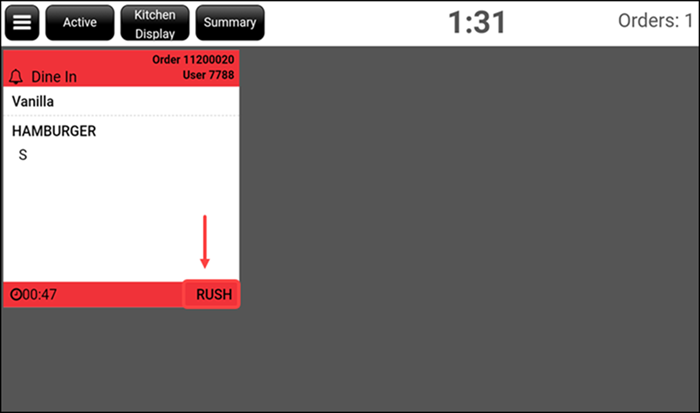
Rushing Orders: — Once an order is active in the EXPO screen, you can long press the order to rush it with high priority. Rushed tickets sort according to the time at which they are rushed to the kitchen from the EXPO screen.
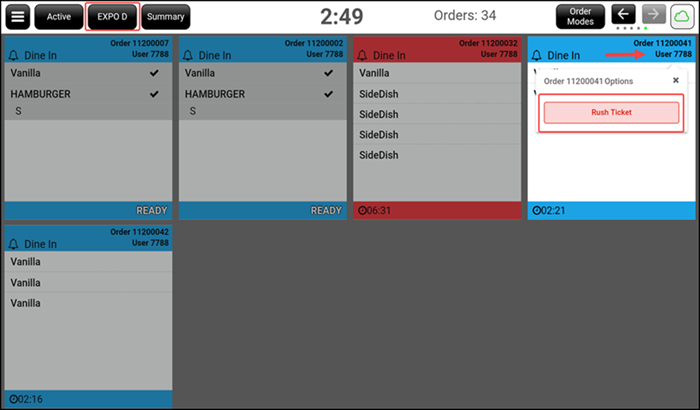
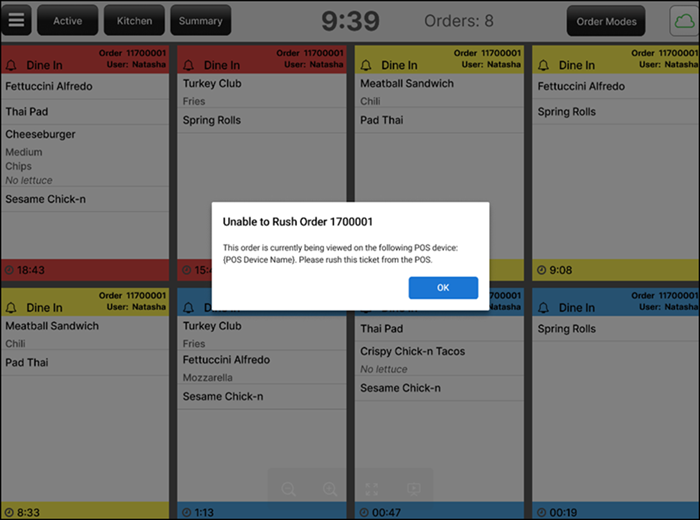
Note: If an order is open in the POS, you cannot rush the order from the EXPO screen. If you try to rush the order from the EXPO screen, the below error message appears.
Using the kitchen expo station
The Expeditor (aka: Expo) is a key role in the kitchens of restaurants with a high demand of orders that need to be processed with efficiency, taking into consideration the preparation time for every item in the order to serve fresh and hot meals to consumers.
Once you are able to add Expo devices, you can see the list of devices that are added, so eventually you will be able to edit them or delete them. From the Expo Station view, when there are Expo devices added to the store, the list of those devices appears. Click the headers in the list to re-sort the items in the list.
Note: The Expo station configuration is only available in Store view. The expo station configuration only works if there is at least one Routing group configured under Kitchen routing setup.
When new items appear on the prep stations KDS, they should also appear in the Expo displays altogether. For example: When there is an order with a Bacon Burger and a Caesar Salad, the Caesar Salad appears on the Salad prep station KDS and the Bacon Burger appears on the Grill prep station KDS; however, both the Caesar Salad and the Bacon Burger appear together under the same ticket on the Expo display.
Note: If items are voided after sent to Kitchen and before firing to Kitchen, those voided items do not appear on the KDS screen but appear on Expo.
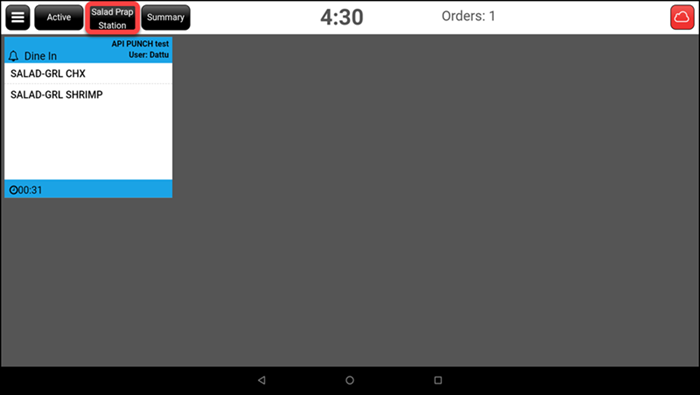
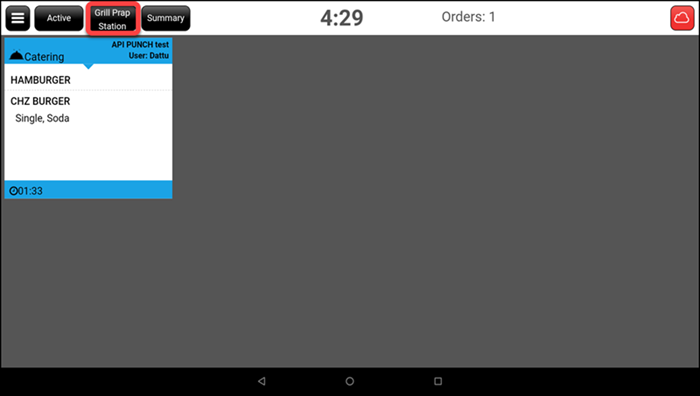

When the kitchen staff finishes with the item, the kitchen staff bumps the item on the KDS screen, as usual; after which, the Expo display screen displays the item as "bumped" (checkmark).
Note: The Expeditor can also bump items in tickets from the Expo display, and such items get bumped from the prep station displays, as well. This functionality is very useful when there is a problem with the prep station KDS and they are not able to bump the item or they just forgot to bump the item.
From the Expo display, once you bump all items on a ticket, the ticket flashes a Ready sign letting know an order is ready to be served.
After a server takes the order to the table, the Expeditor bumps or closes the whole ticket. The ticket then disappears from the Expo display view, leaving room for a new ticket.
In case a ticket is in the Ready state, and an Add-On order is triggered for that table, the ticket will go back to the not-Ready state and will not show the Ready sign.
You can configure one or multiple Kitchen Display Screens as a KDS Expo display screen for consolidating kitchen ticket items for restaurant expeditors, improving order accuracy and speed of service. You are also be able to choose the order modes to appear on the Expo screen, providing enhanced flexibility keeping the staff focused on the order types that matter for their station. Expo display screens also allow you to have a filtered view of the tickets depending on the visible order modes. You can select All Order Modes (selected by default), or select multiple order modes enabled in the store.
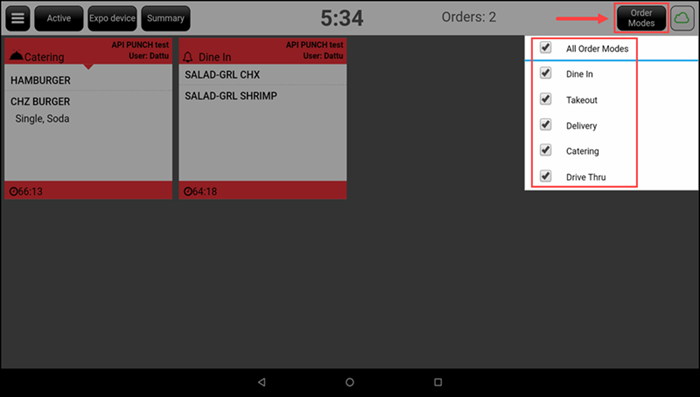
When the SMS Order Ready notification is enabled for your store, once you bump the entire ticket, a text message is automatically sent to the customer informing them the order is ready for pickup.
Using the kitchen expo printer
You can now configure one or more kitchen printers as an Expo Printer to help maintain order accuracy by having a consolidated kitchen chit. You can also choose the order types the printer prints. For example, if an Expo Printer is configured for takeout and dine-in orders, it prints the kitchen chits for takeout and dine-in orders only. This is configured in Aloha Cloud Back Office.
Printer receipt
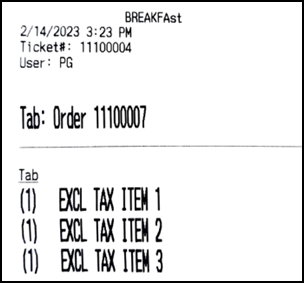
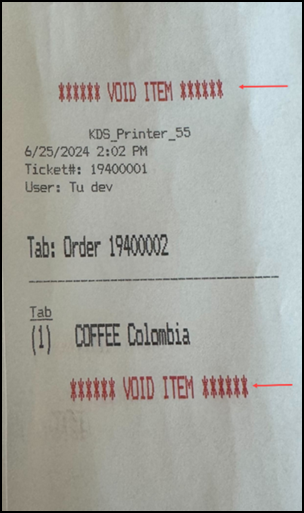
Printer receipt for void items
VOID ITEM text appears bold, red (impact printers) or remain in black (thermal printers) on the kitchen chit.
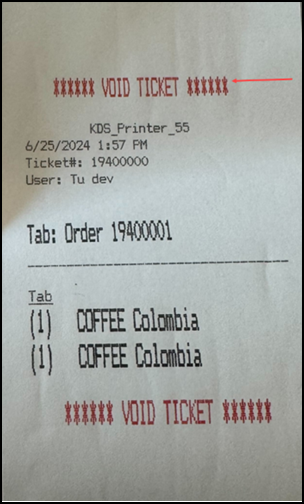
Printer receipt for void tickets
VOID TICKET text appears bold, red (impact printers) or remain in black (thermal printers) on the kitchen chit.
