Installing the kitchen display system
You can install a kitchen display device on a wall or on a pole. Your CX5 display and hardware comes with all the parts and accessories needed to mount the device at your location. While unboxing, ensure and verify the following main components are included:
- Display screen
- Accessory box containing power cords and network cables.
Installing the kitchen display device on a wall
While installing a kitchen display device on a wall, you will require the wall mount adapter, wall mount bracket, and mounting screws in addition to the components in the box.
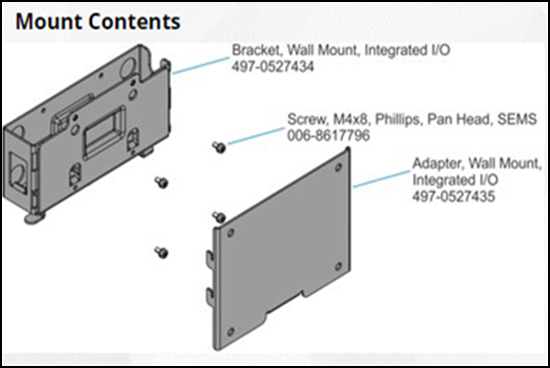
To mount the CX5 kitchen display device on a wall:
-
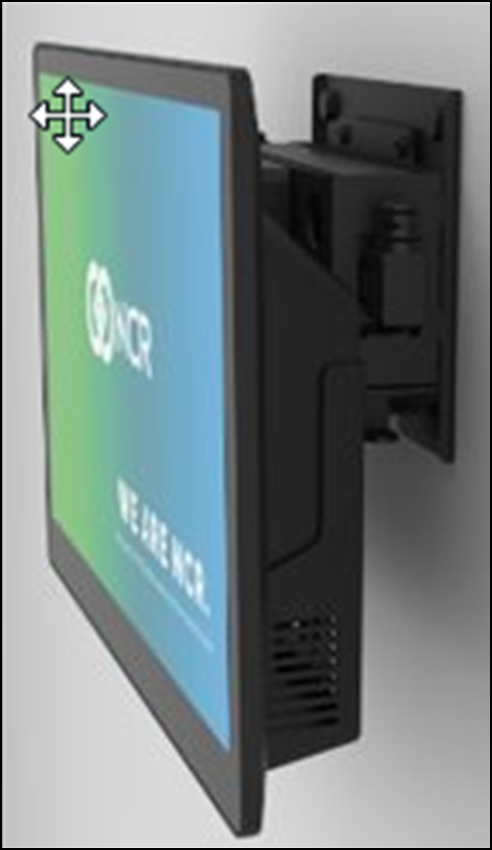
Install the wall mount adapter on a wall using four mounting screws. Be sure to use the proper hardware for drywall or concrete/brick wall mounting.
Note: Attach, if possible, at least the left or right-side screws to a stud for drywall installations.
-
Place the display screen face down on a flat surface. Be sure to use padding to protect the display from scratches.
-
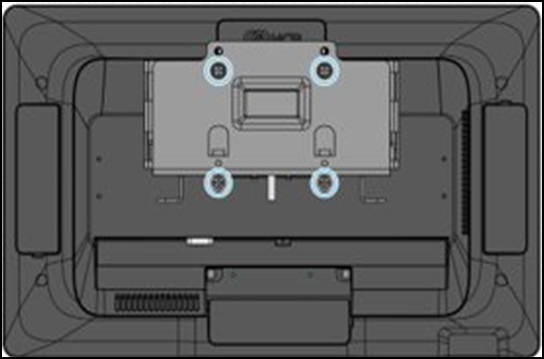
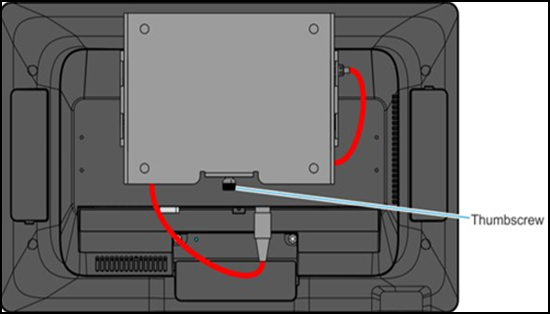
Install the bracket on the back of the display screen using four thumbscrews provided.
-
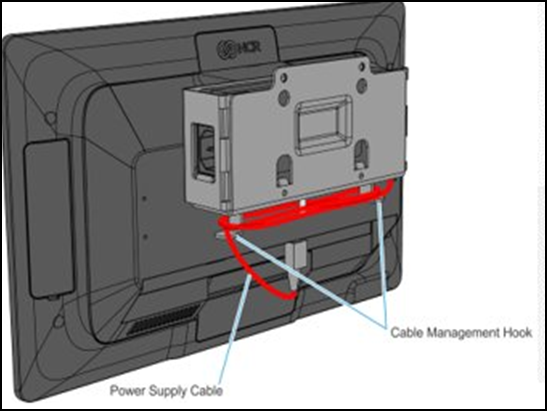
Position the power supply into the bracket and wrap the cable around the cable management hooks on the bracket.
-
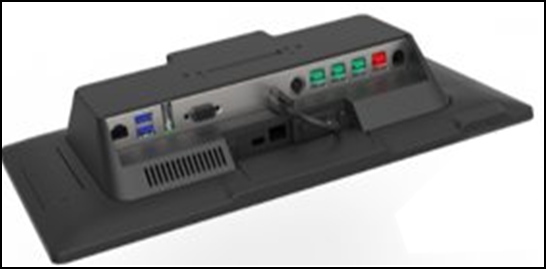
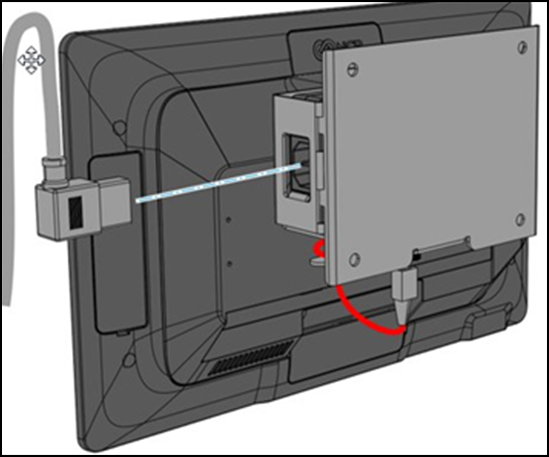
Connect the cable to the Input/Output (I/O) on the back of the display device.
-
Hook the wall mount adapter onto the bracket on the back of the display screen.
-
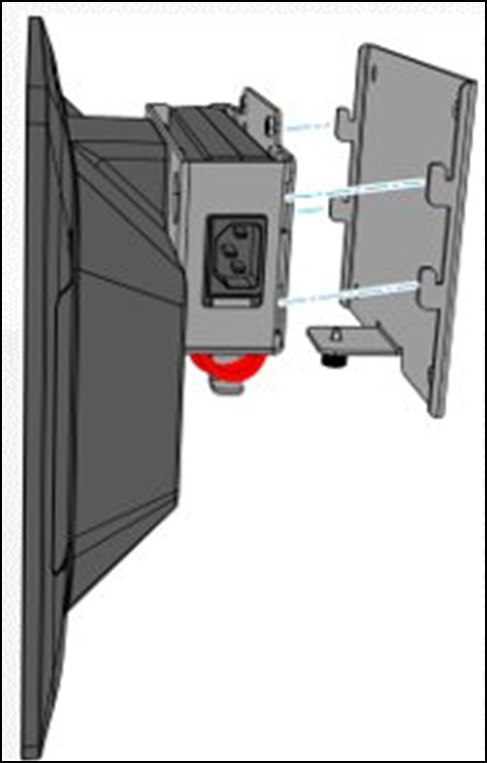
Tighten the thumbscrew to secure the bracket.
-
Connect the power supply cord to the power supply.
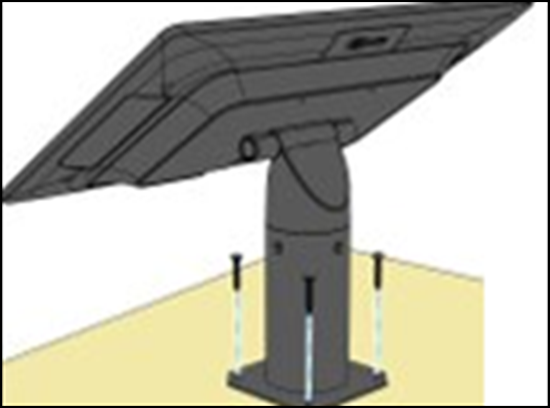
Installing the kitchen display device on a pole
While installing a kitchen display device on a pole, you will require pole, pole mount bracket, thumbscrews, and mounting screws in addition to the components in the box.
To mount the CX5 kitchen display device on a pole:
- Place the display screen face down on a flat surface. Be sure to use padding to protect the display from scratches.

- Connect the power cord and network cables. The network cable is only required for hardwired connections.
- Route cables through the bracket and down into the pole.
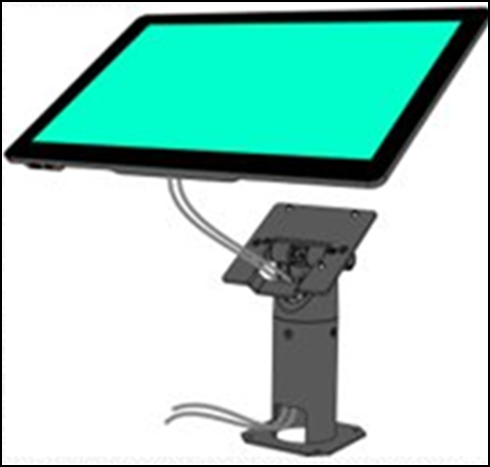
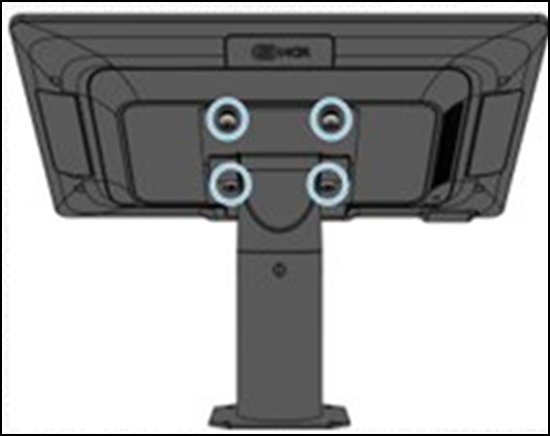
- Attach the display screen on the bracket using the four thumbscrews provided.
- Attach the pole on the countertop surface using the four screws provided.