Working with house accounts
The Customers > House Accounts to enable customers to pay their bill at a later date instead of paying for it at the time of purchase. This function is usually reserved for established clients. Using house accounts includes catering customers, delivery services, hotel room charges, manager comps, and forward day charges, among others.
You can use the House Accounts function regardless if you log in using Company View (All Stores) or to a single site; however, you can only delete a house account when logged in using Company View (All Stores).
Quick tips for working with house accounts:
- You must establish the house accounts in Back Office before you can use them in the POS.
- You must link a customer with a house account. You can also link additional customers to a single house account.
- For example, at ABC Company, Sarah Smith and Tim Jones are authorized to charge food on behalf of ABC Company at CD's Cafe. Sarah is the bookkeeper and is responsible for paying the account monthly; thus, she is the house account owner. Tim is linked to the account as a customer, making him eligible to charge food as well. When either Sarah or Tim walk into CD's Cafe, the cashier looks up Sarah or Tim in the POS to link the house account to the order.
- You create house accounts at the store level.
- You must define the maximum credit limit for a house account, up to $99,999.00.
- You can disable a house account without deleting it.
- Once you create your first house account, a house account tender appears on the POS.
Working with house accounts in Back Office
In Back Office, you can perform the following functions:
- Account activity, such as credits, debits, and payments received.
- Create statements, which you can export into a variety of formats and send to customers.
- View (two) reports, House Accounts and House Accounts Activity.
Working with house accounts in POS
In the POS, you can perform the following functions:
-
Charge a guest check to a house account.
-
Search for a house account by searching for a linked customer record.
-
Accept payment for an outstanding balance through the use of a house account charge.
Note: Internet connection is required to charge a guest check to a house account or accept payment for a house account at the POS.
Managing house accounts
To add a house account:
-
Log in to Back Office.
-
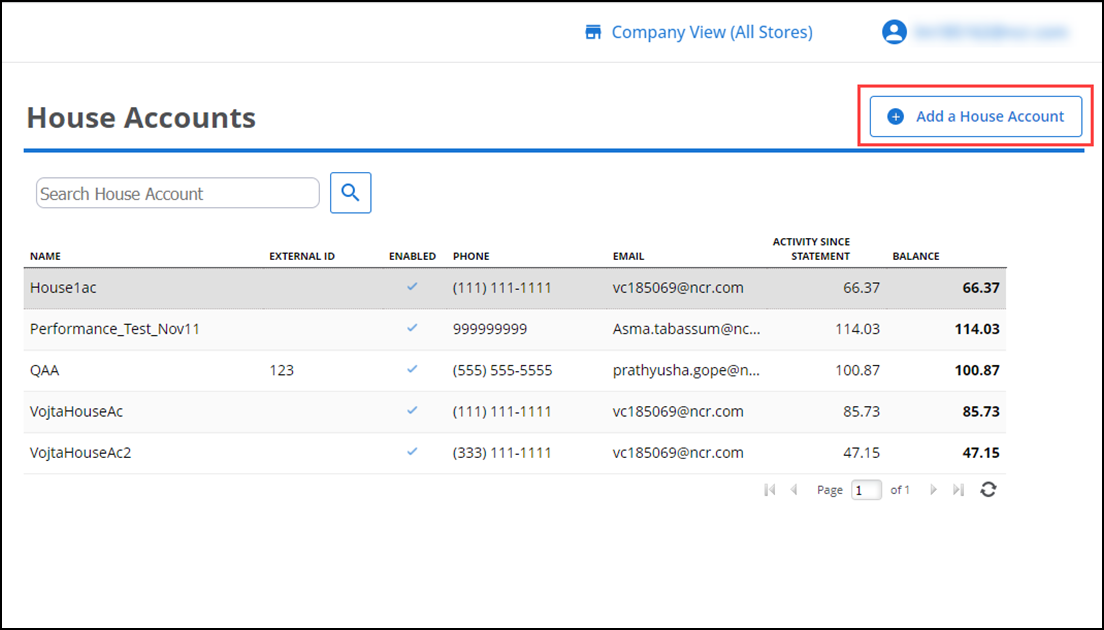
Select Customers > House Accounts.
-
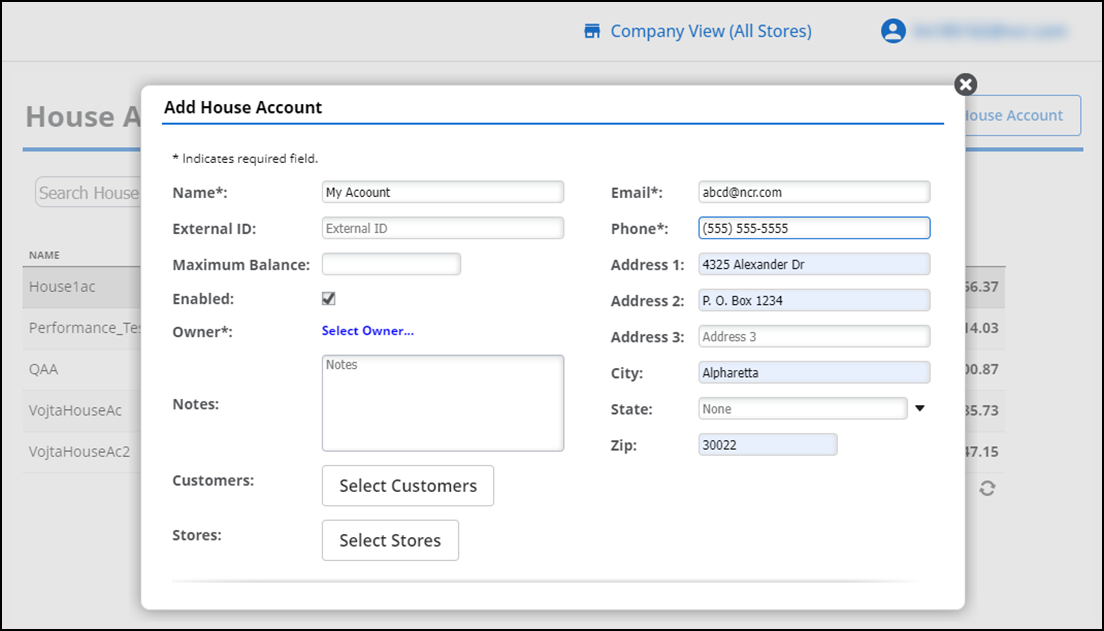
Click Add a House Account.
-
Type a name for the house account.
-
(Optional) Enter an external ID for the house account. For example, if you already have an existing account number you want to use, enter that number here.
-
Enter the maximum balance for the house account.
-
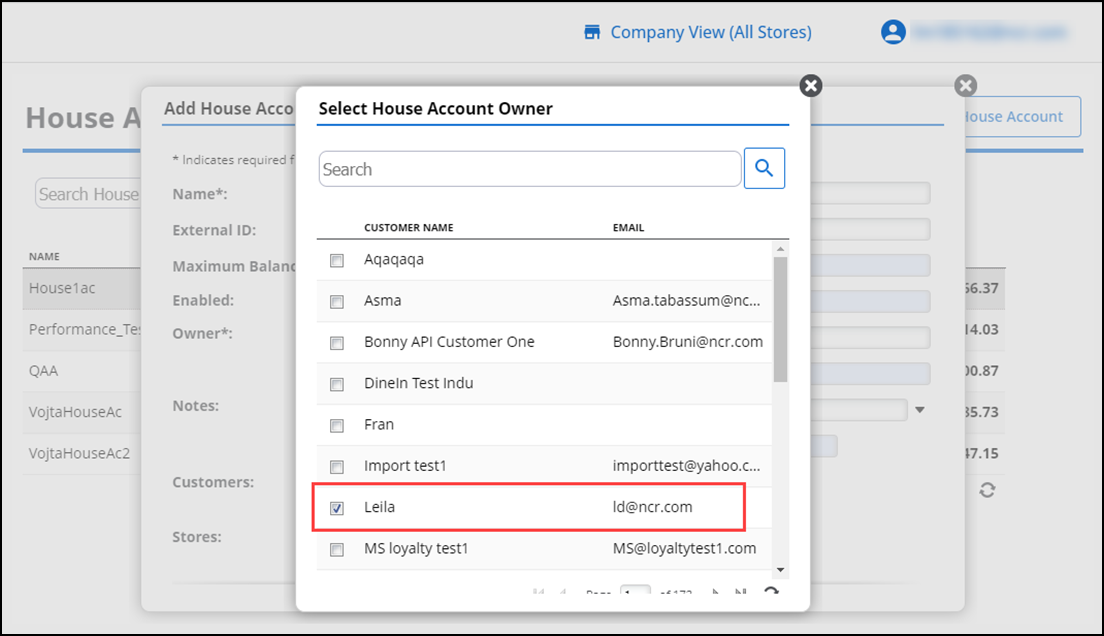
Click Select owner, select the customer who is the primary owner for the house account, and click Done.
-
Click OK at the prompt to use the contact details for the selected owner as of the contact details for the house account.
-
(Optional) Add notes for the house account.
-
(Optional) Click Select Customers to select additional customers who can use the house account.
-
Enter the following information for the house account, if you do not want to use the owner information or if the owner information did not include the following:
-
Enter the email address to associate with the house account.
-
Enter the phone number to associate with the house account.
-
Enter the address, city, state, and zip for the house account. This information appears on the statements you generate.
-
Click Save Changes.
Note: To delete a house account, log in to the Back Office website using Company View (All Stores), select Customers > House Accounts, select a house account to delete, and click Delete House Account. Click OK to confirm you want to delete the house account.
To edit a house account:
Note: To edit a house account, it must have one trasction.
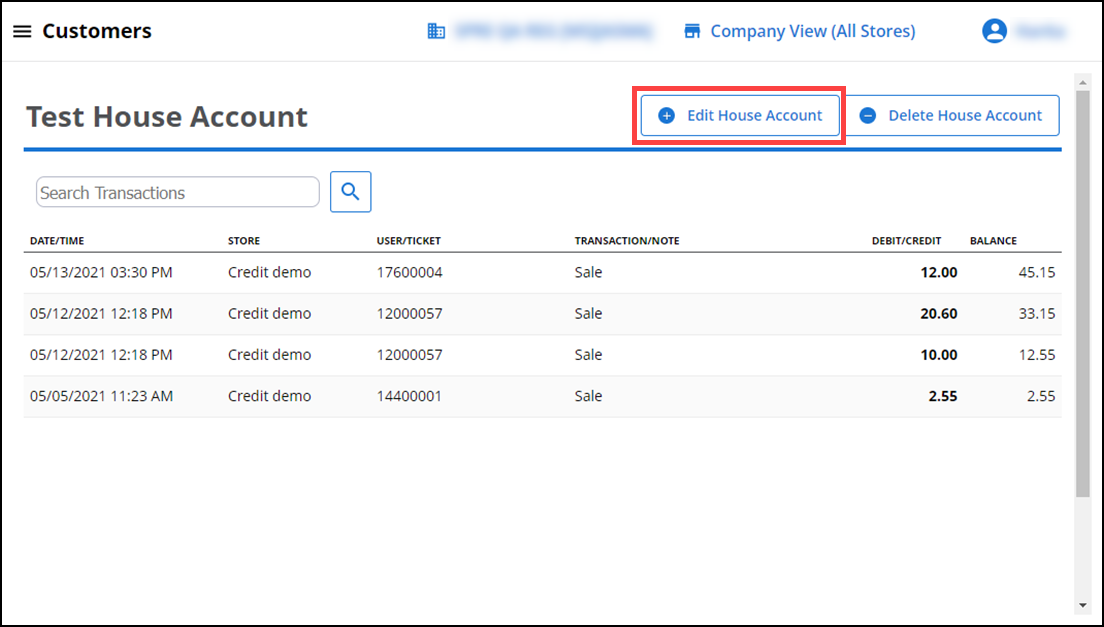
- In Back Office, select Customers > House Accounts.
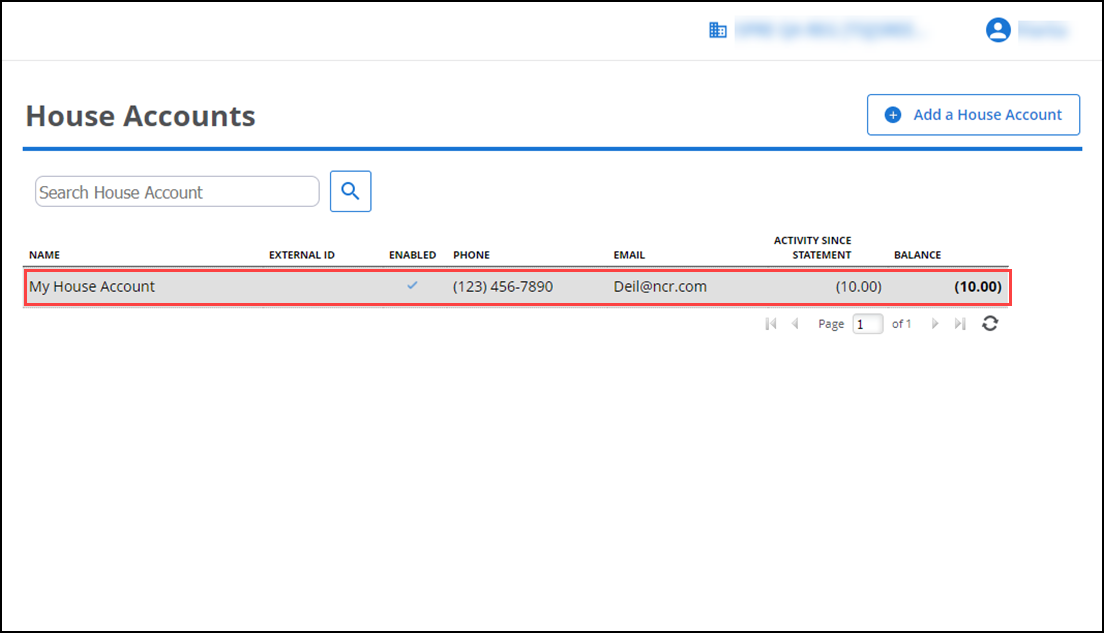
- Select a house account from the list.
- Click Edit House Account.
- Perform the required modifications.
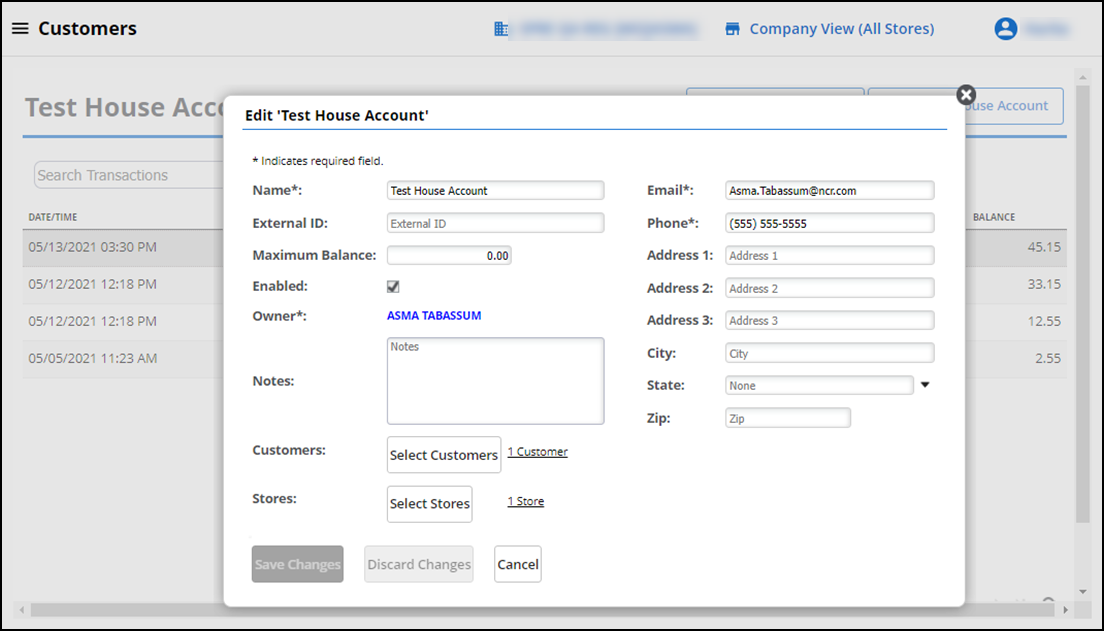
- Click Save Changes.
To delete a house account:
- In Back Office, select Customers > House Accounts.

- Select a house account to delete. The activity view appears.
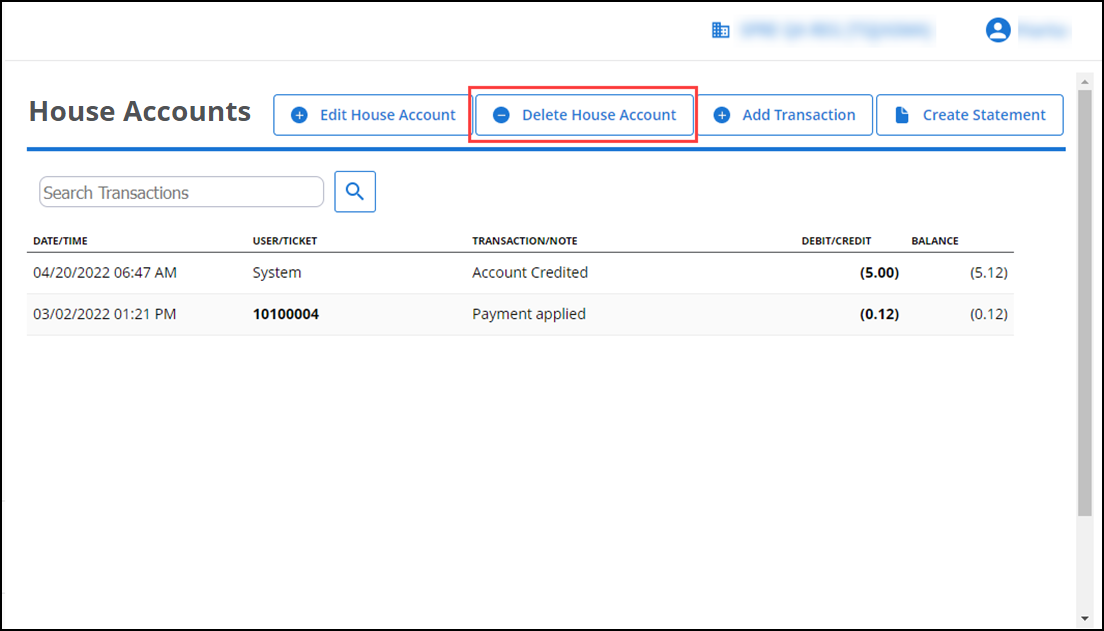
- Click Delete House Account.
- Clik OK to confirm the delete.
To view house account activity:
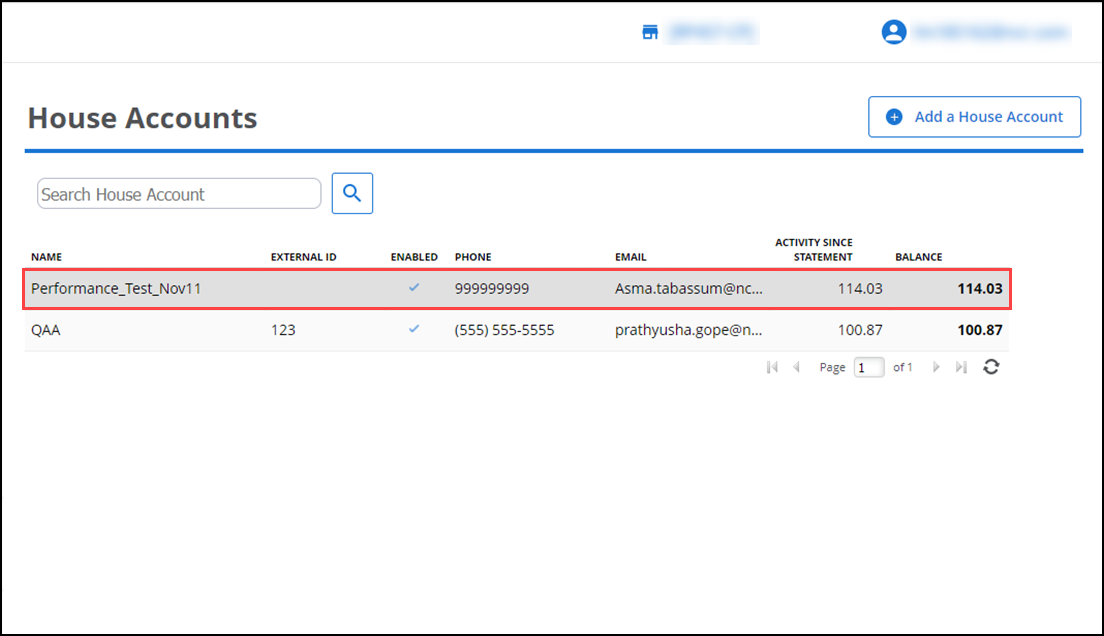
You can view house account activity in Back Office. The activity view includes POS transactions, transactions entered in Back Office (debits, credit, and payments), and statement creations.
-
In Back Office, log in with specific store.
-
Select Customers > House Accounts.
-
Select a house account. The activity view appears.
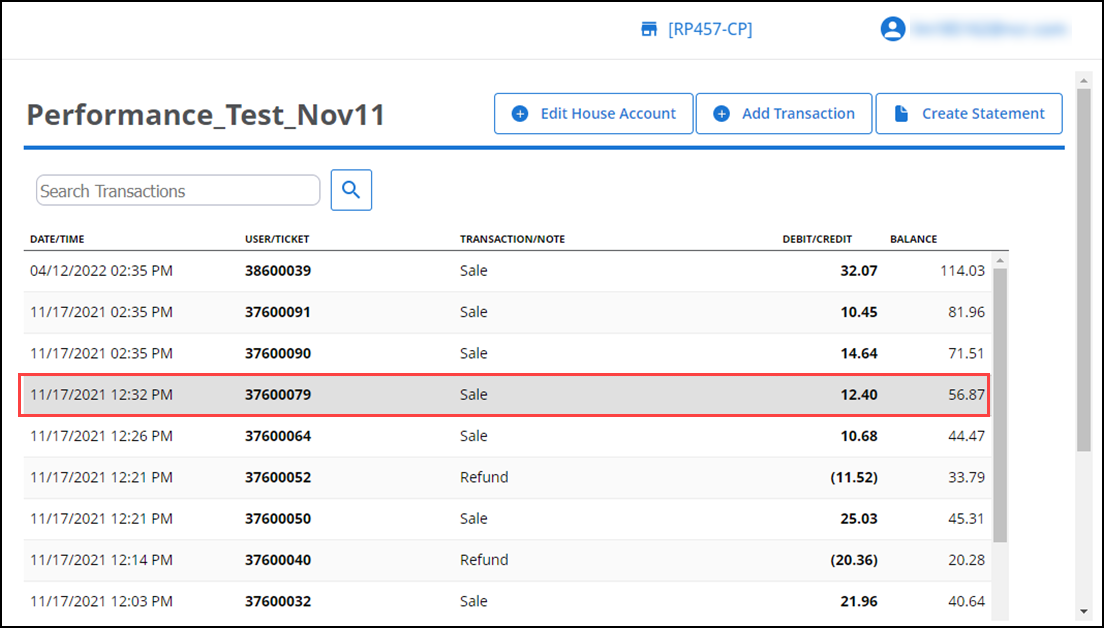
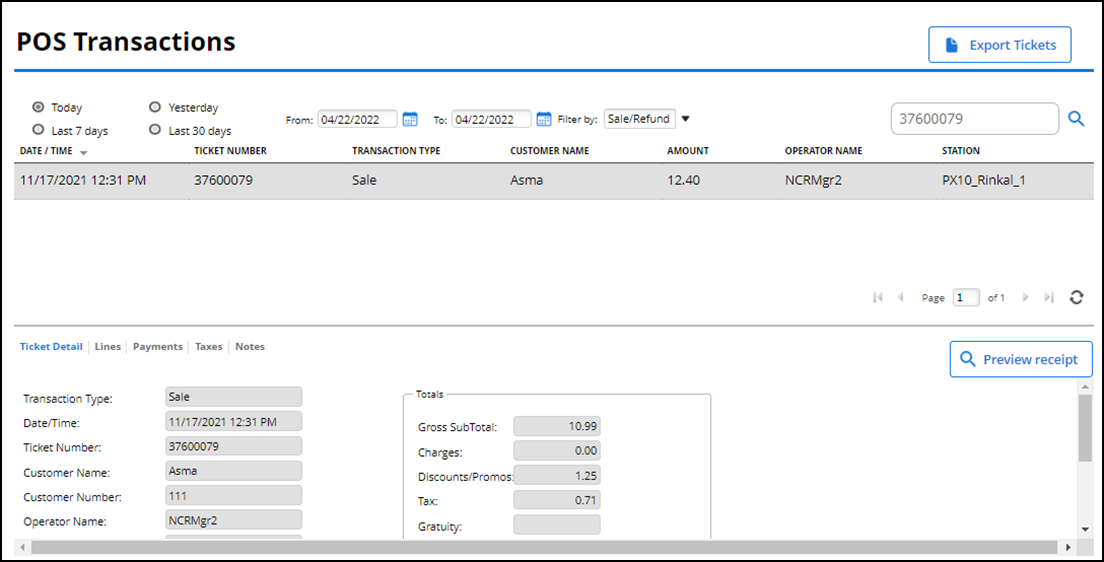
Note: To view details of POS transactions, double click on the specific transaction and the system takes you to the POS Transactions screen.
-
Click Close to return to a list of all house accounts.
Adding a transaction to house account
In Back Office, you can add a transaction to house account.
To add a transaction to house account:
- In Back Office, select Customers > House Accounts.

- Select a house account to add a transaction.
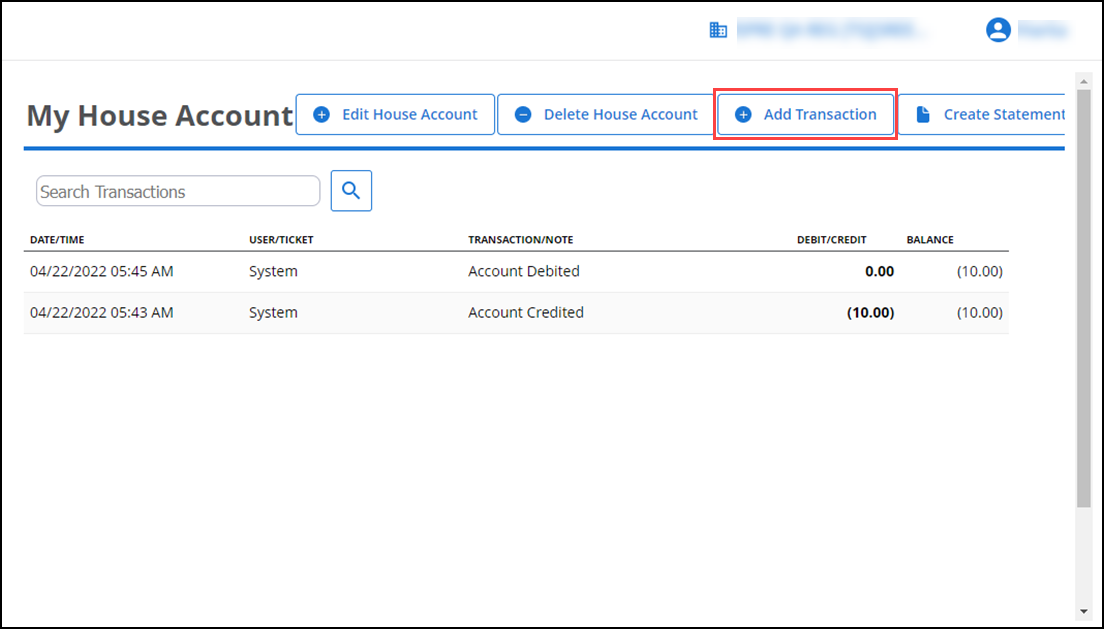
- Select Add Transaction. The Add Transaction dialog appears.
- Select a transaction Type for the frop-down list.
- Enter the Amount.
- Enter Note to the transaction.
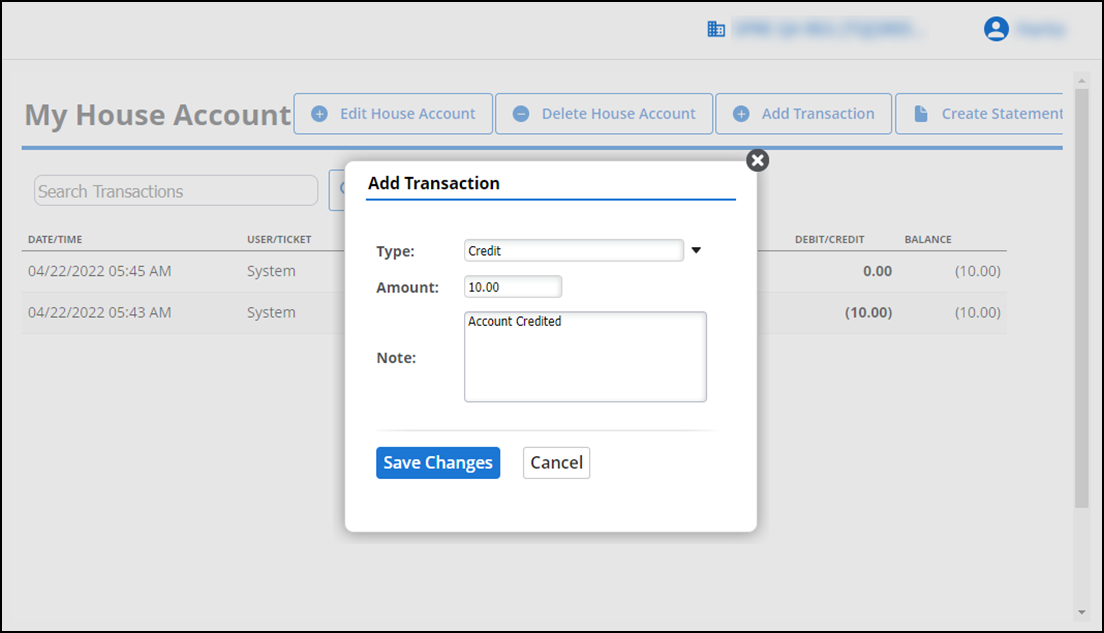
- Click Save Changes.
Creating a house account statement
In Back Office, you can create a statement to provide to your house account customers. The statement includes all activities of a house account . You can print the statement or export it to a variety of formats.
To create a house account statement:
- In Back Office, select Customers > House Accounts.
- Select a house account for which you want to create a statement.
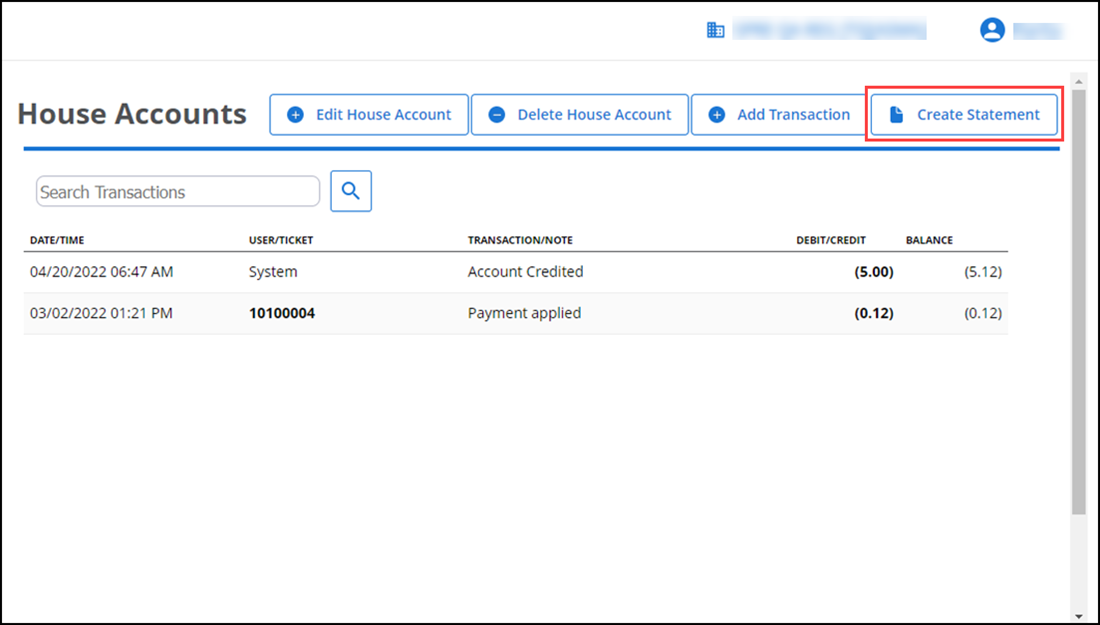
- Select Create Statement. The Create Statement dialog appears.
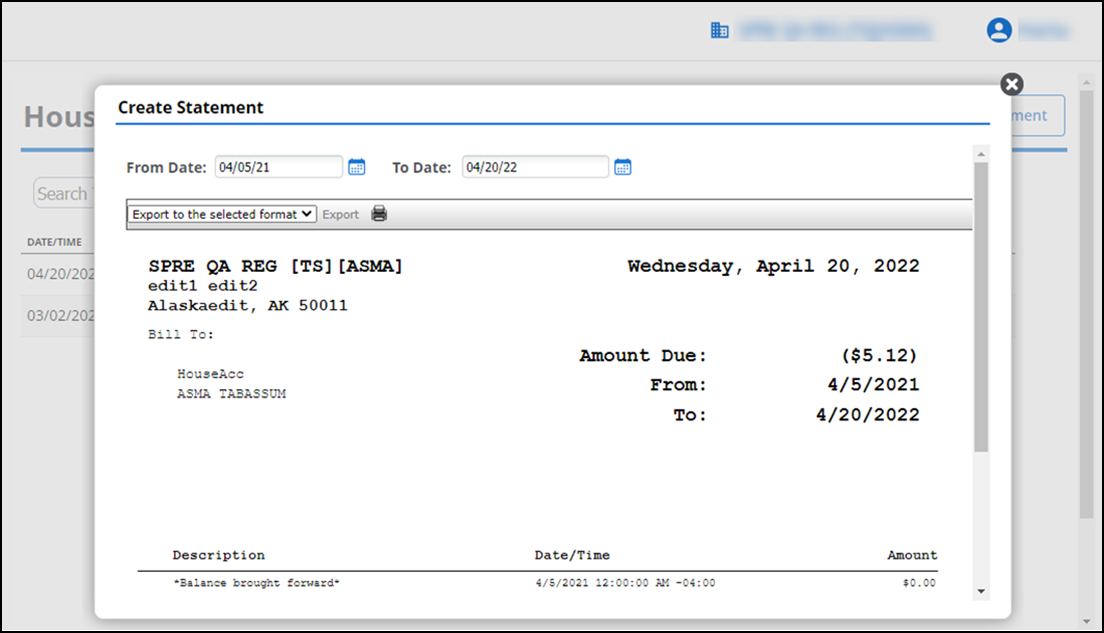
- Select the date range for the statement. A preview of the statement appears.
- (Optional) To export the statement, select the format from the dropdown and click export.
- (Optional) To print the statement, click the print icon.
- Click Save Changes. A statement creation line item appears in the activity view. Click Cancel if you do not want to create a statement.
View video
Please allow time for the "Managing House Accounts" video to load.