Using email marketing
Use Customers > Email Marketing to create marketing email messages that help you campaign with your customers. With this feature, you can keep customers aware of upcoming events, provide soft copies of receipts rather than printed copies, welcome new customers, and touch base (interact) with customers who haven't visited recently. Include special offers in these email messages to entice a return visit to your restaurant and to assist you in tracking the effectiveness of your email marketing campaign.
You cannot make any changes to Email Marketing unless you log in using Company View (All Stores). When logged in to a specific site, all you can do is Preview what was configured for the company.
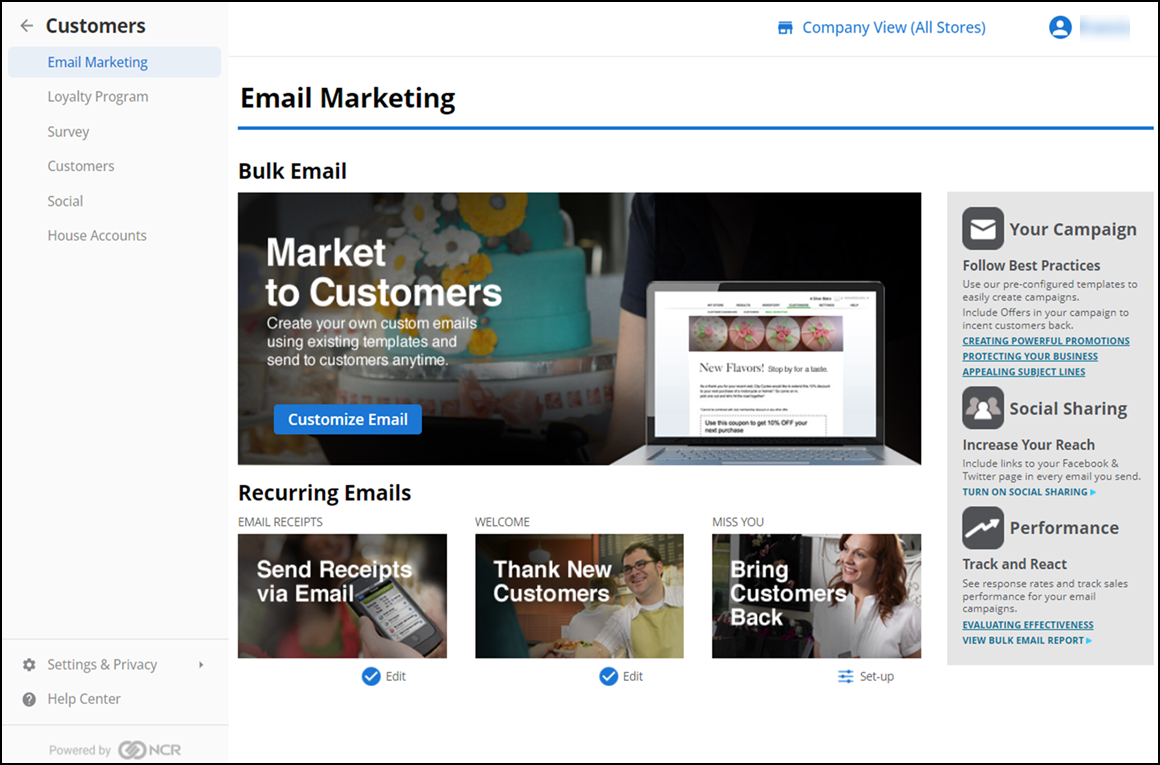
What you can do with email marketing?
Create a marketing email message you can send out in bulk — Create a custom message to send to all customers, or to a select category/set of customers, and update them about any upcoming events and special menu offerings.
Add a message to email receipts — Create a custom receipt to send to customers, as an email message, instead of a printed receipt.
Send out Welcome email messages — Create a custom email message to welcome new customers. The system automatically sends the message to a new customer as soon as you add their email address to your customer database.
Send out Miss You email messages — Create a custom email message to send to customers who have not recently visited your restaurant. You can configure the number of days between visits, at which to send the message.
Email Tips and Tools — Access the tips and tools provided by Back Office to assist you in creating powerful, appealing email messages, and to track the effectiveness of your email campaign. This includes templates, an email designer, social sharing links, and more.
Each email message type uses a designer tool to assist you in creating the message. Though all types share basic similarity, each contains settings specific to that message type. Each email message type can contain three sections: image, text, and offer. If you do not configure a section, it does not appear in your email message.
Note: The Receipt email message type only contains an image and offer section for you to design.
Creating a marketing email message
To create new marketing emails:
-
Log in to Back Office using Company View (All Stores).
-
Select Customers > Email Marketing.
-
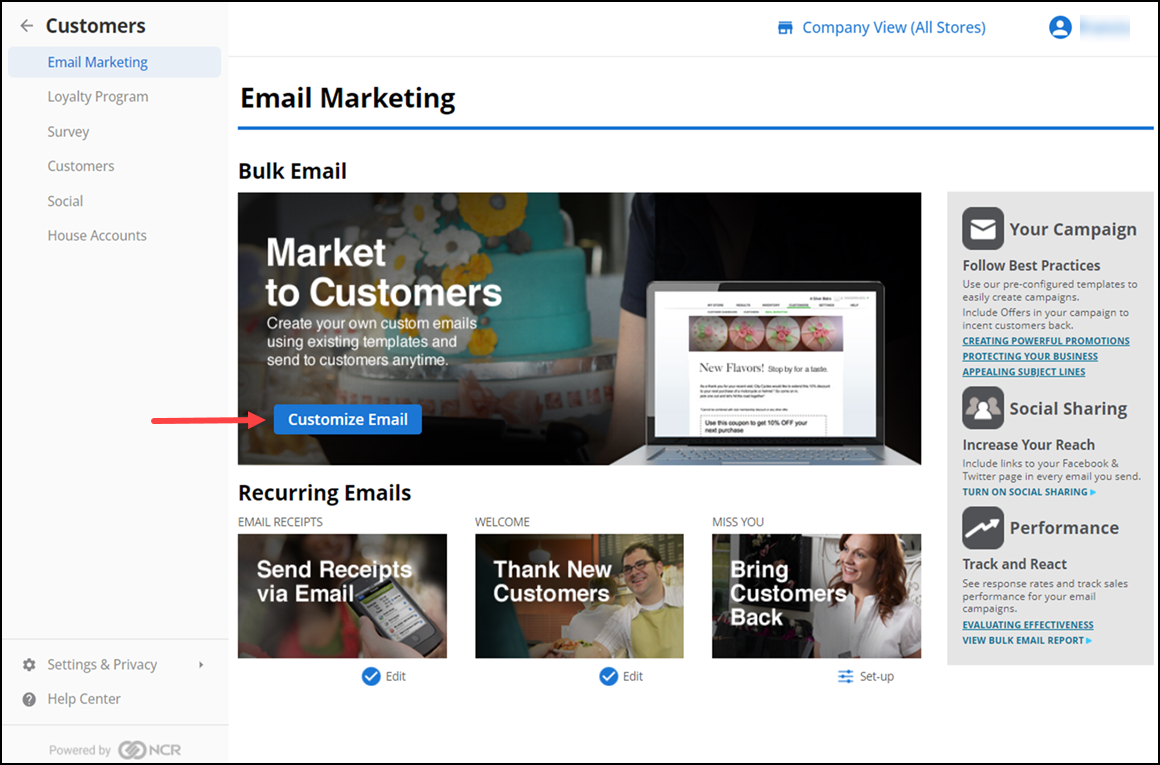
Click Customize Email.
-
Use the default template, or click Start New Email to choose another template for creating the email message.
- Click Customize Email to set up your Bulk emails.
- Click setup icon for the Email Receipts, Welcome, or Miss You emails.
-
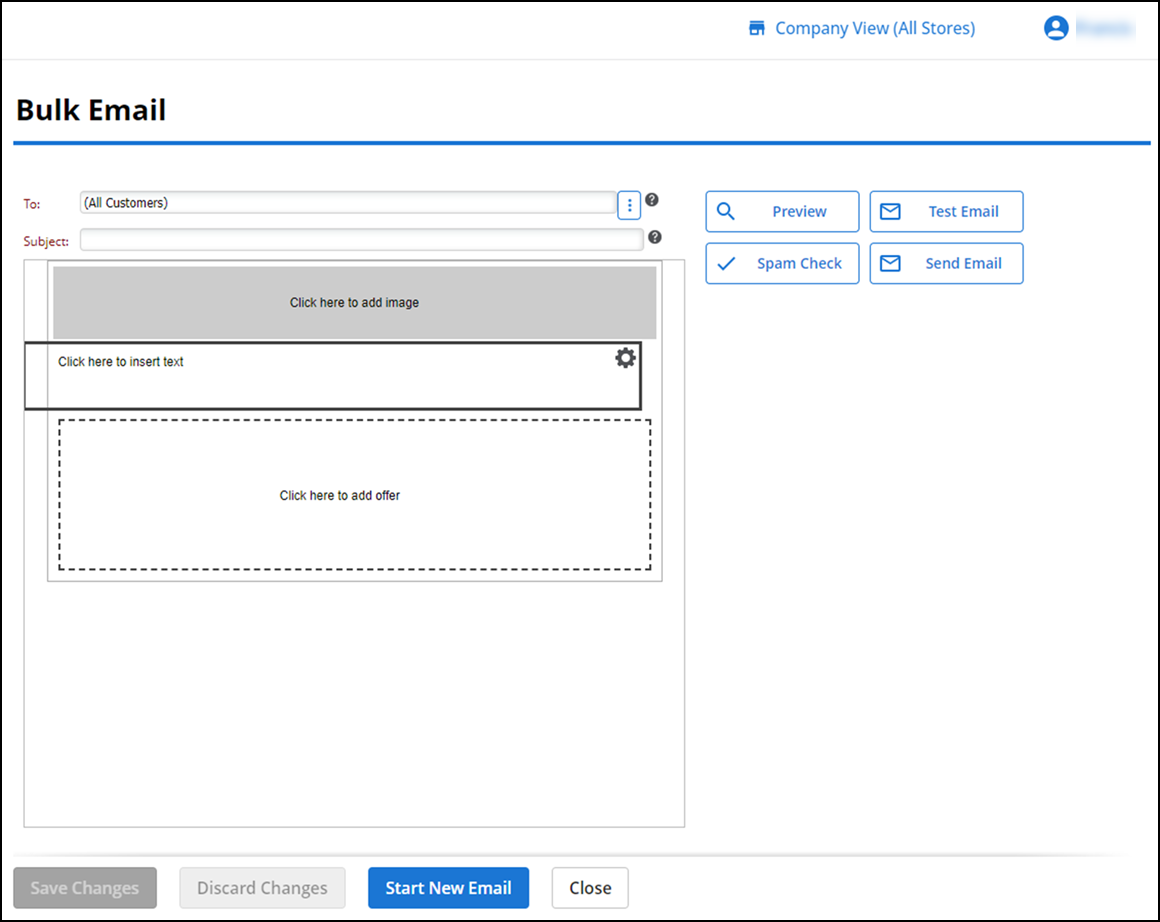
Use the default template or click Start New Email to choose another template for your email message.
-
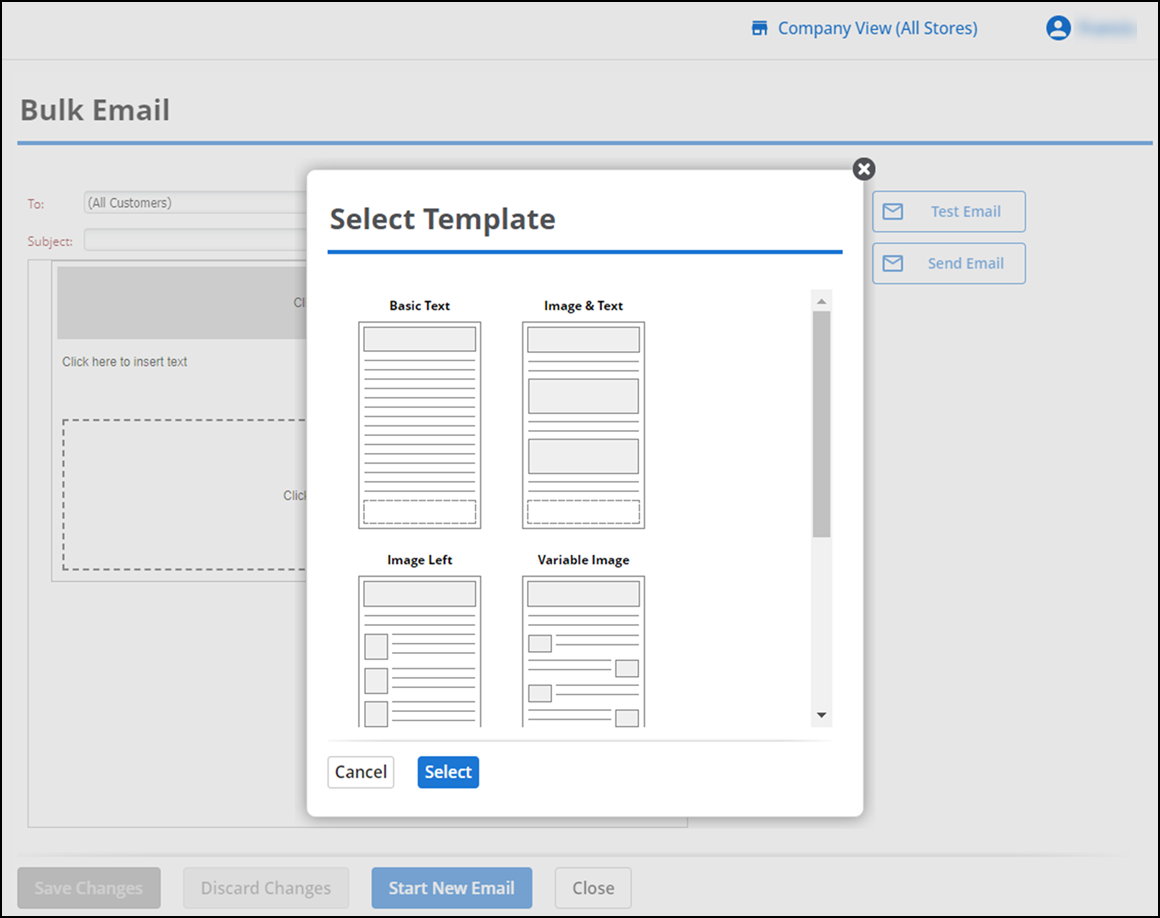
Click Start New Email. The Select Template screen appears.
-
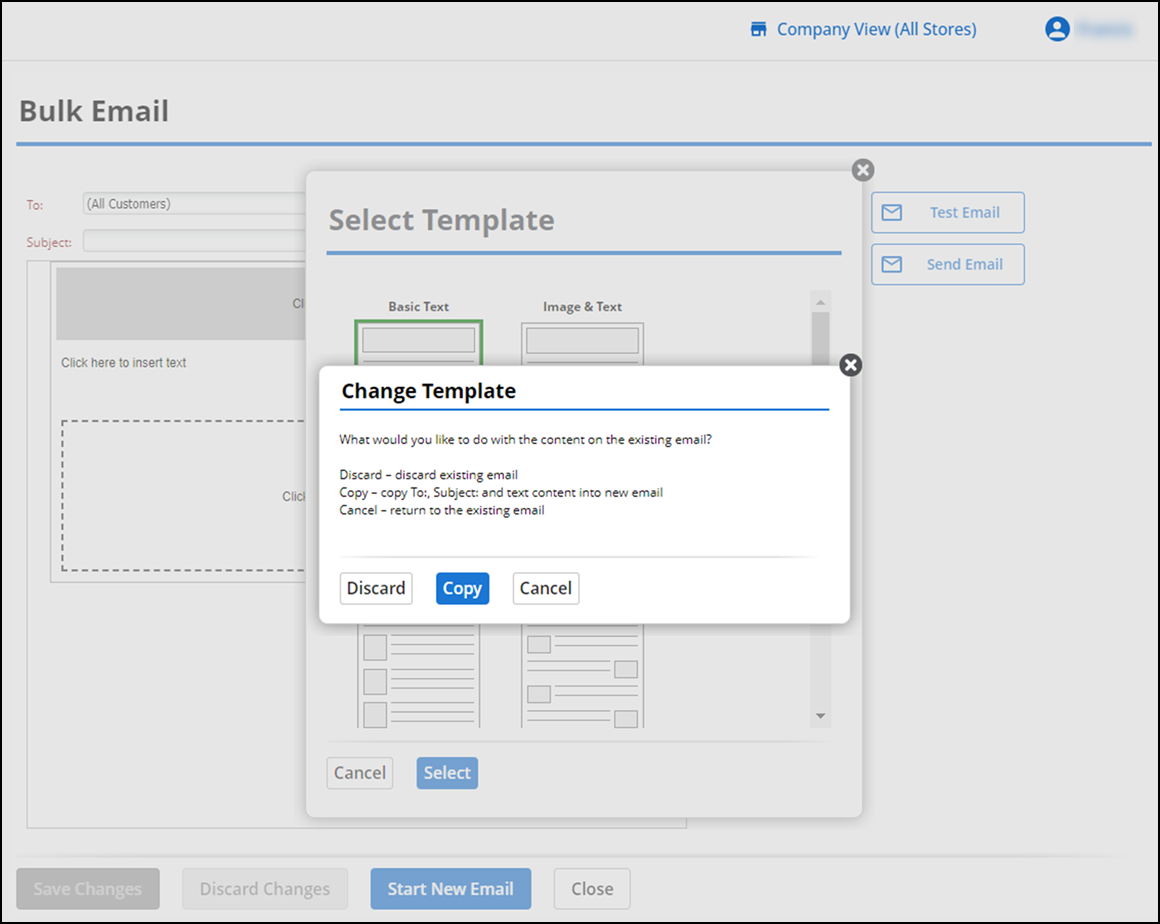
Choose the template to use and then click Select. The Change Template prompt appears with three options.
-
Choose one of the following:
- Discard — To discard the current email content.
- Copy — To copy the subject and text to the new email message.
- Cancel — To return to the previous email template.
-
Click Discard Changes, to revert to the previous template.
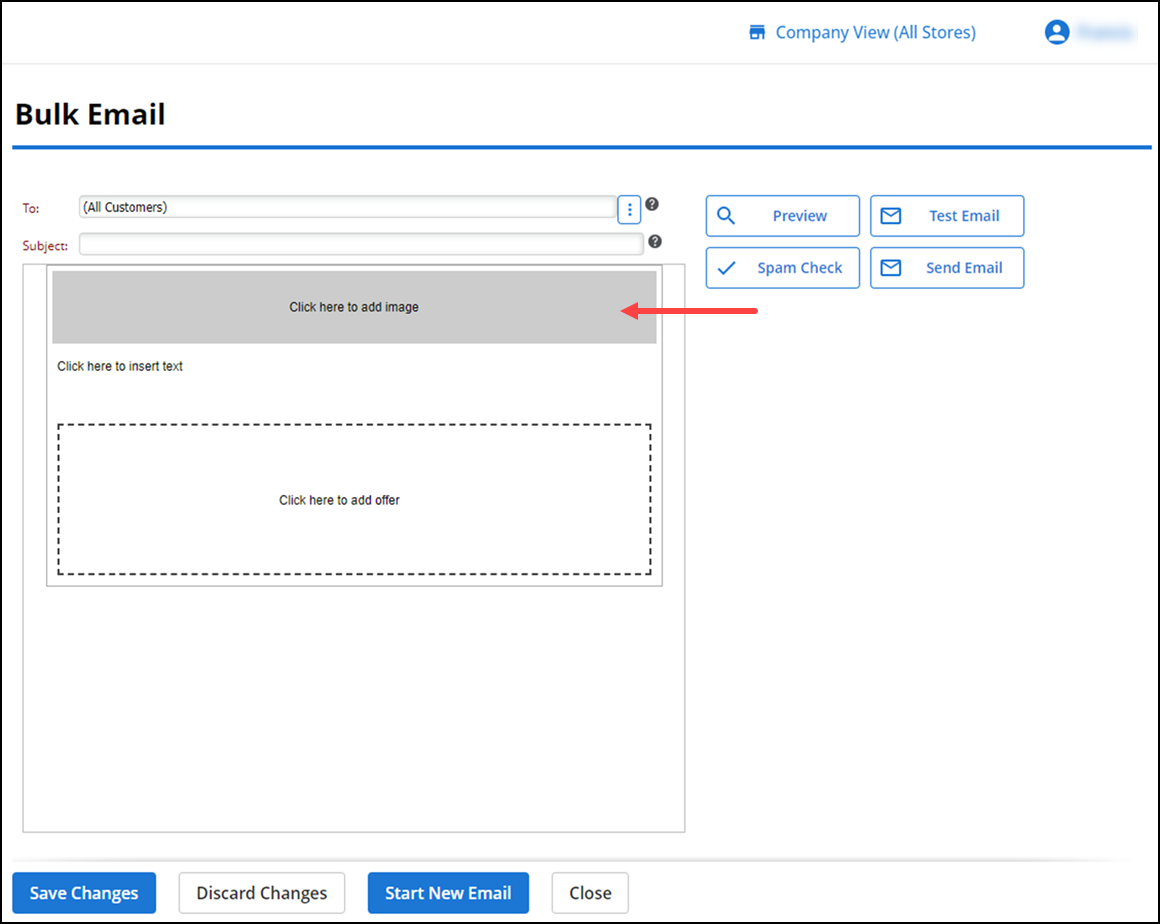
Note: If you spend considerable time to create an email, click Save Changes periodically, to ensure you save your work.
-
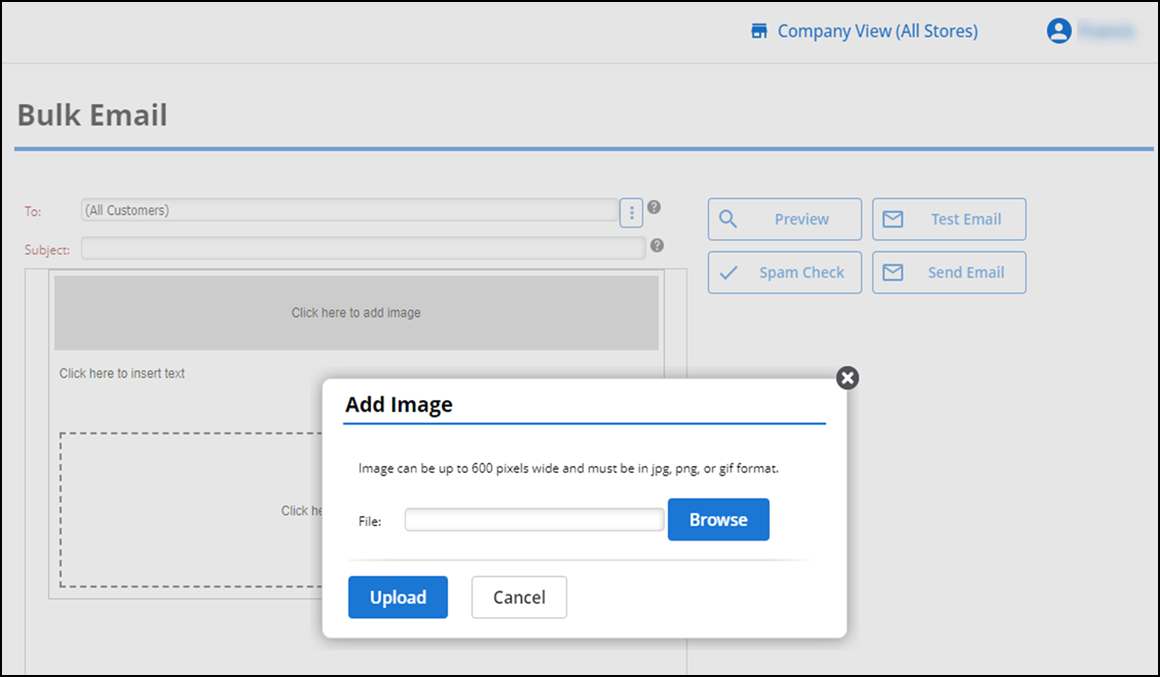
Click Click here to add image. The Add Image screen appears.
-
Click Browse to choose a file.
-
Click Upload. The system uploads your image to the email template. Click OK when prompted.
-
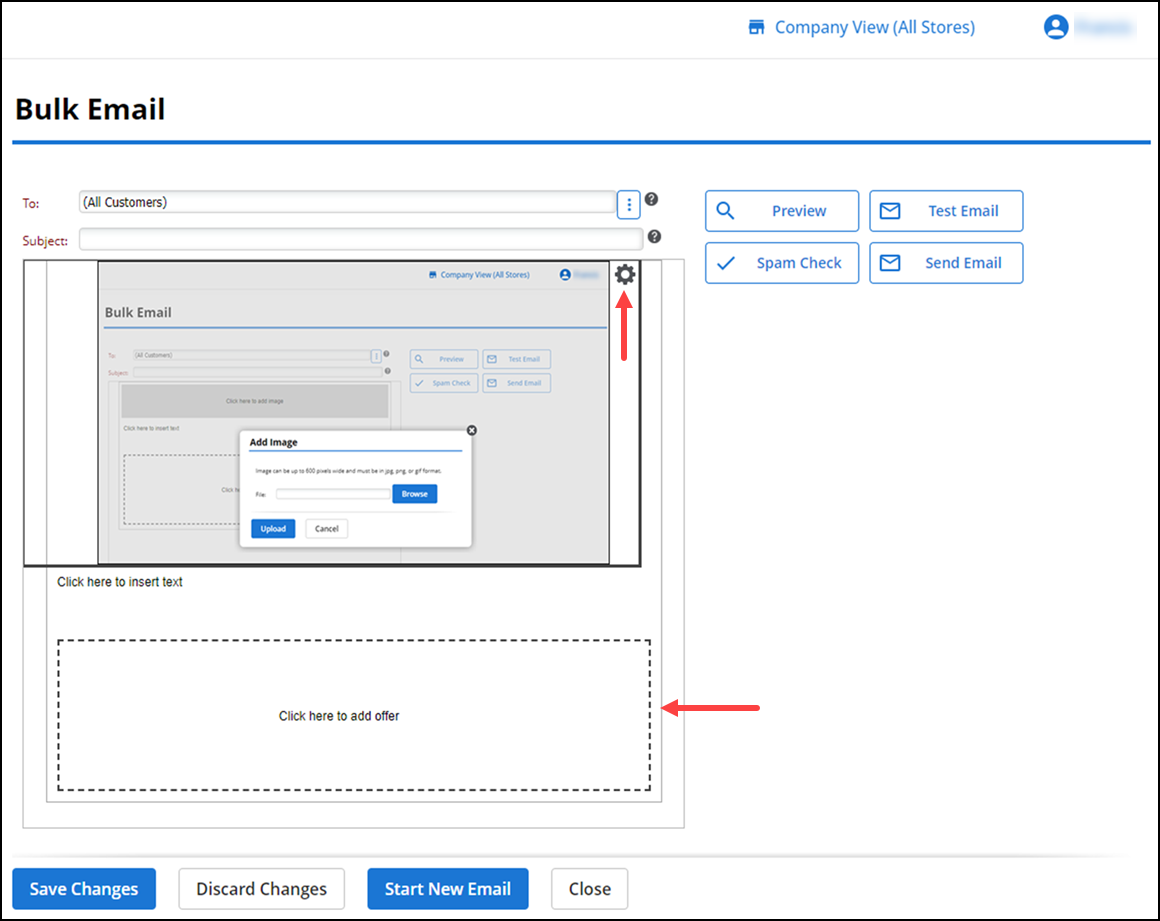
Hover over the image frame and click settings icon at the top right corner to edit the image settings, the placement of the image within the message, or remove the image from the message.
-
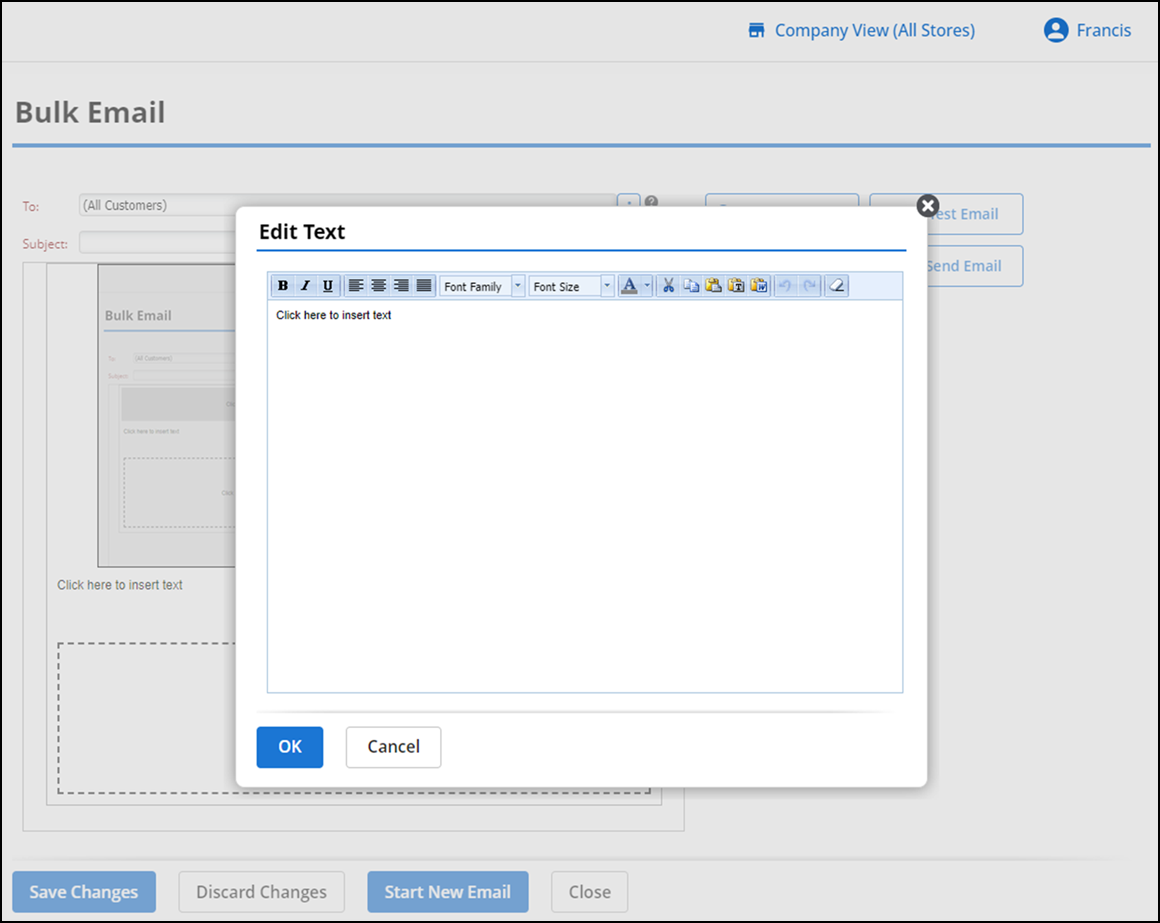
Click Click here to insert text. The Edit Text screen appears.
-
Type your email message and click OK. Use the editing toolbar to adjust the font type and size, the layout of the text, and much more.
-
Hover over the text frame and click the settings icon at the top right corner to return to edit the placement of the text within the message, remove the text from the message, or move the text frame.
-
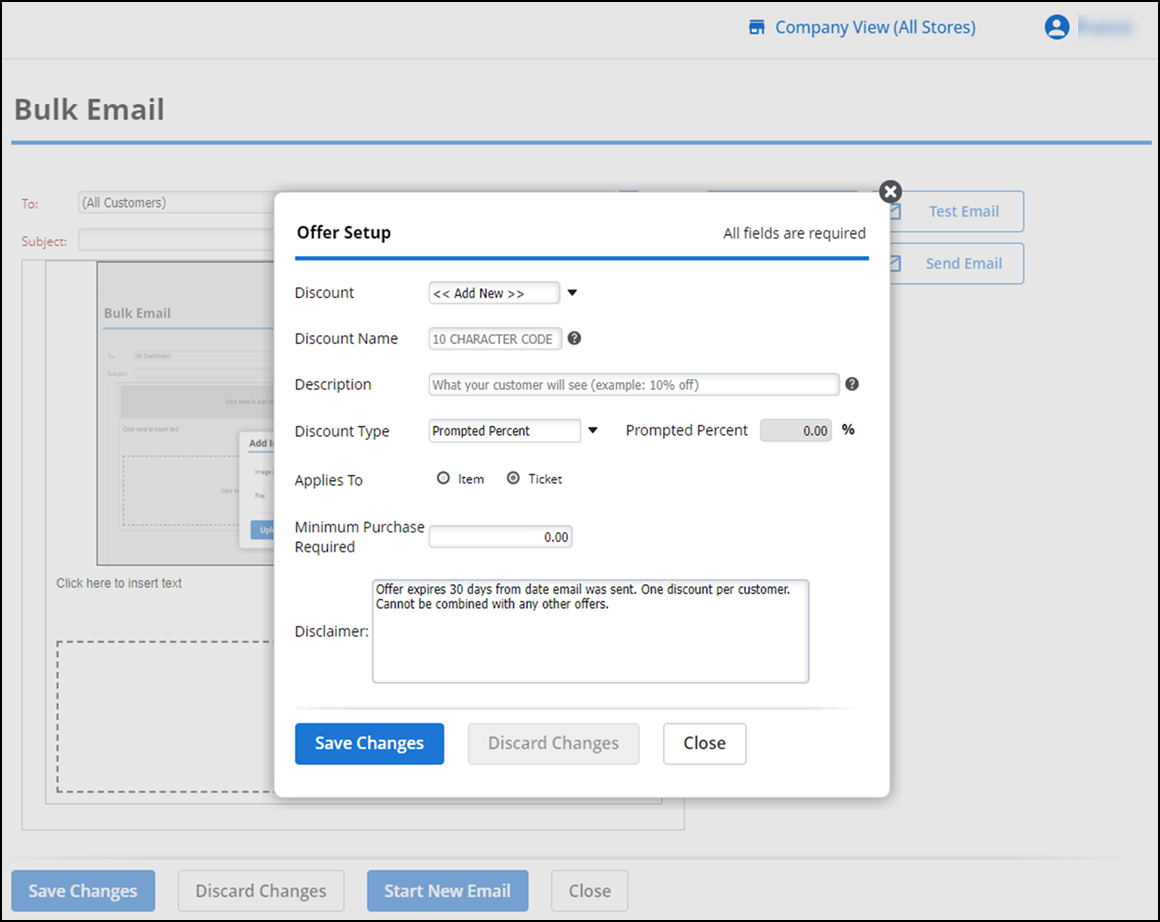
Click Click here to add offer. The Offer Setup screen appears.
-
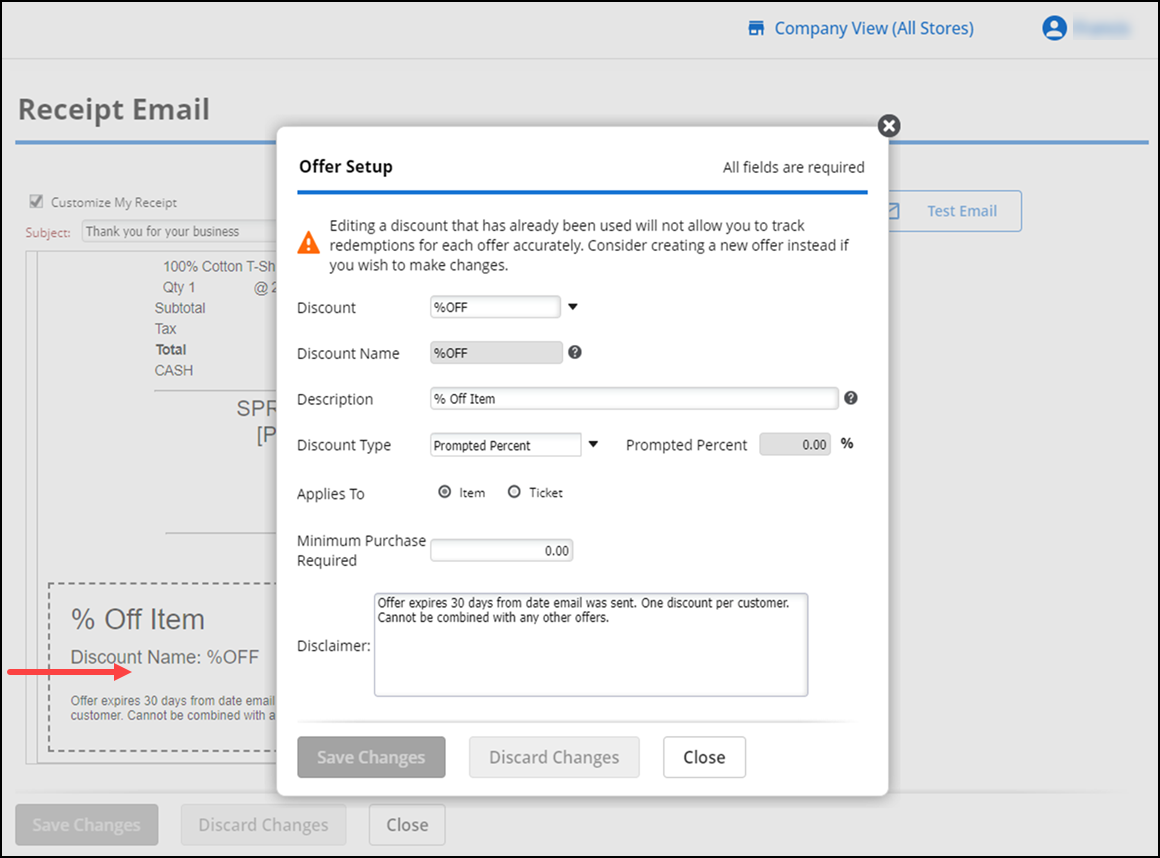
Select an existing discount to use or select Add New from the drop-down list. If you select Add New, it is necessary to type a name for the discount offer. The name does not appear in the email message.
Note: If you use an existing discount offer, you will not be able to accurately track the redemptions from the email offer.
-
Type a description for the offer. The description appears in the email message.
-
Select a Discount Type from the drop-down list. If you select Amount or Percent, it is necessary to enter the percentage or amount of the discount.
-
Select either Item or Ticket, to specify the level at which to apply the discount.
-
Type the Minimum Purchase Required to apply the discount. If a minimum purchase amount is not required to apply the discount, leave the amount as $0.00.
-
Accept the default disclaimer information, or type your own disclaimer information for the offer.
-
Click Save Changes. The system returns to the email designer.
Hover over the offer frame and click settings icon at the top right corner to return to the Offer Setup screen, edit the placement of the offer within the message, or remove the offer from the message.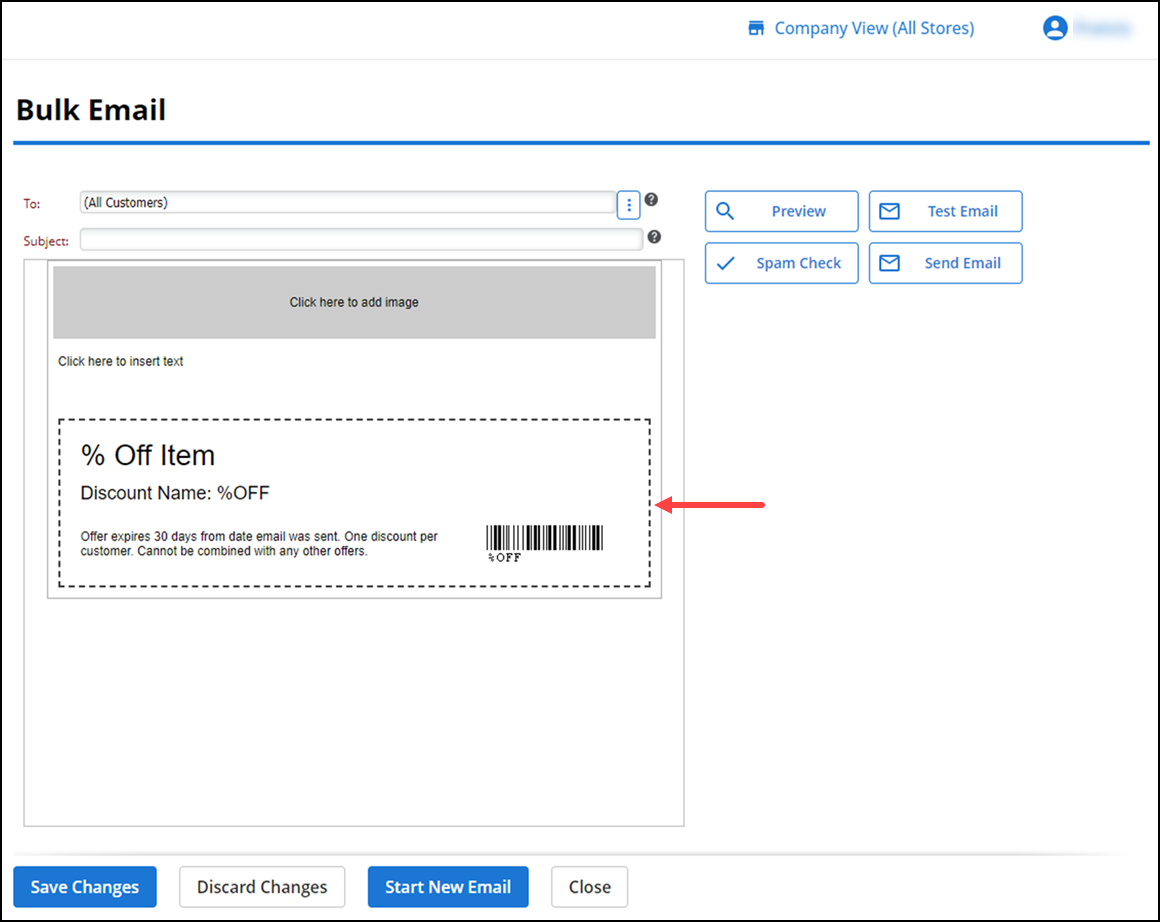
Previewing your email message
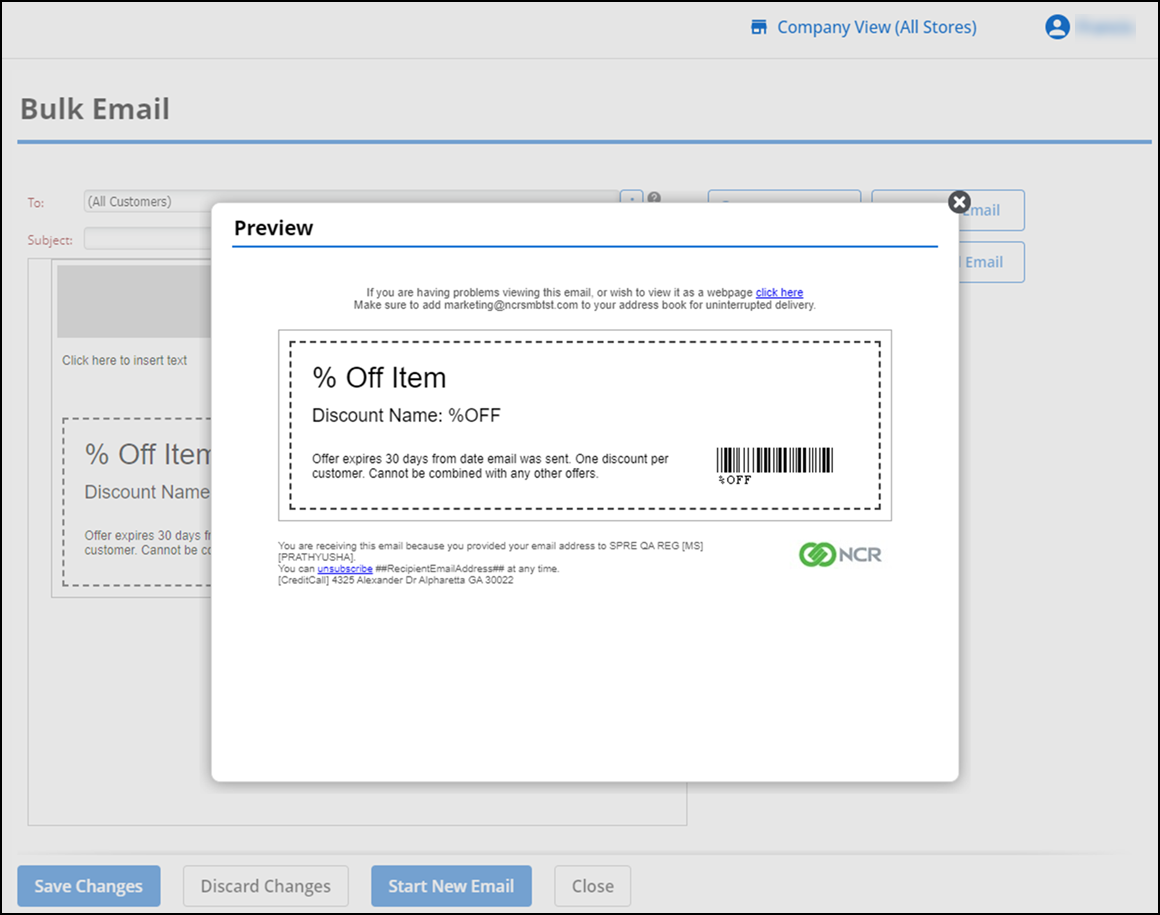
During the creation of the email message, at any point, click Preview to display your email message.
Using spam check
Back Office provides a utility that calculates the likelihood a spam checker may capture your email marketing message. Click Spam Check after creating your email message to determine which, if any, spam triggers exist in your email message.
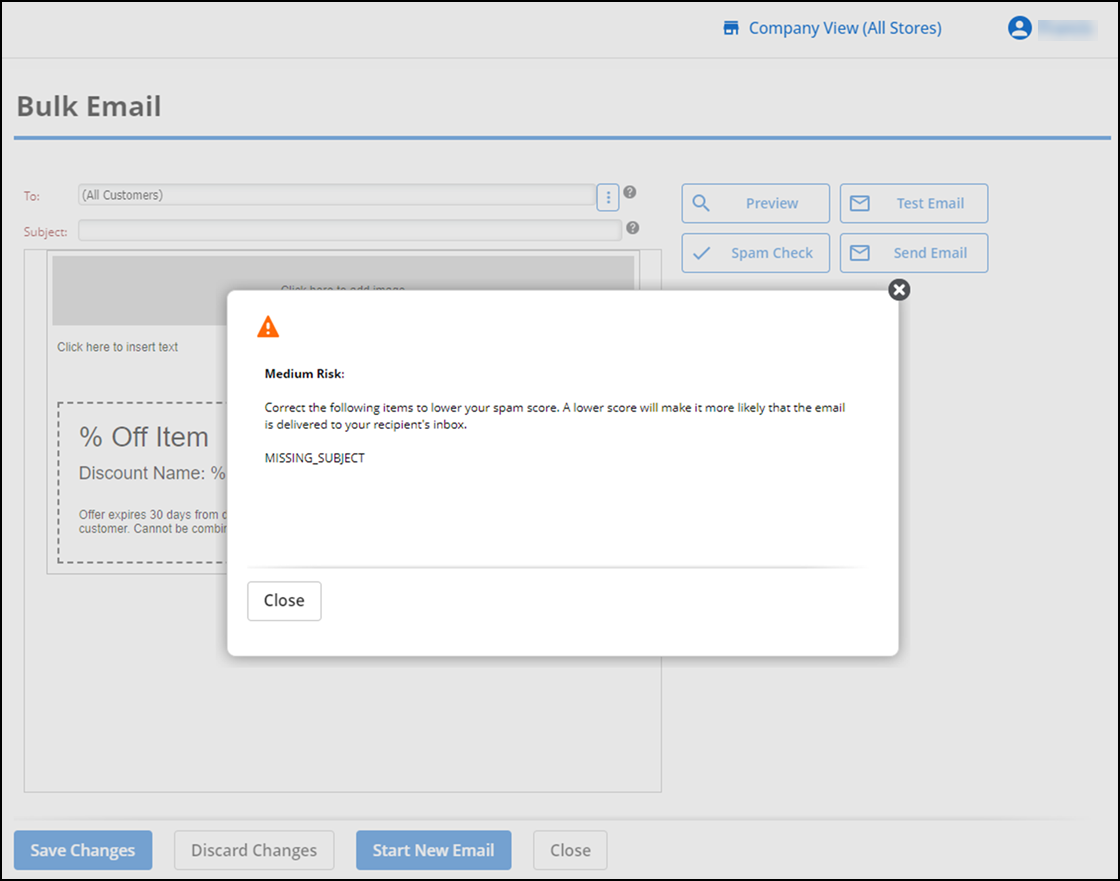
- If the spam check score is Low, you can proceed to send your email message.
- If the spam check score is Medium, the utility identifies the triggers that could classify your email message as spam. You can proceed to sending your message; however, the chance exists that your customer may not receive your email message. Review your email message and modify where necessary.
- If the spam check score is High, the utility identifies the triggers that classify your email message as spam. The system will not send your email message as long as the spam score remains High. Review the triggers identified by the utility, modify your email message, and run Spam Check again.
Sending a test email message
Prior to sending the email message to your customers, you can send a test email message to a maximum of five email addresses. Use Test Email to verify the formatting of your email message on different email clients.
- At the email designer, click Test Email. A Send Test Email screen appears.
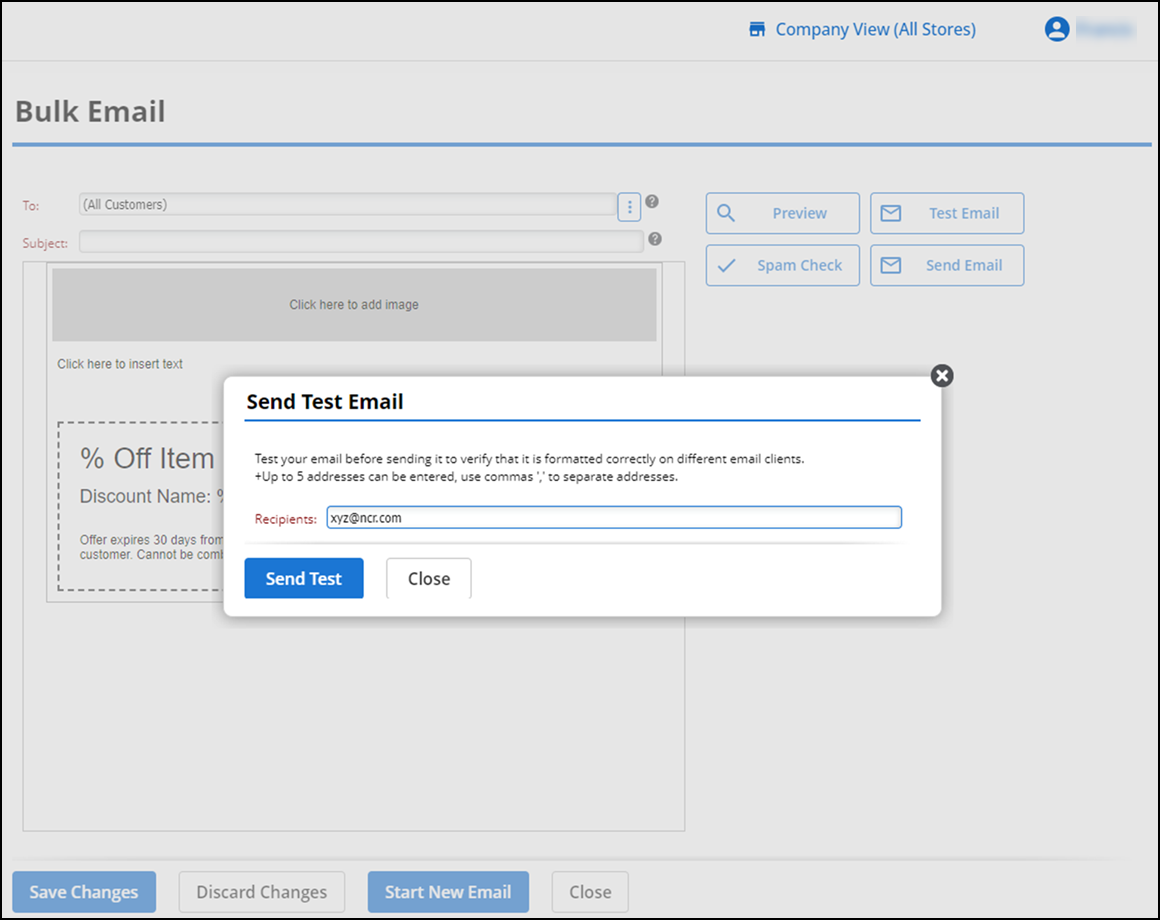
- Enter up to five email addresses, each separated by a comma.
- Click Send Test. The Email Queued prompt appears.
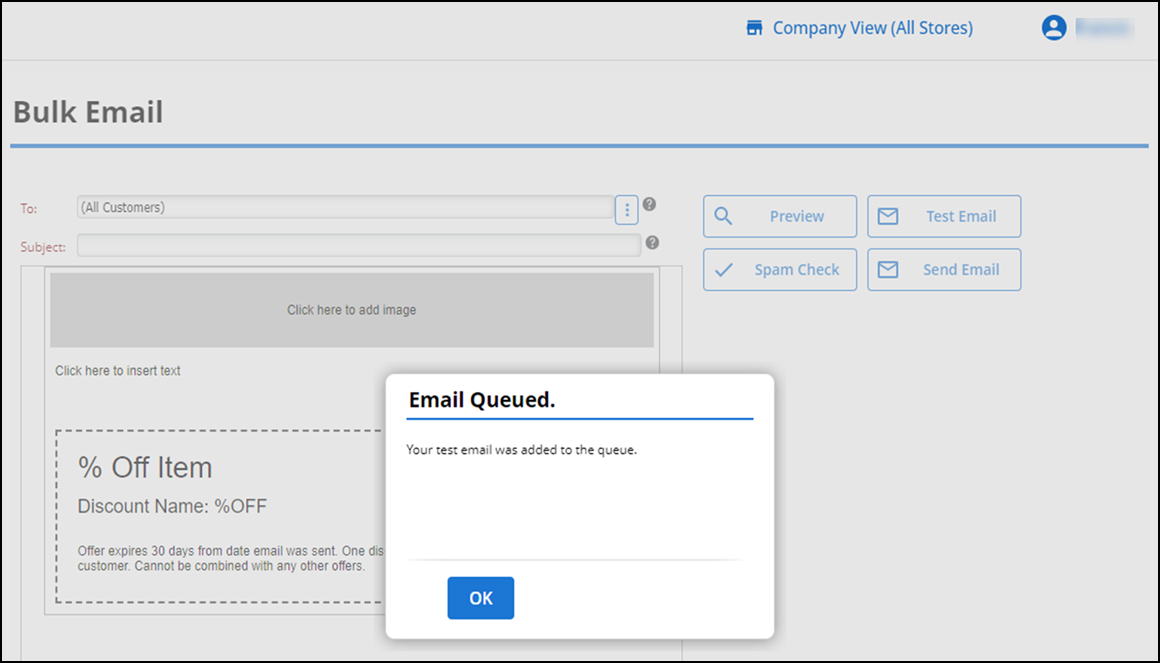
- Click OK. The system sends your email message.
Adding a message to your email receipts
POS operators have the option to send the customer's receipt via email. This feature allows you connect with your customers and notify them about the new offers.
Note: Even if a customer has requested to Opt-Out of email marketing, email receipts will still be sent, allowing you to continue to reach these customers.
The receipt email is turned on by default, and it cannot be turned off. So, if you do not click the Customize My Receipt checkbox and customize the receipt for your store, the customer will receive a simple, default email receipt.
Note: If you are working in an Offline Mode (not connected to the internet), the system will send the receipt emails once your POS device is online.
To customize your email receipts:
-
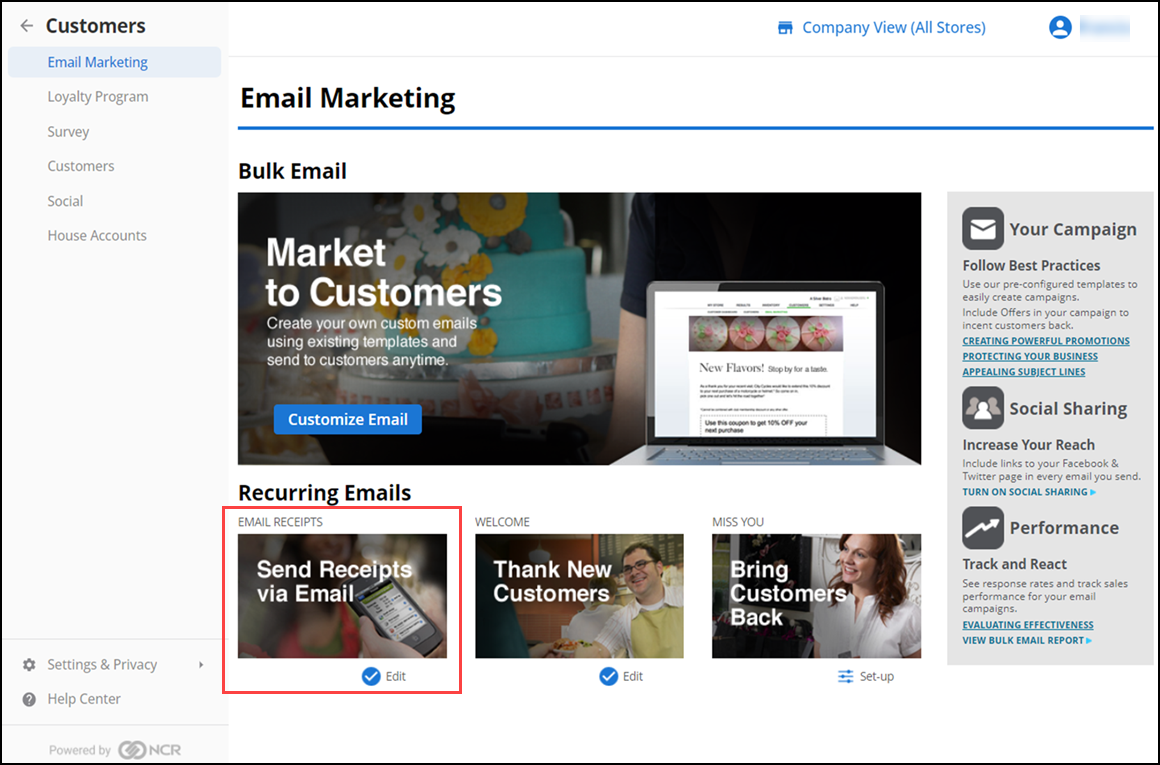
Select Customers > Email Marketing.
-
Click Set-Up/Edit indicator for the EMAIL RECEIPTS. The Receipt email screen appears.
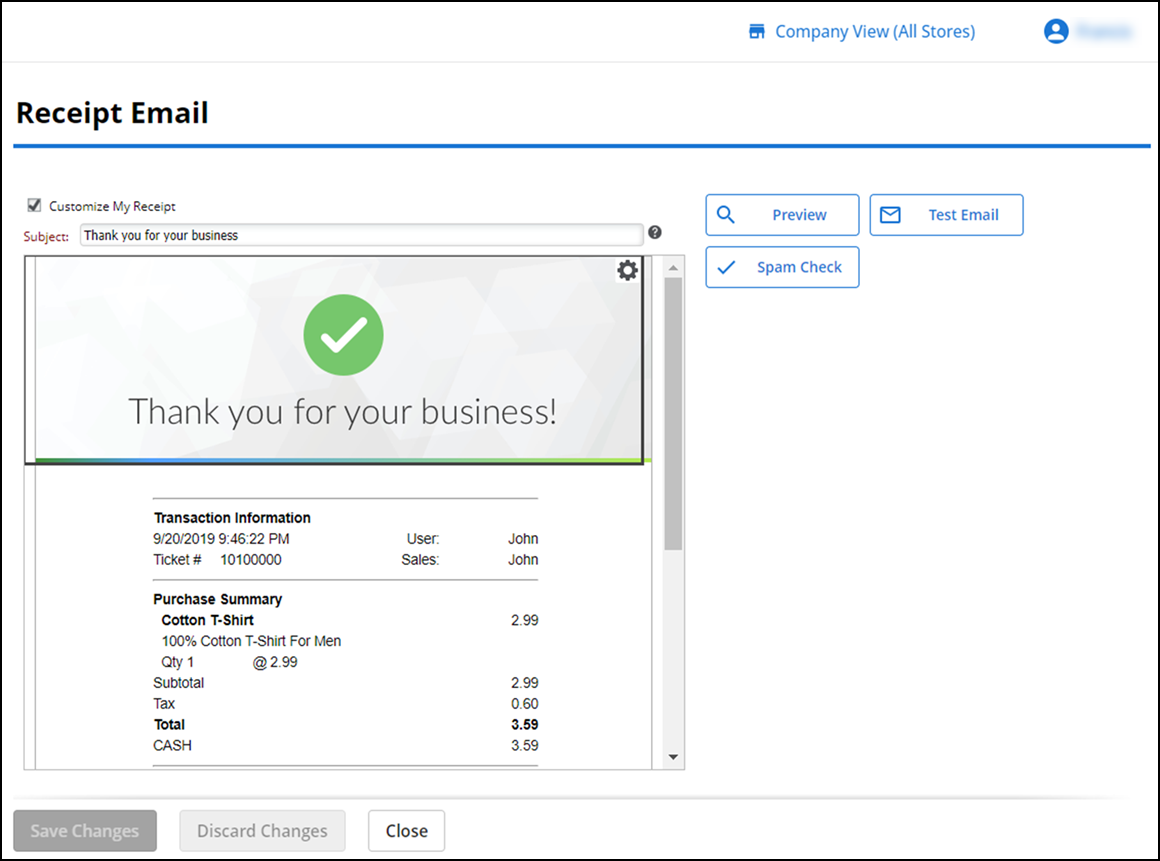
- The store information that is shown near the top of your receipt is copied from the information you entered on the Store Information screen.
- The information shown in the gray area in the middle of the screen is controlled by the system and contains the transaction details. You cannot edit or change this information.
- The information shown under the gray area is copied from the information entered during store configuration, in the Receipt Information > Preview Email Receipt box.
-
Select Customize My Receipt to edit the receipt details.
-
Create a Subject line. Remember, try to capture the recipient's attention by welcoming them to your business and inviting them to return and shop again.
-
Hover over the image area at the top of the screen and click the settings icon to upload your company logo or required image.
-
Do any of the following:
- Edit Image — To edit the image, including adding a URL with a link, adding alternate text, resizing, resetting, and clearing the image.
- Replace Image — To browse and upload another image to replace the current image.
- Clear Image — To remove the current image from the email.
- Duplicate Section — To duplicate the image. This would allow you to show the image both at the top and bottom of the receipt.
- Move Section Down — To move the image to display at the bottom of your receipt.
- Remove Section — The system will alert you that once you remove the image area from the email, you will not be able to attach an image later to the selection.
-
Click Click here to add offer. The Offer Setup screen appears.
-
Click Save Changes to return to Receipt Email screen.
-
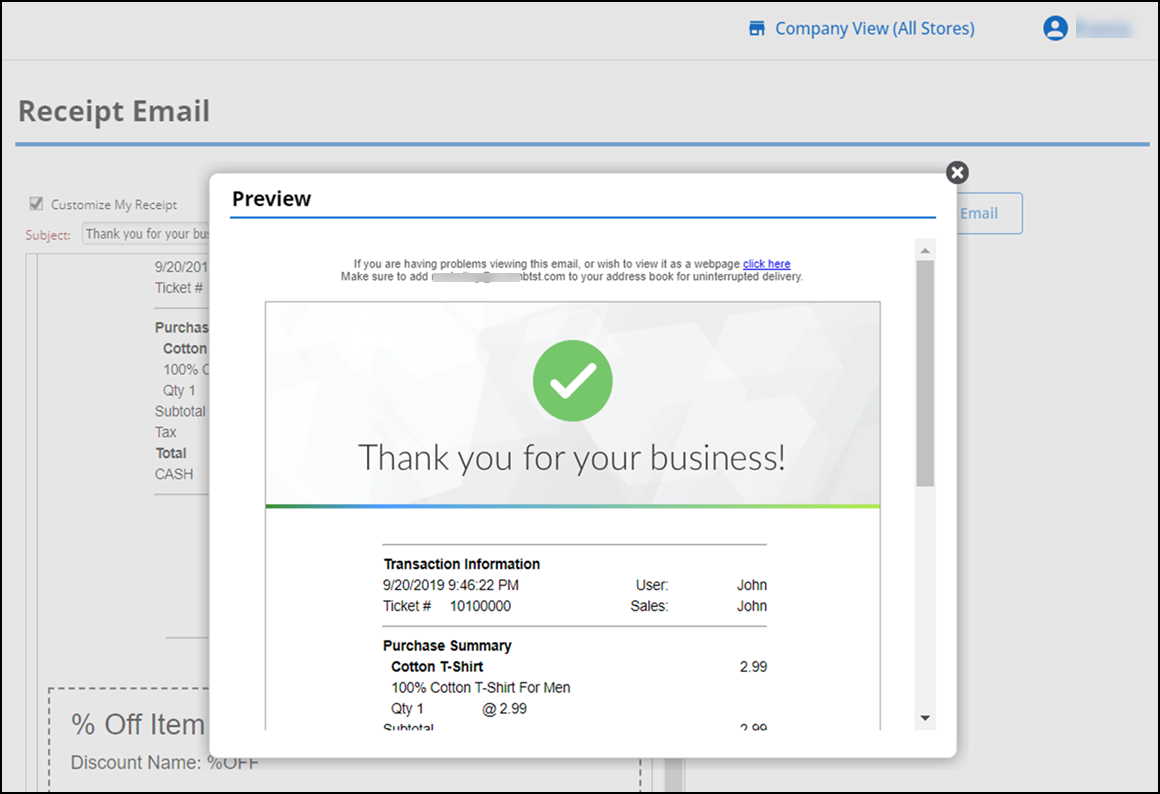
Click Preview to view the entire email along with headers and footers.
-
Click Test Email and enter up to five email addresses to send the email to see the final formatting and/or have your associates review the email for you. This will allow you to see the email exactly as your customers will see it.
-
Click Spam Check to launch the spam checker.
-
Click Save Changes to begin using the updated Receipt Email message to your customers.
Sending out a miss you email message
Note: To ensure you are adhering to email marketing laws, make sure you have the customer's permission to email them before including them in any email marketing campaigns.
Use the feature to reach out to your customers who have not made a purchase in a configurable number of days. The system will count the number of days since a customer made a purchase and will then send the customer the Miss You Email. The purpose of the Miss You Email is to entice the customer to come back to your store and make another purchase. To attract the customers, it is a good idea to attach an offer to this email message.
To send out a miss you email message:
- Select Customers > Email Marketing.
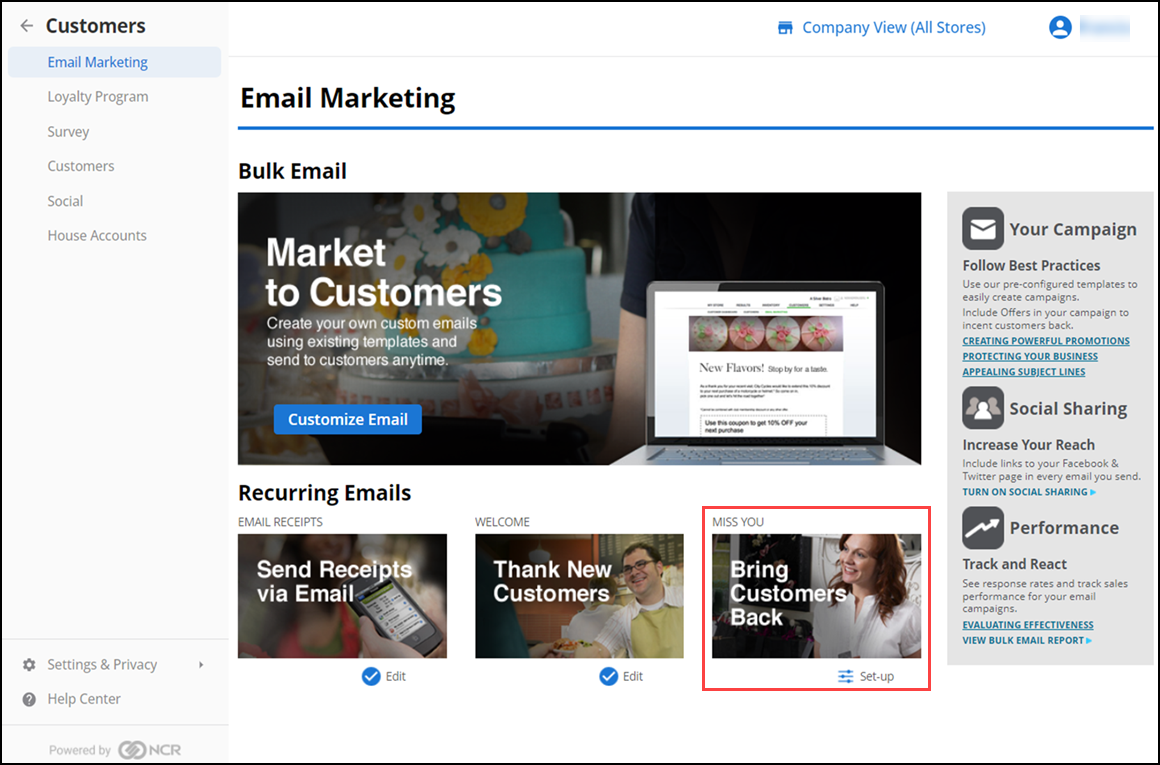
- Click Set-Up/Edit indicator for the MISS YOU. The Miss You Email screen appears.
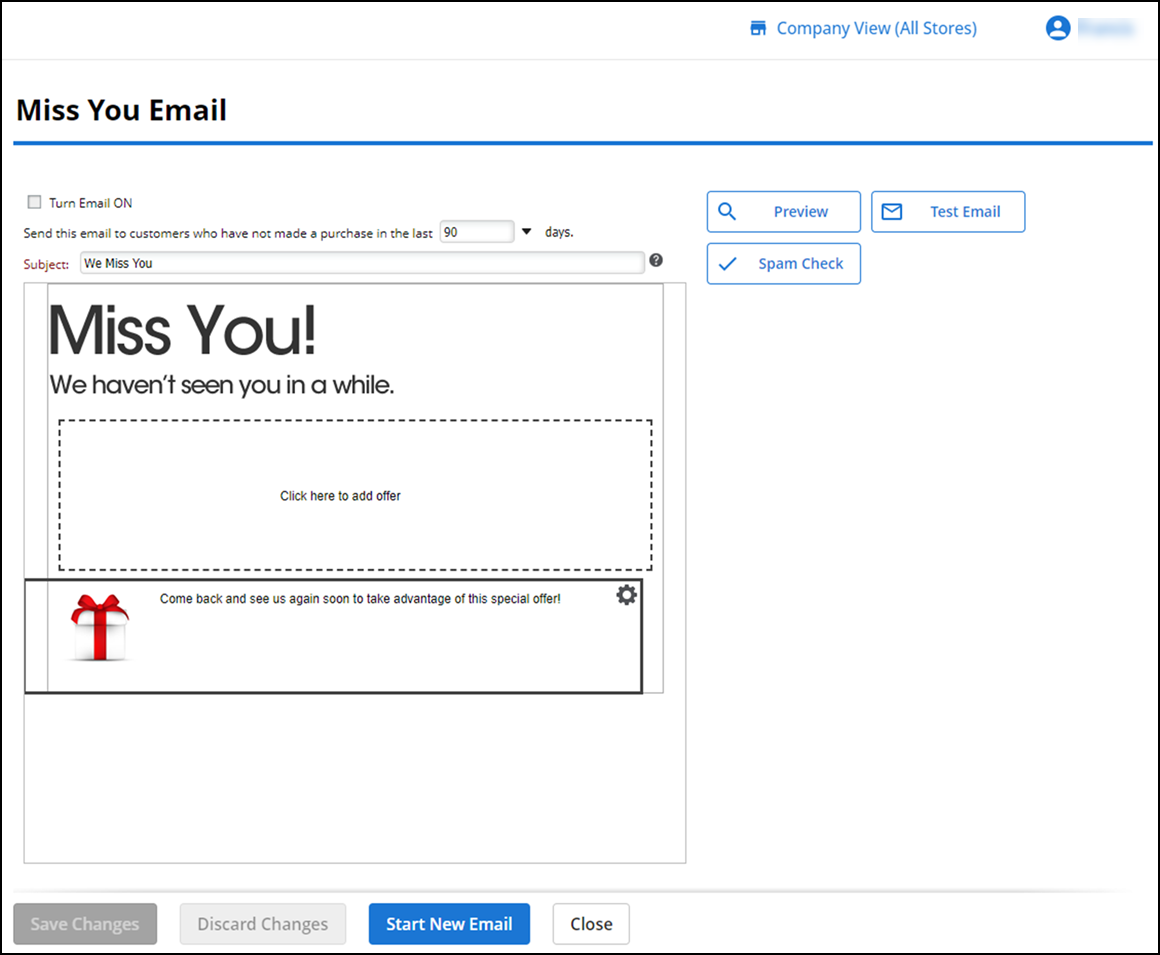
- Click Turn Email On to edit the email message.
- Select the number of days to use from the drop-down list. Your options are 30, 60, 90, 120, 180, and 365 days. For example, if you choose 30 days, and a customer has not made a purchase from you in 30 days, the system automatically sends the customer the Miss You Email. If no purchase is made, the system waits another 30 days before it sends another Miss You Email.
- Create an eye-catching Subject line.
- Upload your store logo or some other image.
- Customize the body of the email.
- Attach an offer (optional).
- Click Preview to view the entire email (along with headers and footers).
- Click Test Email and enter up to five email addresses to send the email to see the final formatting and/or have your associates review the email for you. This allows you to see the email exactly as your customers will see it.
- Click Spam Check to launch the spam checker.
- Click Save to save the changes.
- Once you select Turn Email ON, the system automatically sends the Miss You Email to your customers based on their last purchase. There's nothing else you need to do. You can come back and make changes to your Miss You Email at any time.