Configuring and using notification settings
Examples of how you can use a notification are:
- Let an employee know they did not, or were late to clock in.
- The stock of an inventory item is running low or is at zero.
To configure the notification groups
-
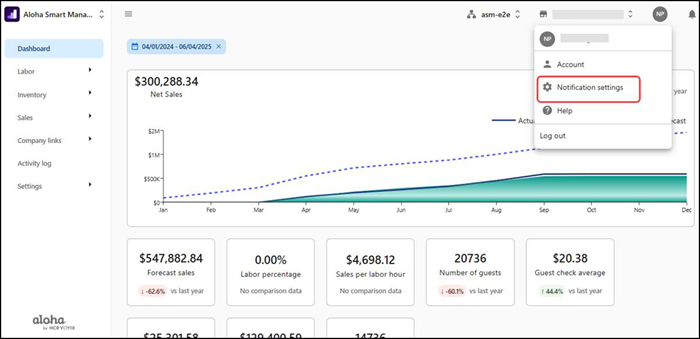
Click the profile icon and select Notification settings from the menu that appears. The 'Notification settings' screen appears.
-
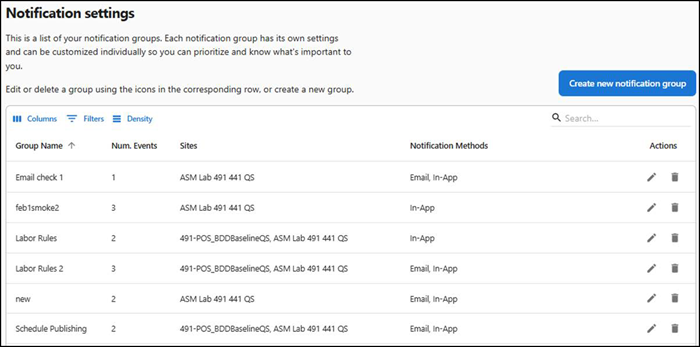
Click Create new notification group. The 'Notification Group Settings' screen appears.
-
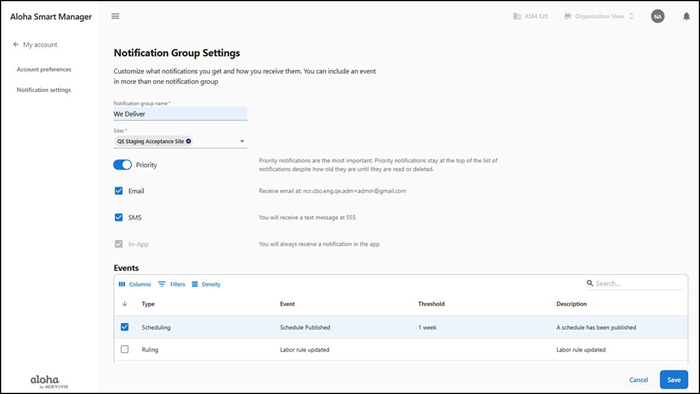
Type a name for the notification group.
-
Select the sites to include in the notification group. Only the sites to which you have access are available for selection.
-
Toggle Priority to on to set a high priority for the events within the notification group. A high priority event appears at the top of the notification list until it is read or deleted. Toggle Priority to off to set a normal priority for the events within the notification group.
-
Select Email to send the notification by email. The system defaults to the email address of the person who is logged in to Aloha Smart Manager.
-
Select SMS to send the notification by short message service (SMS). The system defaults to the phone number configured in the 'Account preferences' screen.
Tip: To use a different phone number, click 'Add phone number' to display the 'Account preferences' screen and enter a phone number.
-
Select In-App to receive notifications within the application. You can select the 'bell icon' in the top-right corner of the dashboard to view these events.
-
Under the Events section, select the event(s) to include in the notification group. You can add multiple events to a single notification group.
-
Click Save to create the notification group. The notification group appears in the 'Notification settings' screen.
To edit or delete a notification group:
-
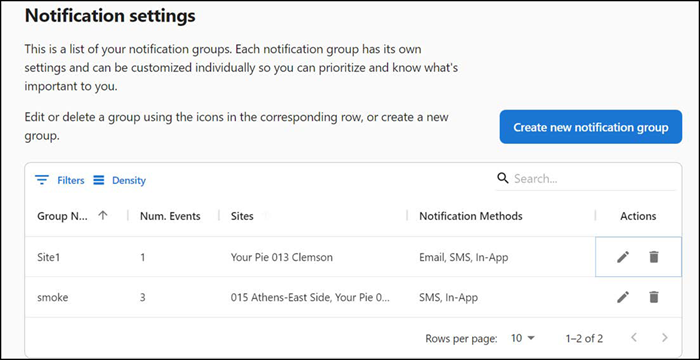
Click the Profile icon and select Notification settings from the menu that appears. The 'Notification settings' screen appears with a list of existing notification groups.
-
Click the three dots under Actions for the notification group to edit or delete.
-
Click the pencil icon to make changes to the group and continue to the next step.
-OR-
Click the trash can to delete the group.
-
Make the necessary edits and click Save. A success message appears and automatically dismisses.
Viewing a notification sent to you
If you opted to send an in-app notification, the bell-shape icon at the top-right corner of the dashboard highlights to let the recipient know a notification is sent.
An in-app notification contains the following:
Priority — Indicates the severity of a notification as either normal or high priority. Use a normal priority for when the stock of an inventory item is running low and requires no action from the manager. Use a high priority for when an inventory item is completely depleted and a manager must mark the notice as read. High priority notifications always appear above all normal priority notifications.
Time — Indicates the time when the notification is received, such as 2m ago (two minutes ago) or 2d ago (two days ago).
Mark read — Indicates the notification is read without opening.
Mark unread — Indicates the notification is not read.
Delete — Deletes the notification.
To view a notification:
- Sign in to Aloha Smart Manager.

- Click the bell in the top-right corner of the screen. The Notifications drawer appears.
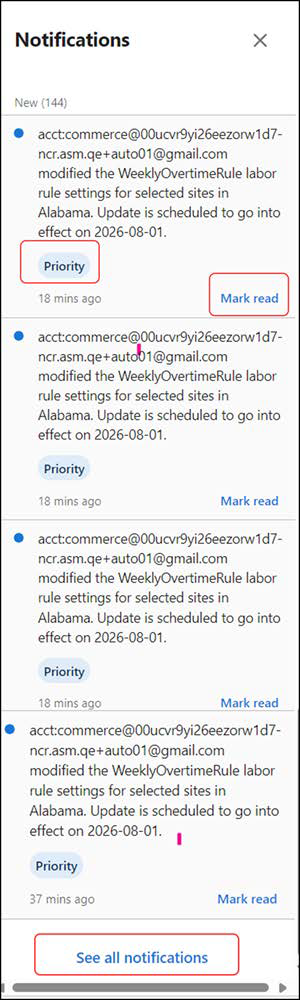
- Click Mark read to mark a notification as read.
- (Optional) Click See all notifications to view the remaining notifications. The 'All notifications' screen appears.
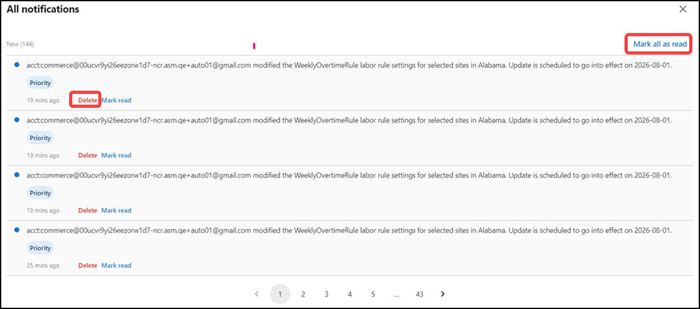
- Click Mark all as read to mark all notifications as read.
- Click Delete on any notification to delete the respective notification.
Return to "Getting started with Aloha Smart Manager," or continue to "Navigating the Help function."