Working with invoices
An invoice is a bill received from a vendor and provides a proof of purchase for the vendor item received at the restaurant. You can use ASM to capture the invoice for proper record keeping and distribution. It is easy to upload invoices in CBO (Cloud Back Office) and view the invoices report. Managers can upload invoices either manually or by scanning a digital invoice file.
Managers review all invoices entered into the Back Office by the entry type (manual, scan flat file import, electronic transfer by vendor, or API). When a manager selects the Optical Character Recognition (OCR)/scan type, the manager is able to compare the image to the invoice data entered into the Back Office system and validate for the proper translation. The manager can navigate from report to invoice entry to make corrections, if needed, and then return to the report to continue reviewing the report.
You can capture invoice details using two different methods:
- Manually adding the invoice details. See Manually adding an invoice
- Uploading a digital image of the invoice. If you upload a PDF, each PDF page is converted to an image file. See Uploading a digital invoice image
Invoice approval process
In ASM, an uploaded invoice must go through multiple stages before it is finalized. The stages of invoice approval are:
- The restaurant obtains the invoice from the vendor.
- An employee or mid-level manager captures the invoice in ASM. The status is set as Draft.
- A manager either accepts or finalizes the uploaded invoice. If accepted, the status changes to Accepted. If finalized, the status changes to Finalized.
Manually adding an invoice
An employee or mid-level manager manually adds the invoice in ASM, which is then approved and finalized by the restaurant manager.
To manually add an invoice:
-
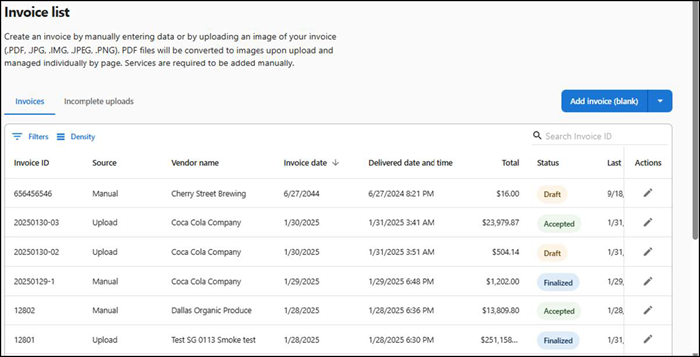
Select Inventory > Invoices. The 'Invoice list' screen appears.
-
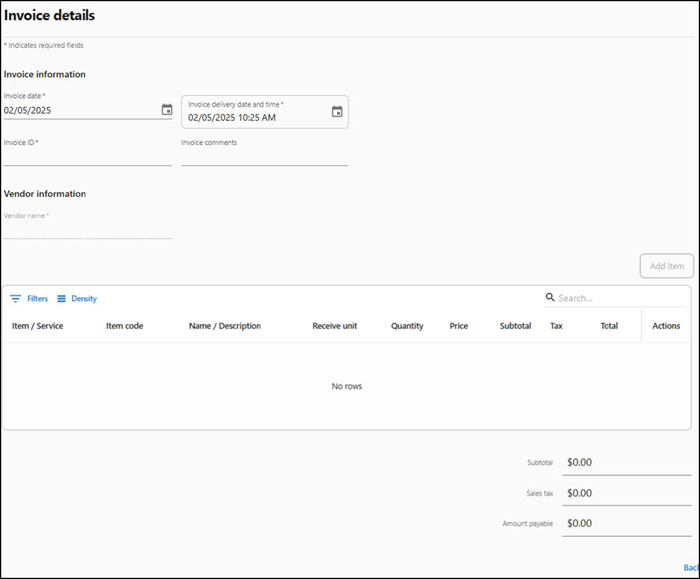
Click Add invoice (blank). The 'Invoice details' screen appears.
-
Select Cash paid in or Cash paid out option if you want to indicate that the vendor performs non-sales related cash-based transactions. Assigning a generic vendor for these cash transaction invoices is recommended as it simplifies tracking of non-sales related transactions.
Note: The Cash paid in and Cash paid out options are applicable for ASM Core Pack only.
-
Select the invoice date.
-
Select the date and time when the invoice was sent to the restaurant.
-
Type the unique ID of the invoice.
-
Type any additional information about the invoice in 'Invoice comments.'
-
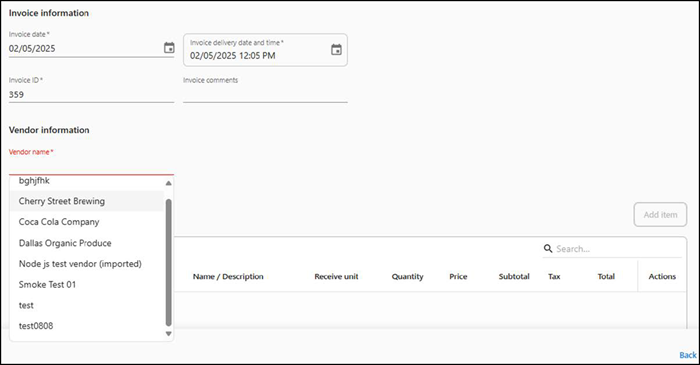
Click Vendor name to view a list of vendors.
-
Select a vendor from the list. Alternatively, if the required vendor is not listed, enter the new vendor name in 'Vendor name.' The Add 'New vendor name' option appears. Click Add to create a new vendor.
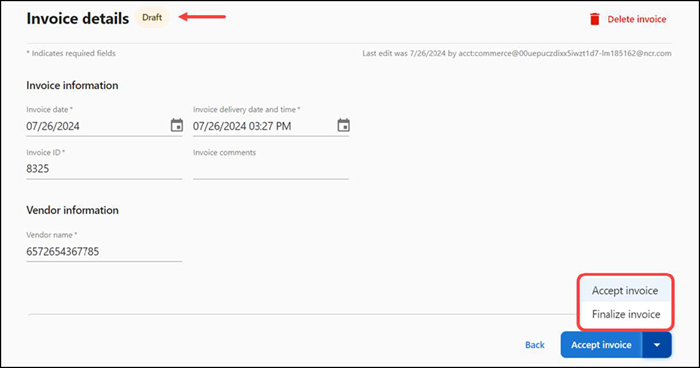
The invoice status is set to Draft and the options to 'Accept invoice' and 'Finalize invoice' appear.

-
Click Add item to manually enter the first item in the invoice. The 'Add item' screen appears on the right side of the screen.
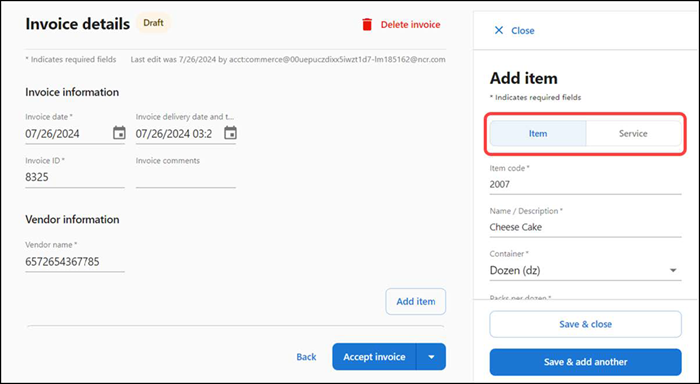
-
Click Item or Service to designate the type of item to add to the invoice. Choose from:
Item — Indicates the item is a product purchased from the vendor, such as egg or milk.
Service — Indicates the item is for a service provided by the vendor, such as a catering service.
-
Type the vendor item code, up to 50 characters.
-
Type the name and description of the item, up to 250 characters.
-
Select the bulk packing type from the ‘Container’ drop-down list. Select from Case (CS), Pail (PL), Bag (BG), Pound (LB), Gallon (GL), Half Gallon (HGL), Quart (QT), Liter (LT), Pint (PT), and Dozen (DZ).
-
Type the total quantity of packs in vendor item container. This must be a numeric value from 1 to 999, up to two decimals.
-
Type the actual size of each unit in the package. This must be a numeric value from 1 to 999, up to two decimals.
-
Select the standard unit of measurement of the item. The available unit of measures are Fluid Ounce (fl. Oz), Quart (qt.), Milliliter (ml), Gram (g), Ounce (oz.), EA (ea), Pint (pt), Gallon (gal), #5 Can (#5 Can), #10 Can (#10 Can), Liter (L), Milligram (mg), Kilogram (kg), Pound (Lb), and Dozen (DZ).
-
Type the quantity of vendor items.
-
Type the unit price of the vendor item container. It must be a numeric value (up to two decimals). The sub-total amount is auto calculated as Quantity × Price. This is the amount excluding the tax amount.
-
Type the tax amount. This is the applicable tax of all units. The total amount of items is auto calculated as Subtotal × Tax. This is the total amount including the tax amount.
-
Click Save & close to save the item and close the invoice, or click Save & add another to save the current item and add another item.
-
Repeat steps 9 through 20 for all items and services to be included as per the invoice. The subtotal, sales tax, and amount payable appear at the bottom.

-
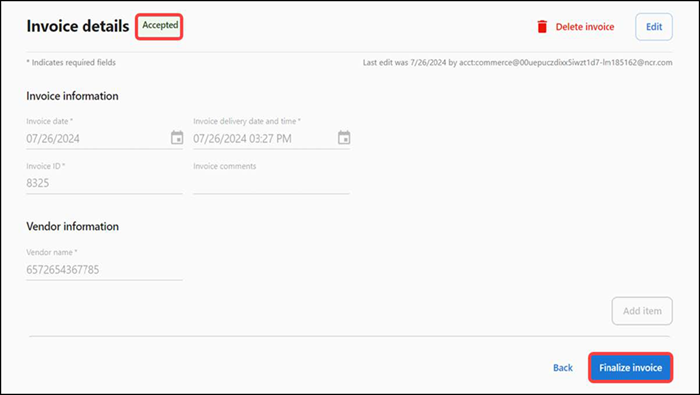
Click Accept invoice to confirm the invoice details. The status of the invoice changes to 'Accepted' and the Finalize invoice option appears. A manager can modify or delete the accepted invoice.
-
Click Finalize invoice to approve the invoice. The status of the invoice changes to 'Finalized.'
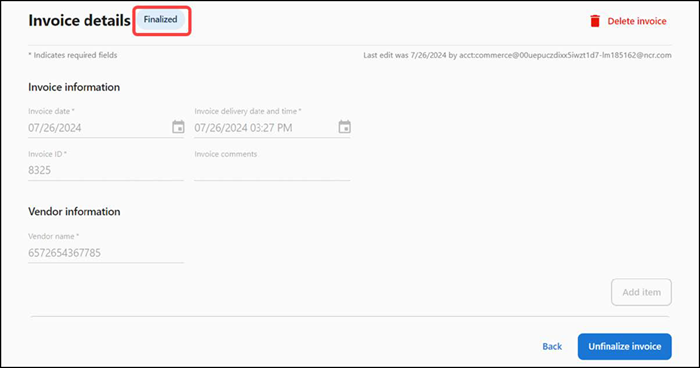
Note: Click 'Unfinalize invoice' to revert the finalized invoice status to Draft.
-
Click Back to return to the invoice screen.
Uploading an invoice
ASM is built with OCR (Optical Character Recognition) functionality that reads the uploaded invoices and feeds data into the system. This technology greatly reduces the time and effort of creating an invoice while retaining the integrity of the printed invoice.
A manager can upload and process an invoice from their desktop or mobile, either as a digital image file or a PDF file. ASM detects the individual elements of the uploaded invoice to process and read the uploaded image. A manager can also make changes to the resulting invoice values. When the system reads the invoice data, the invoice is ready for processing and reporting.
Tip: You can upload only one image at a time. If the invoice is in PDF format, convert the PDF into an image format and upload. You can use JPG, JPEG, IMG, and PNG.
Uploading the invoice details
To upload the invoice details:
- Select Inventory > Invoices. The 'Invoice list' screen appears.
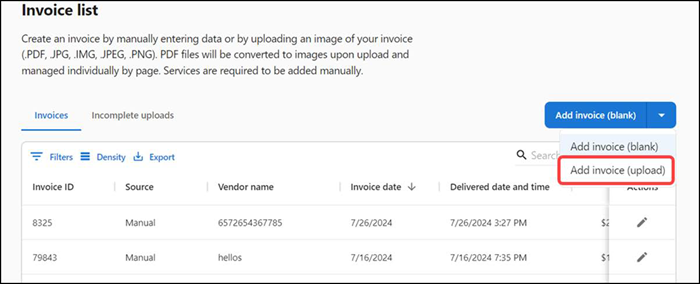
- Select Add invoice (upload) from the 'Add invoice (blank)' drop-down list.
- Browse to and select the invoice to upload. The 'Uploading invoice' screen appears.
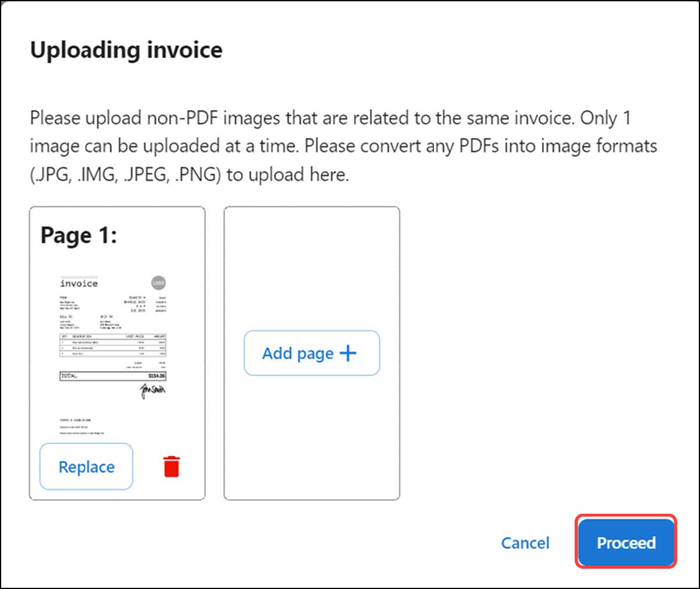
- (Optional) Click Add page + to upload multiple images related to the same invoice.
- Click Proceed. The 'Processing files' status screen appears. If your upload file meets the requirements, the 'Uploading invoice' success message appears.
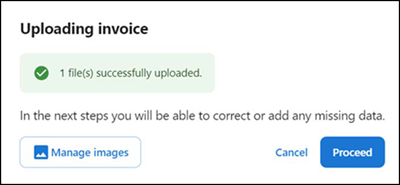
- You can use the Manage images option to upload the images again.
- Click Proceed to continue with the mapping process. The 'Invoice upload validation' screen appears.
- Continue to Mapping invoice information to begin the process of validating the uploaded invoice.
Mapping invoice information
Once you successfully upload an image of an invoice, you must go through the mapping process to ensure the invoice details map to the correct value.
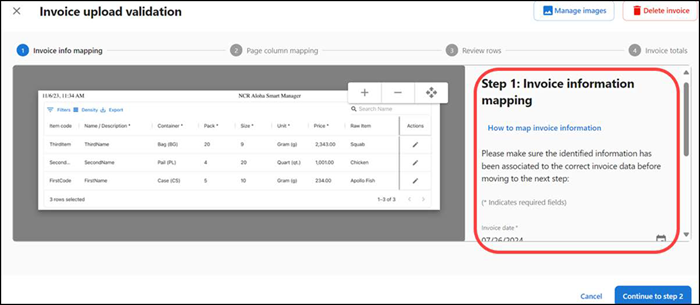
Step 1: Invoice information mapping
-
With the 'Invoice upload validation' screen active, verify the invoice details are mapped correctly. To make a change, re-map the invoice details to the correct value or manually type them.

a. To remap invoice details, click Map next to the data to update.
b. Select the correctly identified text box to map to and then click Apply.
c. Repeat as many times as needed to correctly map the data.
-
Enter the Invoice ID.
-
Enter the Vendor name.
-
Click Continue to step 2. The 'Page column mapping' screen appears with instructions for Step 2: Page column mapping.
-
Continue to the next procedure.
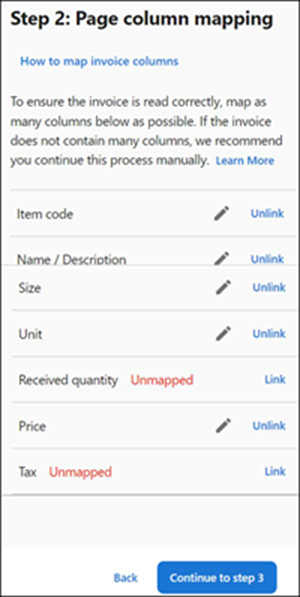
Step 2: Page column mapping
- Review the mapped values for each column in your invoice to ensure each column value mapped correctly. To make a change, click the pencil icon and manually adjust the highlighted area using the provided anchor points. You may edit, unlink, or link your data to the correct values. You can see how the value has been mapped by hovering over the highlighted rectangle on your invoice or column value.
- Click Continue to step 3. The review progresses and the 'Review row information' screen appears with instructions for Step 3: Review row information.
- Continue to the next procedure.
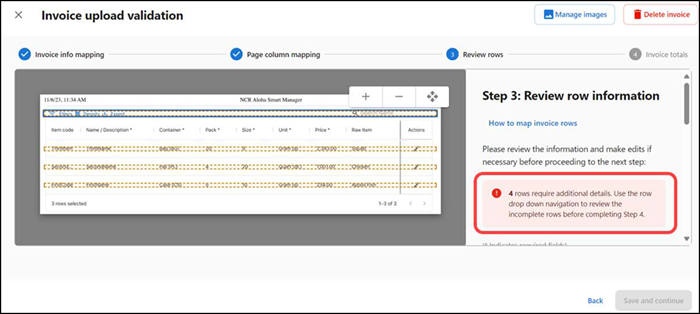
Step 3: Review row information
-
Review and correct the item details before submitting your invoice. Items that are already identified within the catalog are auto-populated with the registered details. For new items, you can edit all item details in your invoice. Based on the modifications, the system enables you to continue.
Note: For items that are recognized in the catalog, you can edit only the quantity, price, and tax of the item.
-
Click Save and continue. The 'Invoice upload validation' screen appears with instructions for Step 4: Invoice totals.
-
Continue to the next procedure.
Step 4: Invoice totals
- Click Create invoice. The 'Invoice details' screen appears. Upon the invoice creation, initially the invoice status is in Draft.
- Click Accept invoice to accept the invoice and continue to finalize the invoice details.
- Click Back to return to the 'Invoice list' screen.
Deleting an invoice
- Select Inventory > Invoices. The 'Invoice list' screen appears.
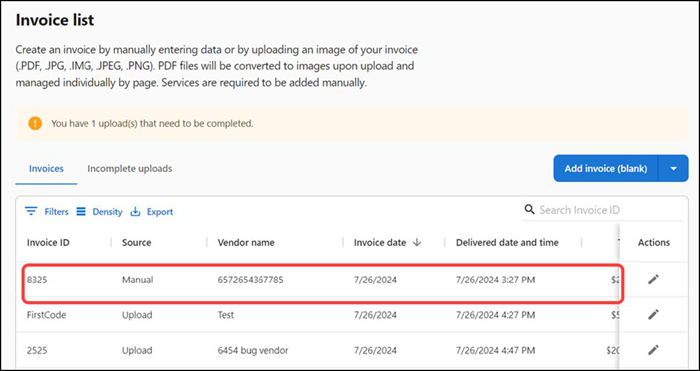
- Select an invoice to delete. The 'Invoice details' screen appears.
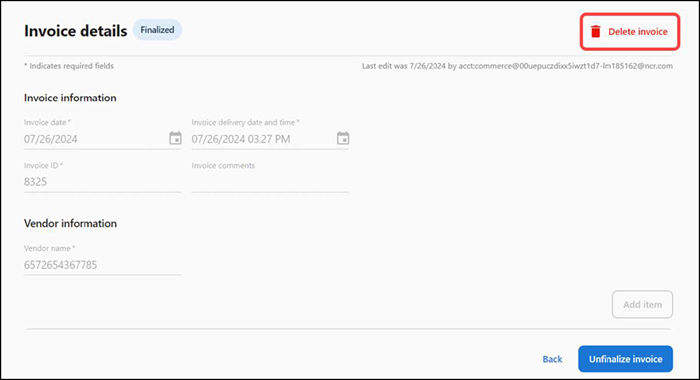
- Click Delete invoice. A confirmation message appears allowing you to confirm the invoice deletion.
- Click Delete to confirm.
Return to "About Inventory Management,"