Working with vendor items
After you add a vendor, you can associate the items you purchase from the vendor to the vendor. All vendor items must first be associated with a raw item.
You can either add vendor items individually or import multiple vendor items in bulk for faster setup.
- Add a vendor item manually. See Manually adding a vendor item
- Import vendor items in bulk. See Bulk importing vendors items
Manually adding a vendor item
To manually add a vendor item:
-
Select Inventory > Vendors to view the available vendors in the 'Vendors' screen.
-
Select the vendor that sells or owns the item. The vendor details appear with the 'General information' tab as the active tab.
-
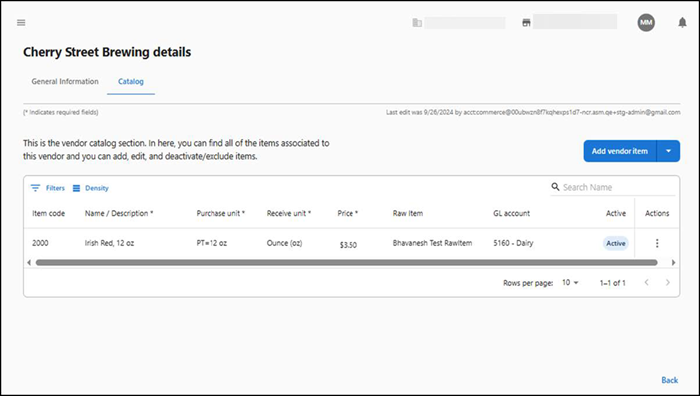
Select the Catalog tab.
Note: The Order & delivery feature is applicable for ASM Core Pack only.
-
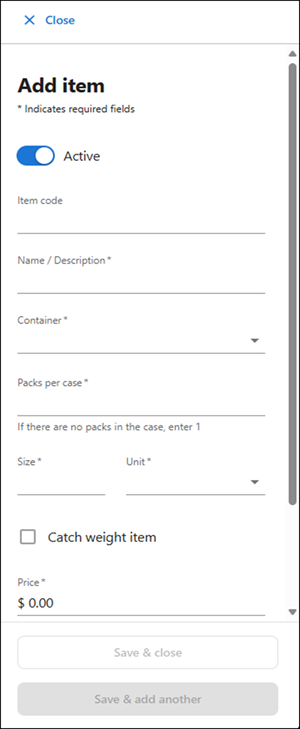
Click Add vendor item. The 'Add item' sliding panel appears on the right side of the screen.
-
Type the vendor item code, up to 50 characters.
-
Type the name of the item, up to 250 characters.
-
Select the bulk packing type from the 'Container' drop-down list. The available options are Case (CS), Pail (PL), Bag (BG), Pound (LB), Gallon (GL), Half Gallon (HGL), Quart (QT), Liter (LT), Pint (PT), and Dozen (DZ).
-
Type the total quantity of packs in the vendor item container. This must be a numeric value from 1-999, up to two decimals.
-
Type the actual size of each unit in the package. This must be a numeric value from 1 to 999, up to two decimals.
-
Select the standard unit of measurement of the item. Select from Fluid Ounce (fl. Oz), Quart (qt.), Milliliter (ml), Gram (g), Ounce (oz.), EA (ea), Pint (pt), Gallon (gal), #5 Can (#5 Can), #10 Can (#10 Can), Liter (L), Milligram (mg), Kilogram (kg), Pound (Lb), and Dozen (DZ).
-
Type the unit price of the vendor item container. It must be a numeric value (up to two decimals).
-
Verify Catch weight item is not selected as it is currently not supported.
-
Select the raw item to associate with this vendor item from the 'Raw item' drop-down list. If the raw item you need does not appear in the list, you can select ‘Unassigned’ to allow you to save the vendor item. It appears as Unassigned in the vendor item grid. You must then access the Raw item function and associate the raw item to the vendor item using that function.
Tip: ‘GL account’ is populated based on the configuration of the raw item and is informational only.
-
Click Save & close to save the changes.
Or,
Click Save & add another to add another item to the vendor.
Bulk importing vendor items
When working with vendor items, you have the option to upload vendor items into organizations within Aloha Smart Manager using a .CSV file. This helps high-end corporations, franchisees, and restaurants who use an extensive number of vendors to easily manage the transfer of these items to ASM without having to perform the tedious task of entering each vendor item individually. To take advantage of this time-saving feature, you must enter your vendors into a spreadsheet. Be aware that Aloha Smart Manager requires specific rules and provides a downloadable template file for a successful upload. You must manually enter any fields that do not download successfully, or retry the upload.
Upload vendor items in bulk using the 11 columns in the vendors_item_import_template.CSV file, using the following rules:
- Do not alter the width of any column or you may receive unwanted changes. Always keep the width at approximately 8.43 units, which is the MS Excel default.
- The total file size of the spreadsheet must not exceed 1 MB.
You will need the container.CSV, purchaseunit.CSV, and category.CSV as a reference for entering the data into vendors_item_import_template.CSV.
| Column | Description |
|---|---|
| Item name | The vendor item identifying number, up to 50 characters. You can leave this blank as long as name/description, container, pack, size, and unit combination are unique. |
| Name/Description | The description of the vendor item, up to 250 characters. This is a required field. |
| Container | The bulk packaging type used by the vendor. Click ‘Download container options list’ for the list of containers defined in Aloha Smart Manager. This is a required field. |
| Pack | The number of packs within the vendor item container. This field must be a numeric value from 1-999 and can include decimals with up to two decimal points. This is a required field. |
| Size | The amount or size of every unit inside each pack, such as 16 pounds. This field must be a numeric value from 1-999 and can include decimals with up to two decimal points. This is a required field. |
| Purchase unit | The industry standard measurement of product inside a pack, such as 16 pounds. Click 'Download unit options list' for the list of purchase units defined in Aloha Smart Manager. This is a required field. |
| Catch weight | The catch weight indicates if an item may vary in weight when it is received. This field must be entered as True or False where True indicates the item has a catch weight and False indicates the item does not have a catch weight. This is a required field. |
| Receive unit | Where 'Catch weight' is True, enter the industry standard measurement of the received product. Where 'Catch weight' is False, the receive unit should be the same as the 'Purchase unit.' This is a required field. |
| Price | The price of the vendor item container. This field must be a numeric value and can include decimals with up to two decimal points. This is a required field. |
| Raw item | The name of the raw item associated with the vendor item, up to 250 characters. |
| Category | The category ID associated with the raw item. Click 'Download category options list' for the list of categories defined in Aloha Smart Manager. |
To upload vendor items in bulk:
-
Select Inventory > Vendors. The available vendors appear in the 'Vendors' screen.
-
Select the vendor for which to upload vendor items in bulk. The vendor details appear with the 'General information' tab as the active tab.
-
Select the Catalog tab.
Note: The Order & delivery tab feature is applicable for ASM Core Pack only.
-
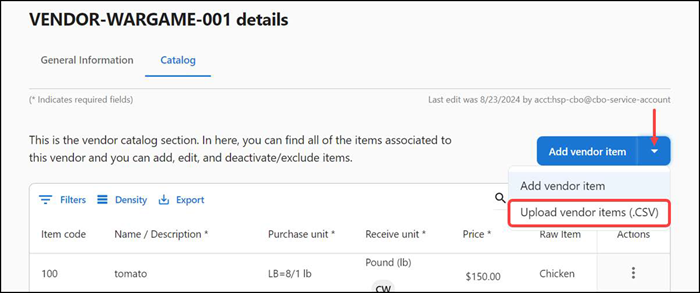
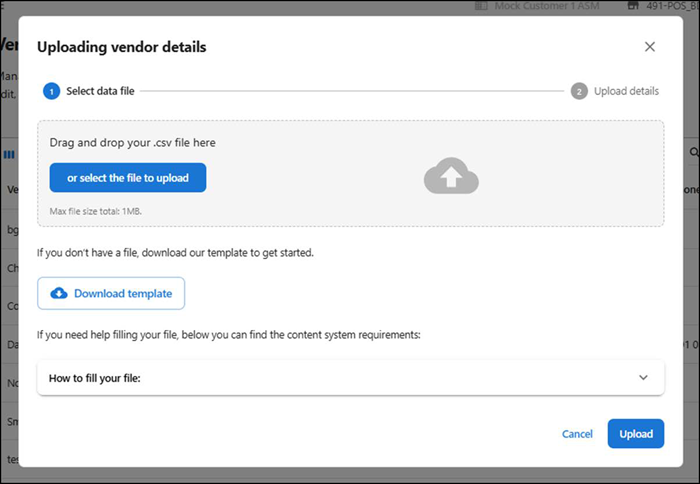
Click the 'Add vendor item' drop-down arrow and select Upload vendor items (.CSV). The 'Uploading vendor details' screen appears.
-
Click Download template. The file automatically downloads vendor_item_import_template.CSV.
-
Click the How to fill your file drop-down to expose instructions for completing the spreadsheet.
-
Type or copy and paste the vendor item information into vendor_item_import_template.CSV.

-
Perform one of the following actions to upload the .CSV file:
Drag and drop the file containing the vendor item details.
-OR-
Click or select file to upload, browse to and select the file to upload, and click Open to upload and complete the upload.
-
Click Upload to upload the file into ASM. A 'Processing file' status screen appears as ASM validates the file.
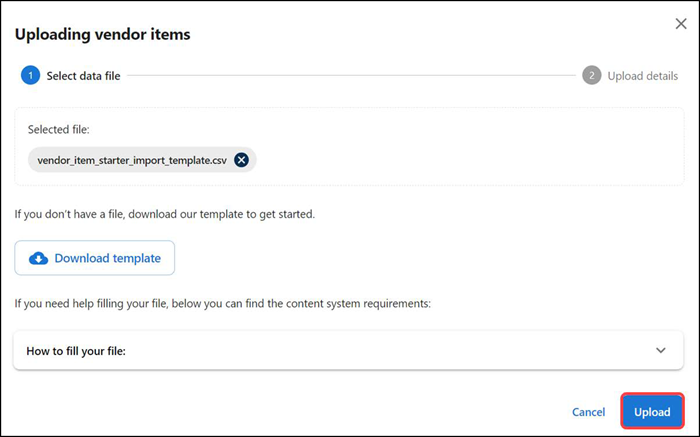
The 'Processing file' status screen appears.
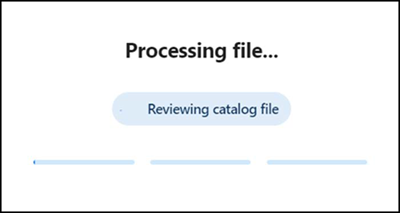
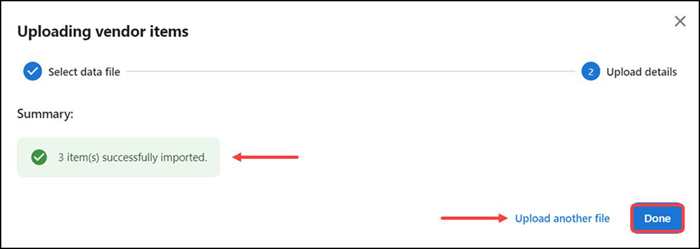
Once uploaded, the vendors appear in a grid format under the 'Selected file' tab. The summary appears in the 'Uploading vendor items' screen. Inspect any data that was not uploaded successfully.
-
Click Upload another file to upload another file with bulk vendor item details, or click Done to return to the vendor details > 'Catalog' tab.
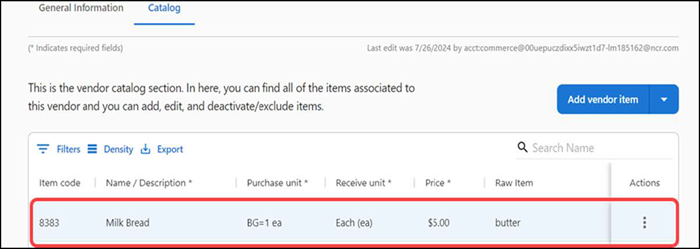
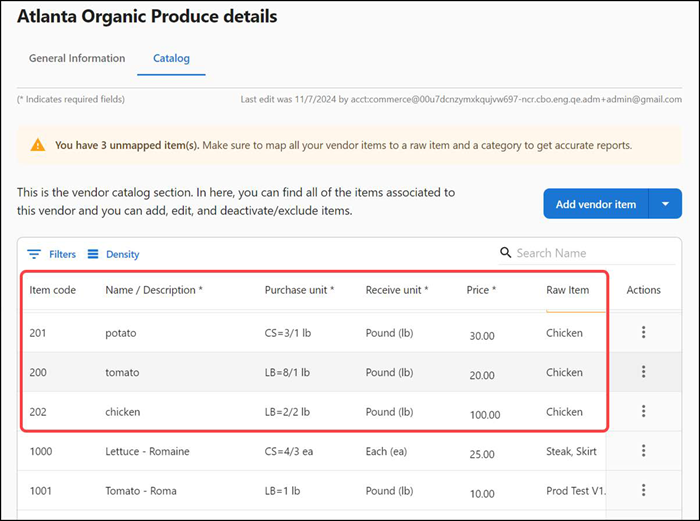
Once uploaded, the details appear in a grid format on the Catalog tab. The vendor details show the added vendor items.
Modifying a vendor item
- Select Inventory > Vendors. The available vendors appear.
- Select the vendor that sells the item. The vendor details appear with the 'General information' tab as the active tab.
- Select the Catalog tab. The list of items associated with the vendor appear on the screen.
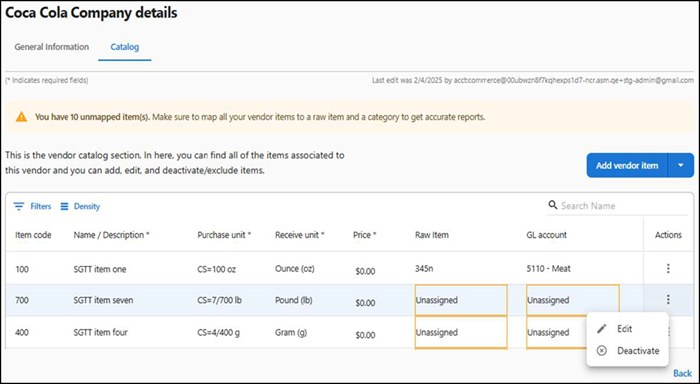
- Select an item from the list.
- Click the three dots menu under Actions and select Edit from the menu that appears. A screen appears on the right side of the screen.
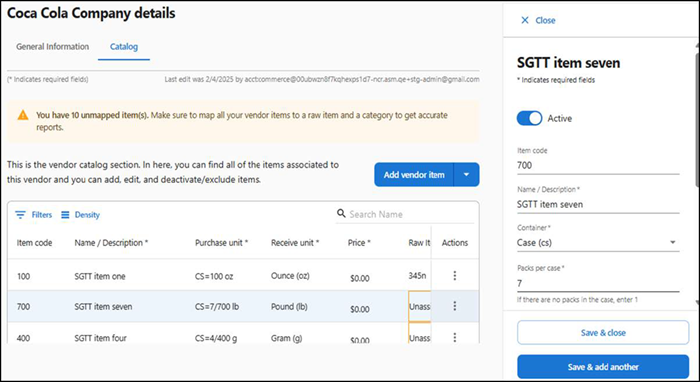
- Click Save & close to save the changes and close the vendor item edit window, or click Save & add another to save the edits and add another vendor item.
Deactivating a vendor item
- Select Inventory > Vendors. The available vendors appear.
- Select the vendor that sells the vendor item. The 'Vendor details' screen appears with the 'General information' tab as the active tab.
- Select the Catalog tab to view a list of the vendor items.
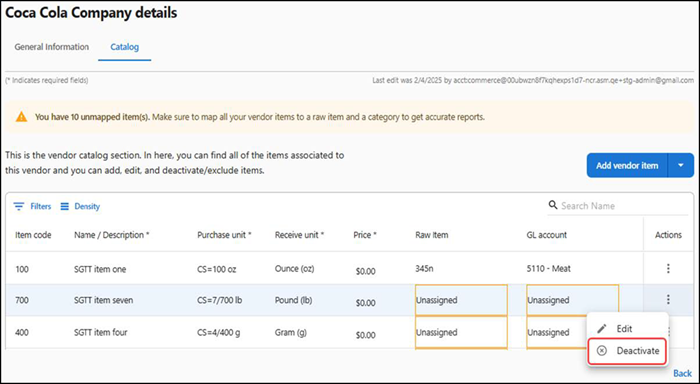
- Select a vendor item.
- Click the three dots menu under Actions and select Deactivate from the menu that appears. A confirmation message appears.
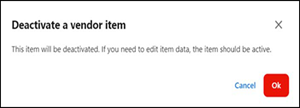
- Click OK to confirm.
Using the Raw Items function to associate a raw item with a vendor item
As an alternate method to working in the Vendors function, you can use the Raw Items function to associate a raw item with a vendor item. The vendor item must already exist.
- Select Inventory > Raw Items. The 'Raw items' screen appears.
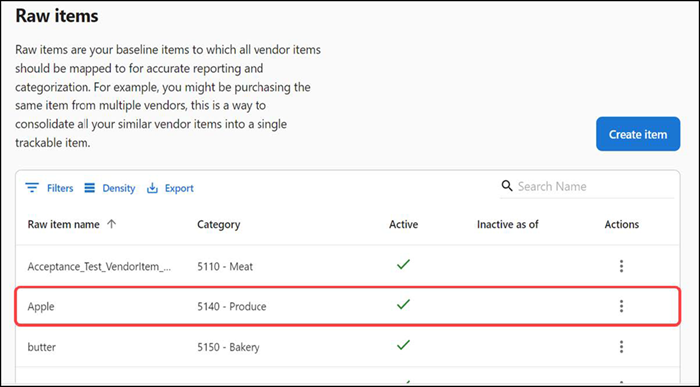
- Select a raw item from the list.
- Click the three dots menu under Actions and select Edit from the menu that appears. The 'General information' screen appears.
- Scroll down the screen to the ‘Assign vendor items to raw item’ group bar.
- Select ‘Unassigned to raw item’ from the Assignment drop-down list. The vendor items that are not assigned to a raw item are listed.

- Select the vendor item to assign to the selected raw item. The selected 'vendor item' appears in the 'Current selection' pane.
- (Optional) To cancel the vendor item association with the raw item, click Clear selection.
- Click Save to confirm the changes and exit the screen.
Return to "About inventory management," or continue to "Working with order and delivery."