Working with modifiers
At the company level, use MENU > MODIFIERS to add modifier groups and modifier items; however, at the store level, you can only edit the pricing and availability for individual modifier items.
This document discusses the following:
- Understanding modifiers
- Configuring modifier groups
- Editing modifier groups
- Sorting modifier groups
- Export list
- Understanding modifier items
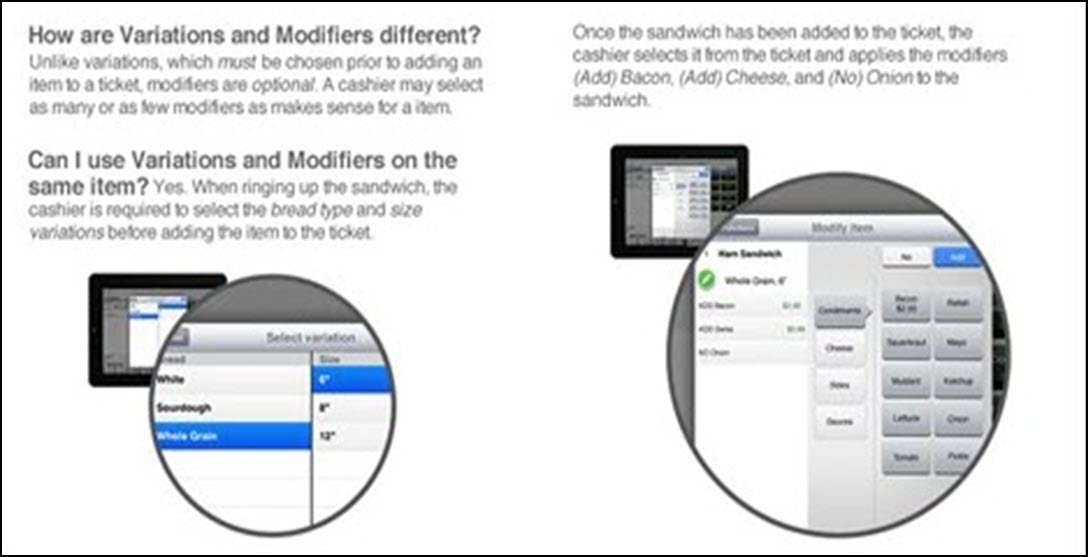
- Understanding variations vs. modifiers
Understanding modifiers
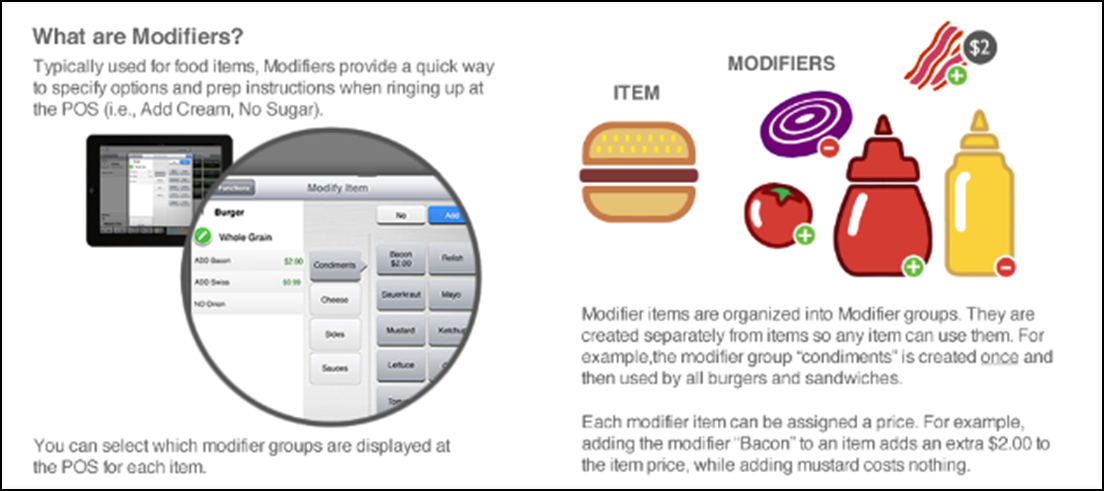
- Modifiers allow a server or cashier to give special instructions to the kitchen or bar about menu items and how they should be prepared. Modifiers are configured in the Back Office (like variations).
- Sometimes a modifier is a special request, such as add pickles and other times. It is a change to the listed menu item (such as, no mayo). This feature is also allowing restaurants to charge for additional ingredients that may be added to an item, such as $1 for bacon.
Modifiers and kitchen printers
- If you do not have modifiers configured in Back Office, you can only add kitchen notes.
- If you have configured modifiers and you have a kitchen printer, you can use the kitchen notes and modifiers.
- If you have modifiers configured, but you do not have a kitchen printer, the modifiers only print on the customer's receipt (but the kitchen notes do not print).
- If the kitchen printer is offline for any reason, an alert appears on the POS to let you know there is an issue. Any tickets sent to the kitchen printer are added to a storage queue for approximately 10 minutes. Once the kitchen printer is back online, the tickets begin printing. If it takes longer than 10 minutes to get the kitchen printer back online, you can recall and re-send those tickets manually to a printer of your choice. If you are unable to get the kitchen printer back online, you can edit your receipt printer's settings and designate it as a receipt and kitchen printer. You would then need to take the printed receipts to the kitchen.
- For restaurant establishments, you can capitalize on the combination of kitchen printing and holding tickets to essentially work like a "tab". Though you will not capture any payments, you can add the customer, place a drink order, place the order on hold, which will send the drinks to the kitchen printer. Later, you can recall the ticket and add an appetizer, put the ticket on hold, which will print the appetizer only to the kitchen printer.
- The system will only send an item to kitchen printer one time, when you hold the ticket or during checkout.
Item modifiers
- Setting up item modifiers makes it easy for employees to select options and extras when selling an item in the POS. This feature also allows restaurants to charge for additional ingredients that may be added to an item, such as $1 for bacon.
- You configure item modifiers once and reuse them across multiple items. This differs from variations (such as size and color), which are set for each individual item under item setup.
- Item modifiers are used at the POS to give instructions to kitchen or prep station staff about how items should be prepared. For example, item modifiers for a sandwich could include condiments or other toppings, such as lettuce, pickles, cheese, and bacon.
- Item modifiers are grouped into modifier groups for quick navigation on the POS. So, in our example, our modifier group could be Sandwich Toppings, and the item modifiers would be the toppings that could go on a sandwich.
- You can set an item modifier to have a $0.00 price or with an actual dollar amount. For example, you would probably set the price for lettuce to be $0.00, but you might set the price for bacon to be $1.00. Any price for an item modifier will be added as an upcharge to the base item's price.
- Once you create your modifier groups and item modifiers, these will be available on the POS.
- All modifier groups and modifier items can be available for all items they do not have to be tied to a specific item. For example, you could use a modifier group of Sandwich Toppings for turkey burgers, beef burgers, turkey sandwiches, chicken sandwiches, etc. So, just create them once and use them for any item. You can limit the modifier groups that are available with items. For example, let's say you have a cafe, but you also sell t-shirts with your logo on them. The modifier groups you might set up for your sandwiches, such as bread, cheese, etc, wouldn't make much sense when associated with t-shirts. You could then choose to not have any modifier groups tied to your t-shirt item.
Configuring modifier groups
Modifiers exist to provide the kitchen or bar specific instructions for how to prepare an order. These can be a special request, such as ‘Lite Mustard,’ a requirement, such as meat temperature, 'Steak– Medium Rare,' or an option on a side, such as 'Salad– Ranch Dressing.' Modifiers also allow you to charge extra for additional ingredients, such as ‘Bacon’ or ‘Extra Cheese.’ Modifier groups enable you to locate modifier items easily at the Point of Sale.
With Back Office, you can also price modifiers by variation. For example, you may want to charge different amounts for a modifier, such as ‘Extra Cheese,’ based on the size of the sandwich.
Configuring modifier groups
You can create as many modifier groups as necessary for your menu. When you configure a modifier group, you can define whether you want the prompt for the modifier group to appear when the parent menu item is selected. Additionally, you can rank the order in which modifier groups appear.
To add a modifier group:
- Log in to Back Office using Company View (All Stores).
- Select INVENTORY > MODIFIERS. The MODIFIER GROUPS screen appears.
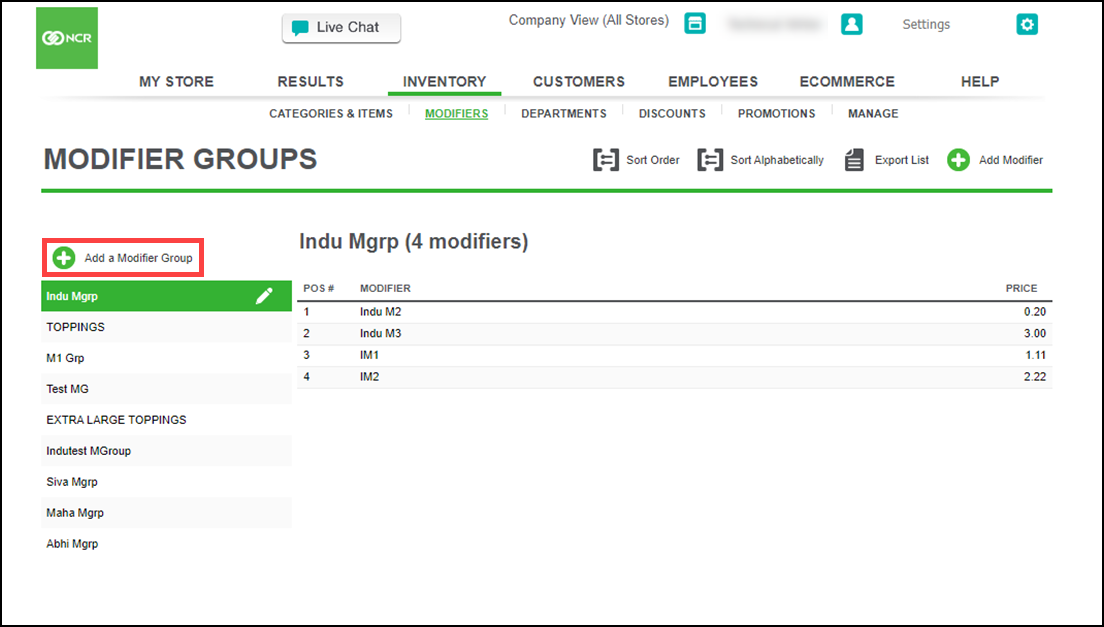
- Click Add a Modifier Group. The Add Modifier Group screen appears.
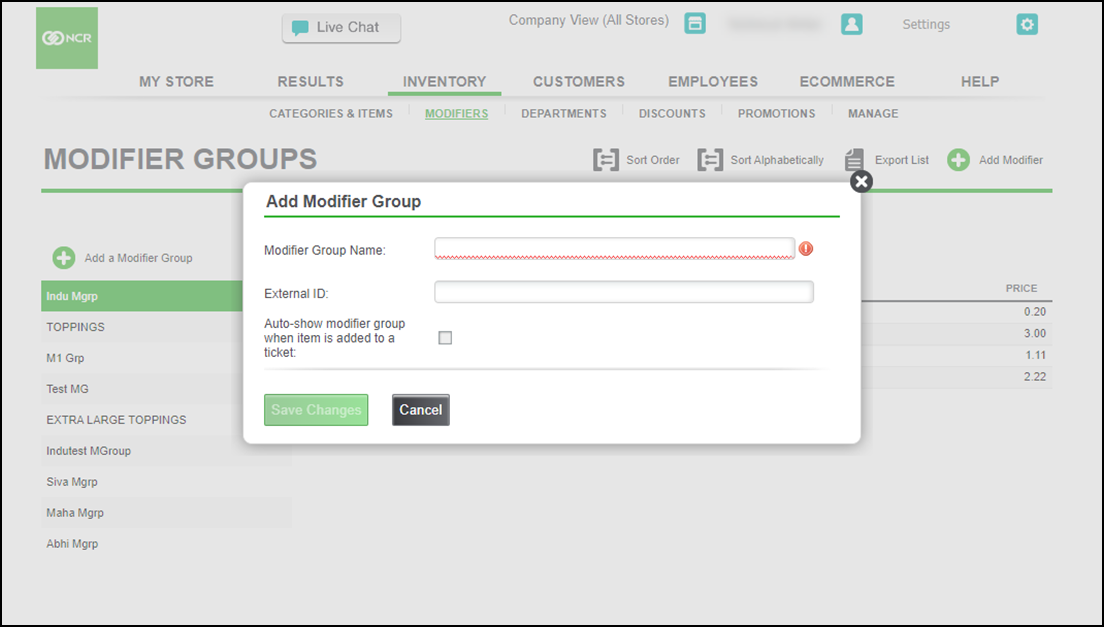
- Type a name for the modifier group.
- (Optional) Assign an External ID number to the modifier group. It is not necessary to enter an External ID number.
- If you leave External ID blank, the system populates the External ID with a system-assigned Master Item ID when you save the item record.
- If you enter a number for the External ID, the External ID number for the item will be different than the Master Item ID number.
- Uncheck the Auto-show modifier group when item is added to a ticket: checkbox if you do not want this modifier group while adding item to a ticket.
- Click Save Changes.
Editing modifier groups
To edit modifier groups:
- Log in to Back Office using Company View (All Stores).
- Select INVENTORY > MODIFIERS. The MODIFIER GROUPS screen appears.
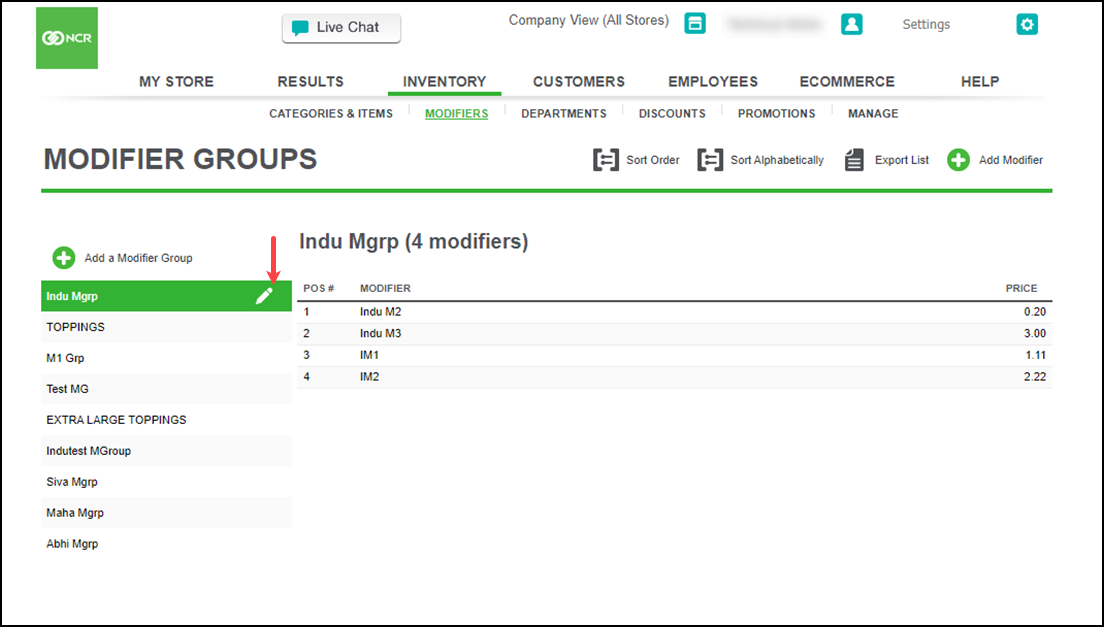
- Click the pencil icon to the right of the modifier group to edit. The Edit Modifier group dialog appears.
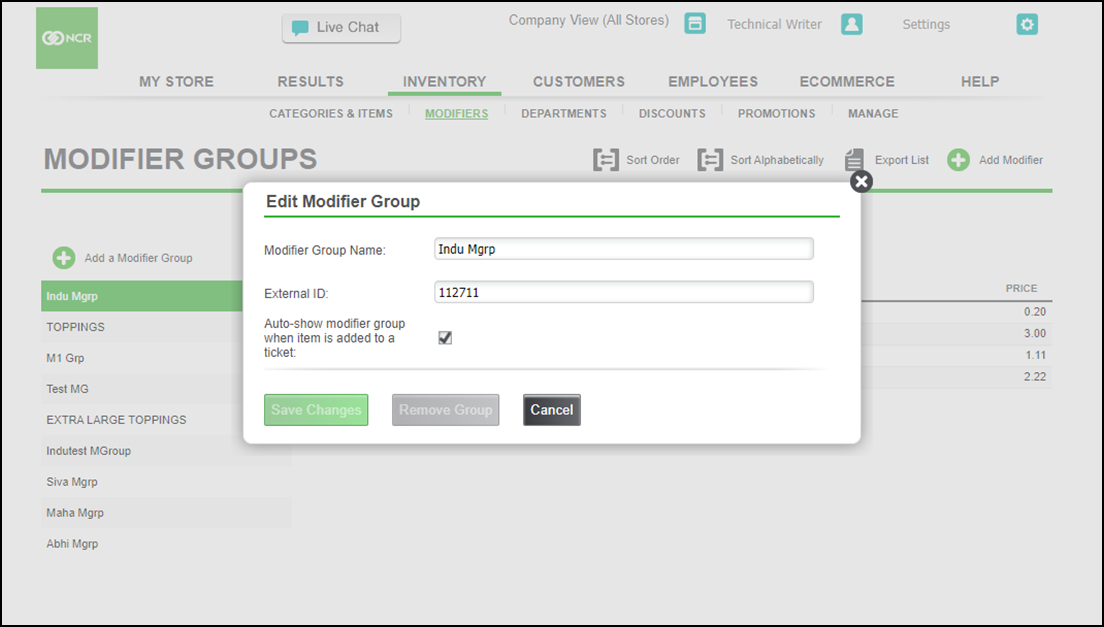
- Make the desired changes.
- Click Save Changes.
Sorting modifier groups
You can rank modifier groups to change the order in which they appear.
To rank modifier groups:
- Log in to Back Office using Company View (All Stores).
- Select INVENTORY > MODIFIERS. The MODIFIER GROUPS screen appears.
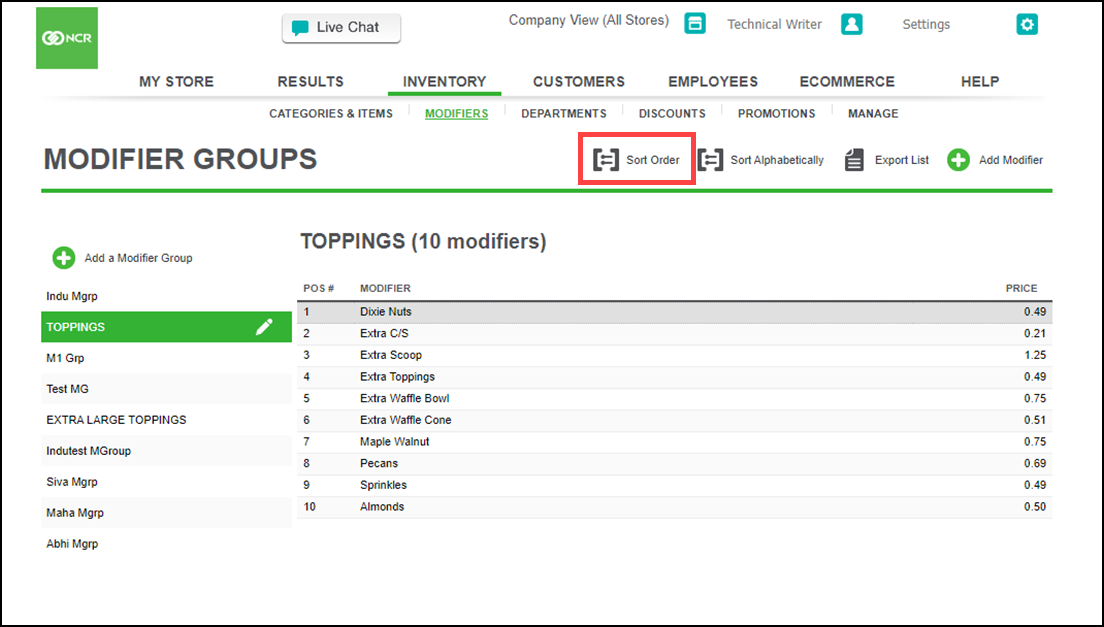
- Click Sort Manually.
- Click sort up arrow icon to move a modifier group up one level or click sort down arrow icon to move a modifier group down one level. Repeat until you have the modifier groups ranked as desired.
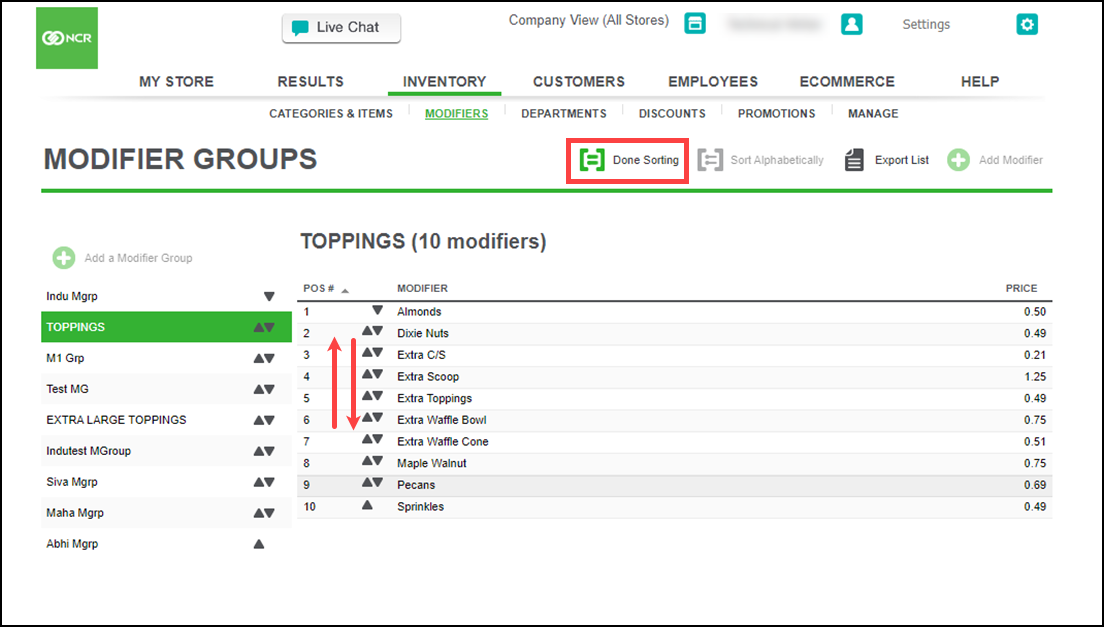
- Click Done Sorting.
Sorting modifiers alphabetically
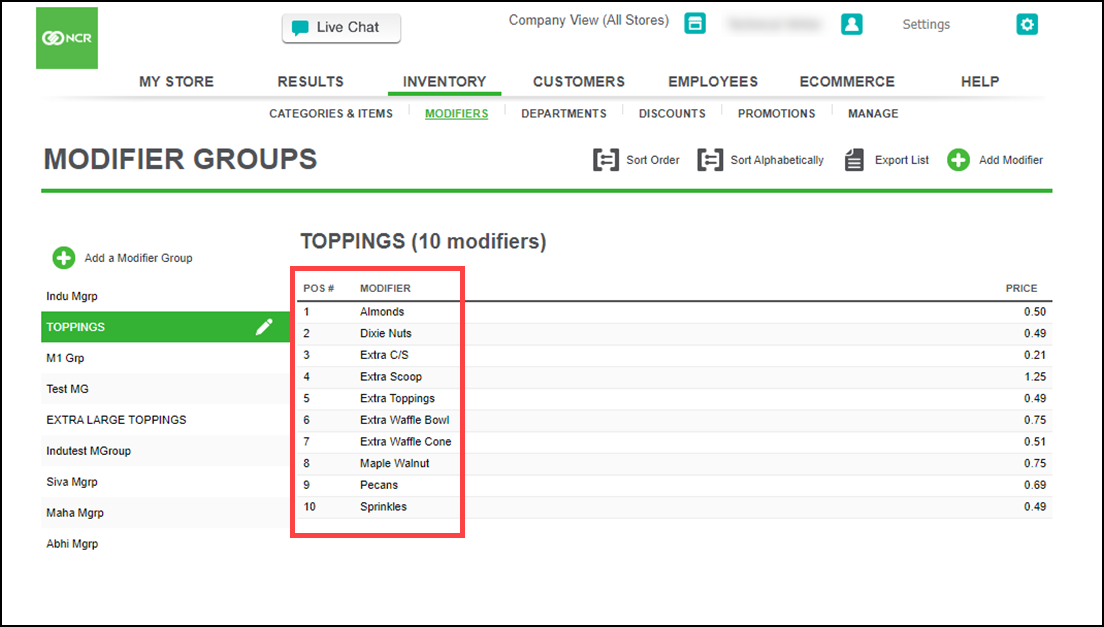
You can rank modifier items within a modifier group or sort them alphabetically.
To sort modifier items within a modifier group:
- Log in to Back Office using Company View (All Stores).
- Select INVENTORY > MODIFIERS.
- Select the modifier group to sort modifier items.
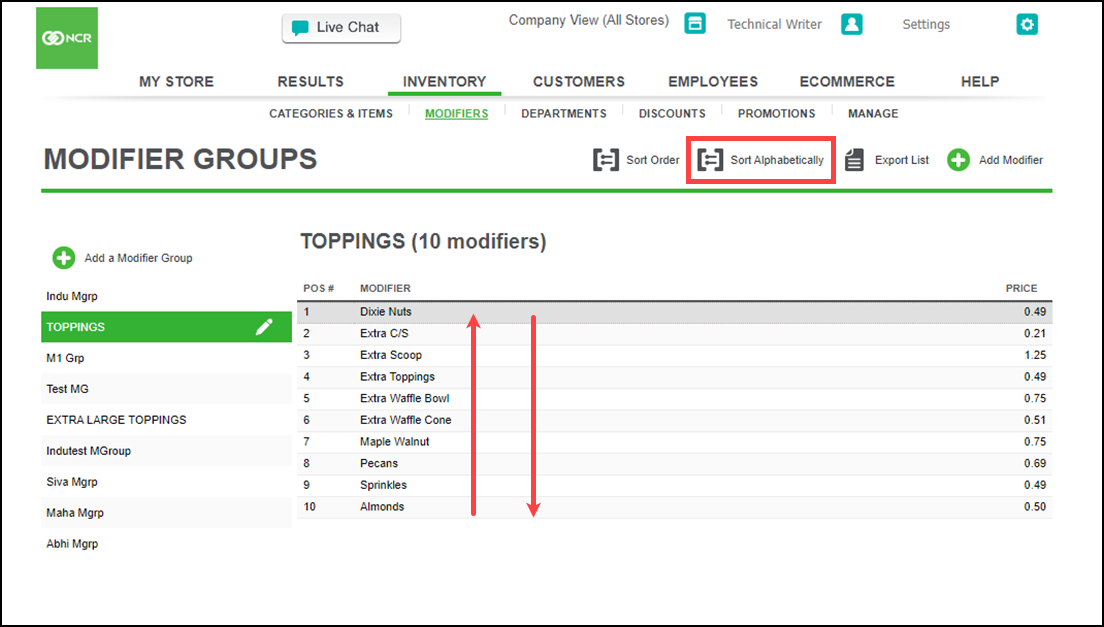
- Click Sort Alphabetically to sort the modifier items in a chronological order (A-Z).The application updates the order.
Export list
- Log in to Back Office using Company View (All Stores)/Store View.
- Select MENU > MODIFIERS.
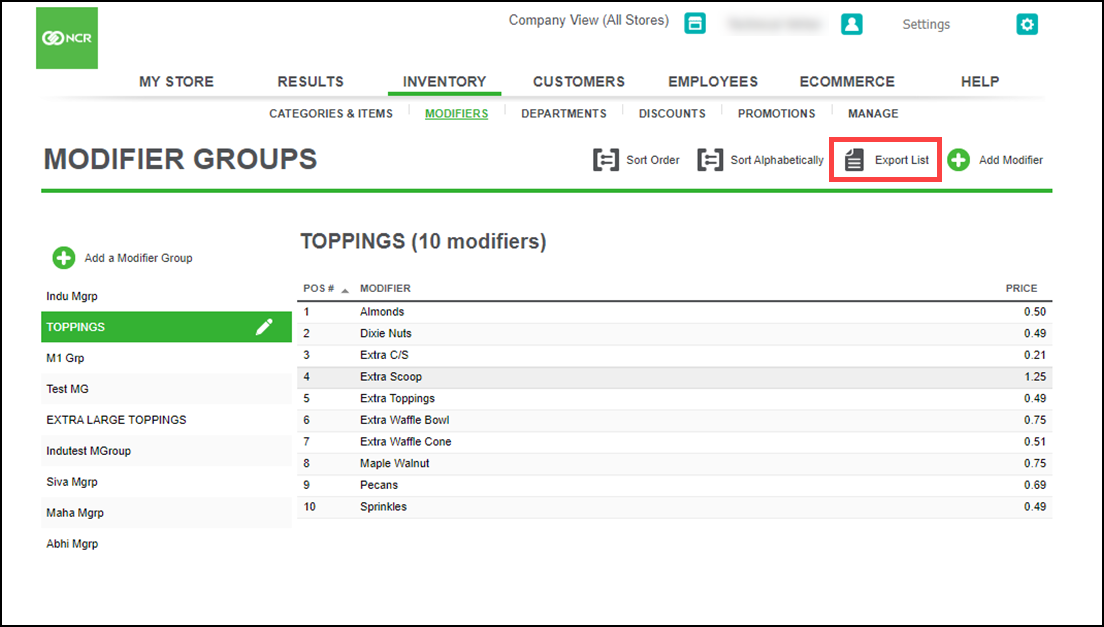
- Click Export List. The system directs you to the RESULTS > REPORTS > LISTS > MODIFIERS. The Modifier Report screen appears.
Understanding modifier items
In Back Office, modifier items can be both menu items and modifiers items. Modifier items can be sold without variation and with variation of size. When modifier items are sold by variation of size, you can link the size of the modifier item to the size of the parent menu item. When you create modifier items, you must configure how you want to sell the modifier, price the modifier, and whether the modifier ought to be the default modifier item for the modifier group.
Understanding variations vs. modifiers
Modifier items without variations
In some situations, you may not want to sell the modifier item by variation. In one scenario, for turkey sandwiches, you have ‘Tomato’ as a modifier item to enable customers to customize their sandwich. In a second scenario, for steaks, you want customers to determine the meat temperature of their steak, and you create the following modifier items: ‘Rare,’ ‘Medium,’ and ‘Medium Well.’
To add modifier items without variations to a modifier group:
Note: You must first create the modifier item without variations.
-
Log in to Back Office using Company View (All Stores).
-
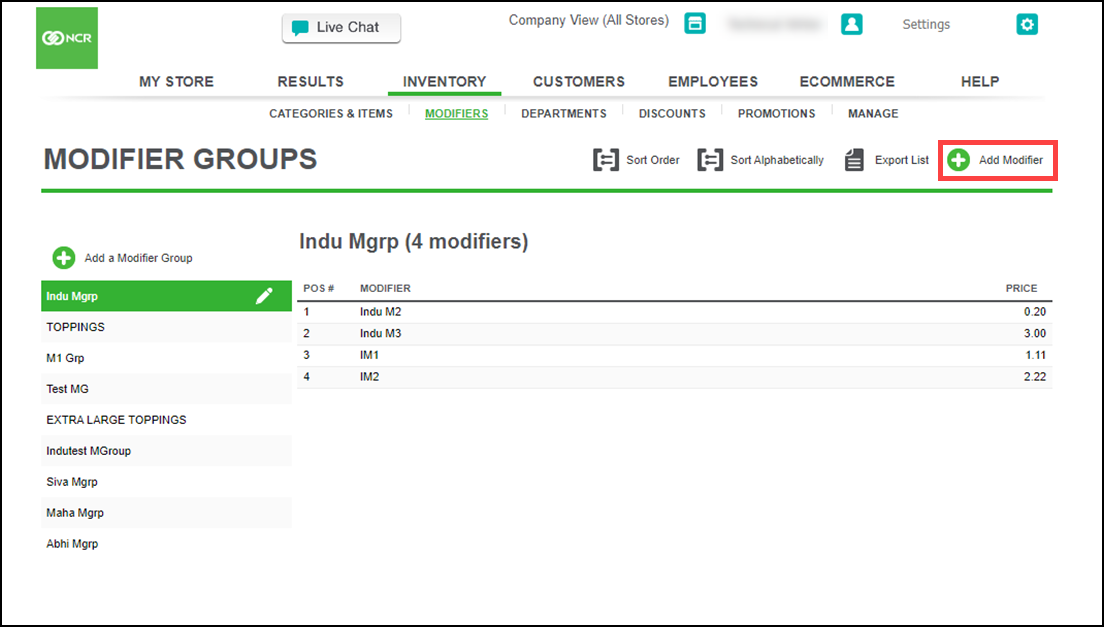
Select INVENTORY > MODIFIERS. The MODIFIER GROUPS screen appears.
-
Select the modifier group for which to add a modifier item.
-
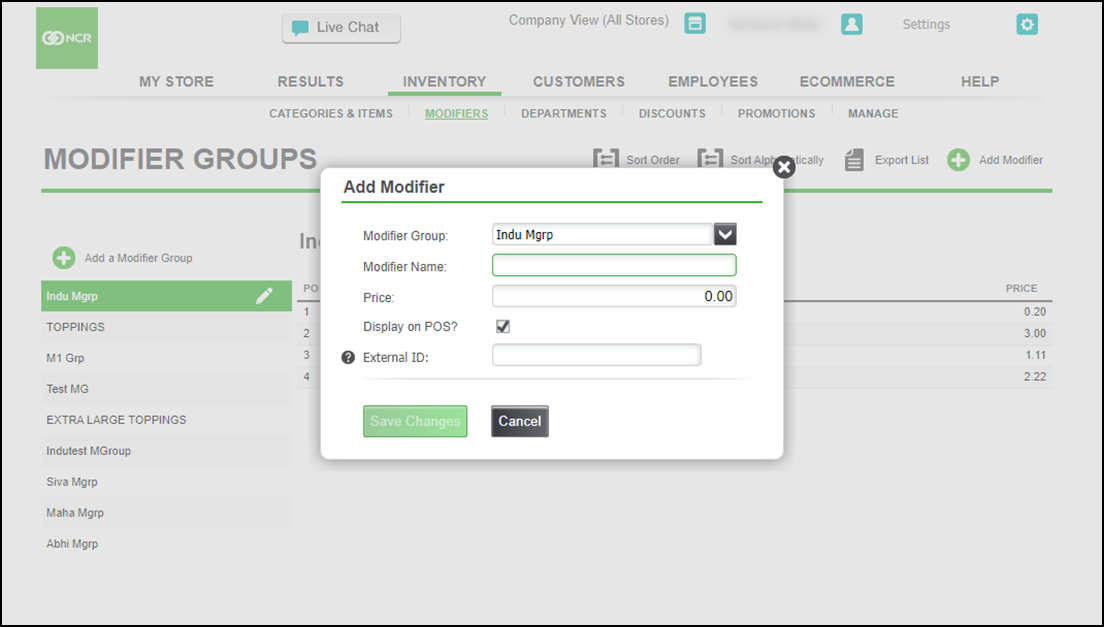
Click Add Modifier.
-
Modifier Group: Select the required modifier group from the drop-down list.
-OR-
Select Add New to add anew modifier group. The Add Modifier Group dialog appears.
-
Modifier Name: Enter a name to the new modifier.
-
Price: Enter a price (or leave the default $0.00 price).
-
Uncheck the Display on POS? check box if you do not want this modifier item available on the POS.
-
External ID: Enter the external ID.
-
Click Save Changes.
Editing modifiers
You can edit a modifier, remove it from a modifier group, and rank the appearance of the modifiers.
To edit or remove a modifier item from a modifier group:
-
Log in to Back Office using Company View (All Stores).
-
Select INVENTORY > MODIFIERS.
-
Select the modifier group containing the modifier item to edit or remove.
-
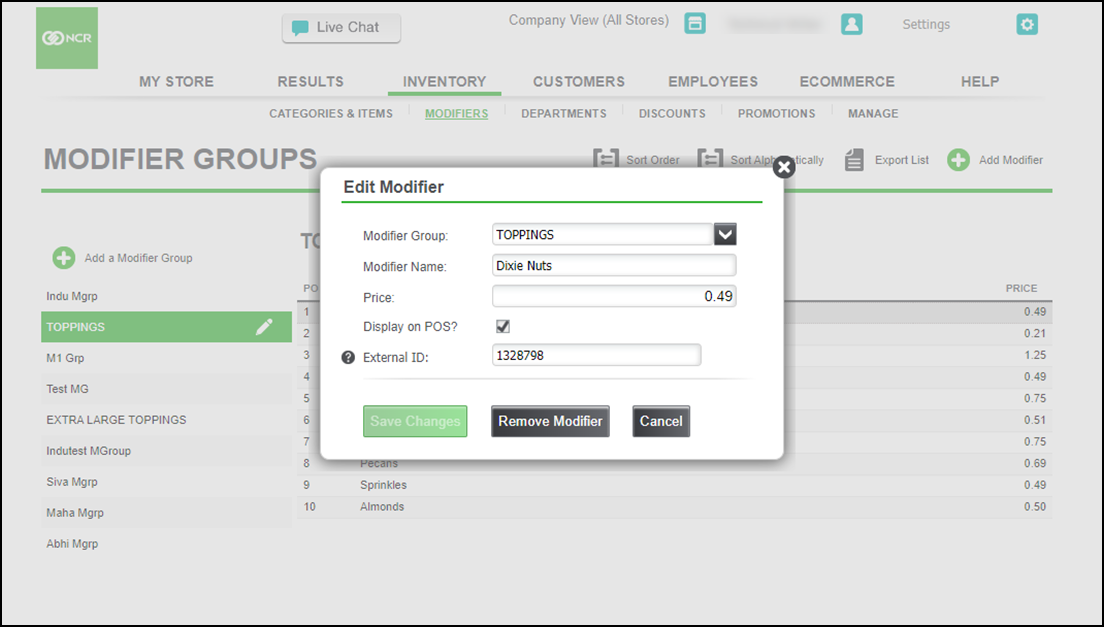
Select the modifier item to edit or remove.
-
Make the desired edits and click Save Changes.
-OR-
Click Remove Modifier to remove the modifier item from the modifier group. A prompt appears. Click OK.
Modifier items with variations
You can also sell modifier items by variation of size. This allows you to price modifier items according to the size of the menu item. For example, for turkey sandwiches, you offer the modifier item option of ‘Extra Cheese.’ You may want to charge more for extra cheese on a large sandwich rather than a small sandwich.
To sell a modifier with variations, the modifier item must be assigned variations and be priced according to variations.
When you choose to sell the modifier by variation, you can elect to create a modifier variation link, which connects the modifier variation dimension (i.e., size) to the parent menu item variation dimension. This allows the system to automatically apply the correct charge for the size of the modifier dimension based on the selection of the parent menu item. Also, when you enable the modifier variation link, employees cannot change the size of the modifier at the POS, they can only change the size of the parent menu item, which automatically changes the size of the modifier variation.
For example, you offer the following menu item, ‘Turkey Sandwich,’ available in the following sizes, ‘S,’ ‘M,’ and ‘L.’ You also create a modifier ‘Extra Cheese,’ available in ‘S,’, ‘M,’ and ‘L.’ You then elect to sell it by variation and link the variation of the modifier to the parent menu item. When a customer orders a medium turkey sandwich with extra cheese, the system automatically applies the correct modifier dimension and any associated price. If the customer changes their mind and wants a small sandwich instead, the user changes the size of the sandwich and the system automatically changes the size of the modifier.
The system links the variation dimension (i.e., ‘Size’) of a modifier only when you configure the variation dimensions of the modifiers exactly as the variation dimensions of the parent item. Linking the dimension variations of the menu item and the modifier item requires they have the same dimension name, same number of options, and the option names must be the same.
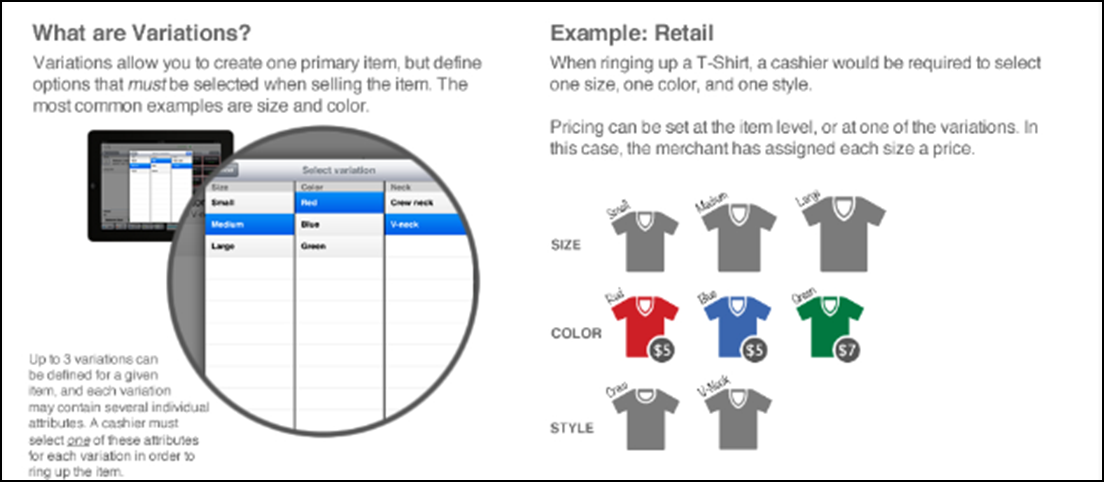
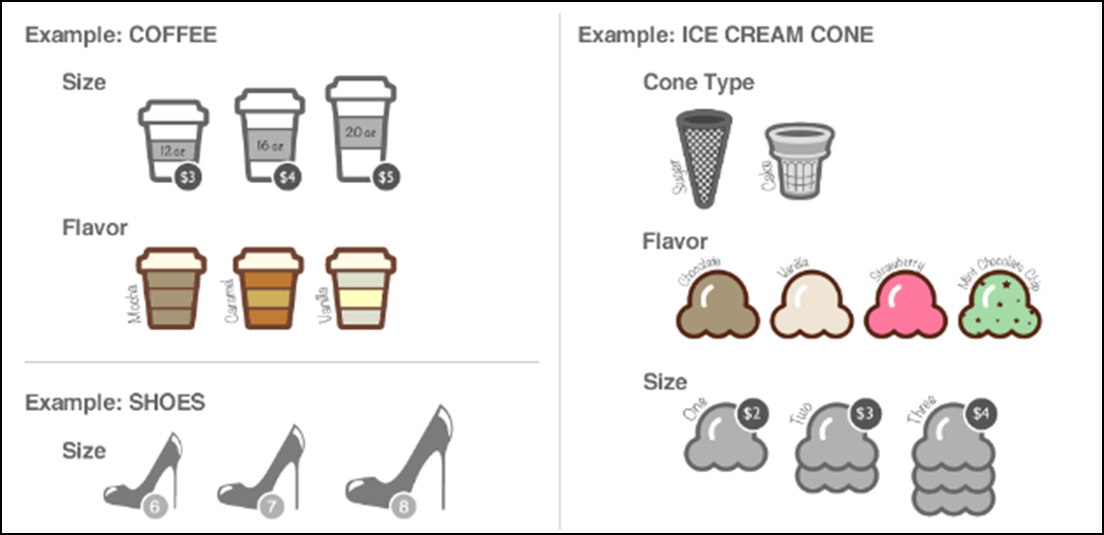
The following table provides examples of menu and modifier items with variations and whether they can be linked.
| Menu Item with the varation options | Modifier item with the varation options | Can be linked |
|---|---|---|
| S, M, L | S, M, L | Yes |
| S, M, L | Small, Medium, Large | NO |
| S, M, L | M, L | NO |
| S, M, L | Regular, Large | NO |
Reference documentation:
Refer to the below related documents for additional information.
Looking for resources or help with Silver? Click here.