Managing employee profile
Once you complete the Profile tab of the Employees screen, you can edit the information based on your business needs. You can transfer out an employee, put an employee on leave of absence, and terminate an employee. You must provide an appropriate reason for leave of absence and termination status changes.
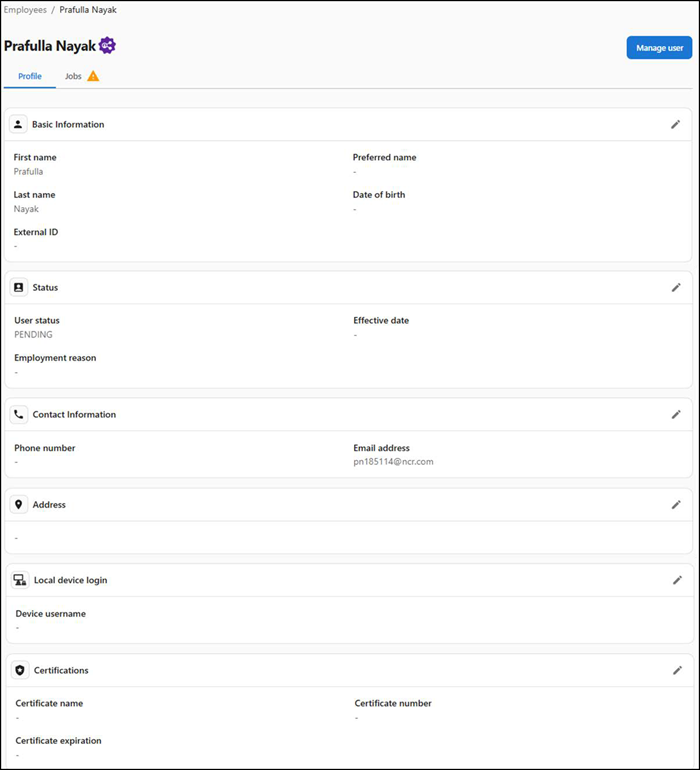
Note: The Manage User option in the top-right corner allows you to manage users. Selecting this option will leave Aloha Smart Manager and redirect you to the NCR Identity application.
To view and edit the employee profile:
-
Select Labor > Employees. The 'Employees' screen appears.
-
Select the employee from the list. The employee profile screen appears.
-
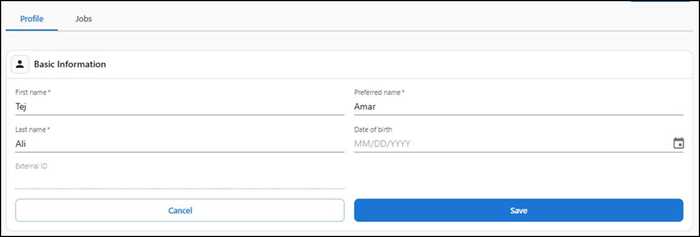
Click the pencil icon at the right end of the Basic information group bar.
-
Type First name, Last name and Preferred name of the employee.
-
Enter the Date of birth of the employee or select it from the calendar.
-
Click Save.
-
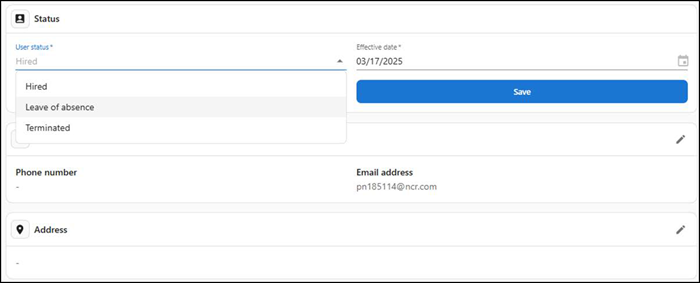
Click the pencil icon at the right end of the Status group bar, if you need to change the status of the employee.
-
Select Hired to indicate the employee is available for scheduling. Hired is the default status for active employees. You cannot change the 'Effective date' for employees if the User Status is Hired.
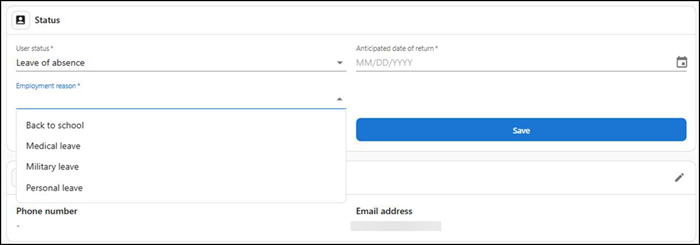
Select Leave of absence to place an employee on leave of absence. Select a reason from the drop-down list and the anticipated date of return.

Select Terminated to indicate an employee is terminated. When you terminate an employee, you must provide a reason for the termination and the date on which the termination is effective. Select Eligible for rehire if you want to rehire an employee after termination.
-
Click Save to save the changes to status.
-
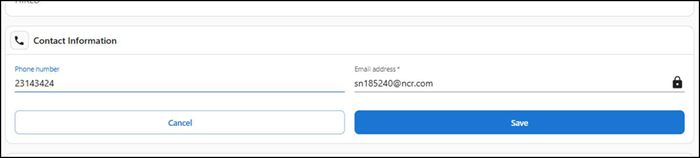
Click the pencil icon at the right end of the Contact Information group bar to edit or change the address of the employee.
-
Type the Phone number and Email address of the employee.
-
Click Save.
-
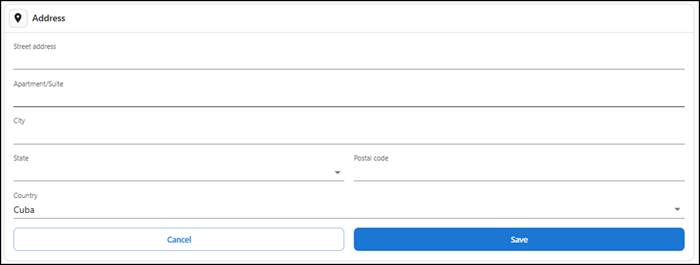
Click the pencil icon at the right end of the Address group bar to edit or change the address of the employee.
-
Type your Street address, Apartment/Suite, City, and Postal code.
-
Select the State and Country from the drop-down list.
-
Click Save.
-
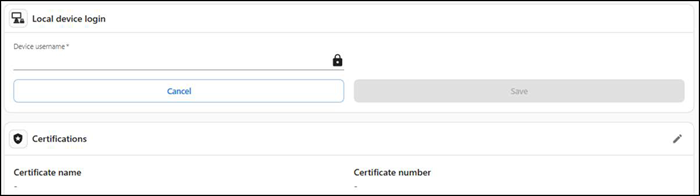
Click the pencil icon at the right end of the Local device login group bar to enter the code to login to the POS.
-
Click the pencil icon at the right end of the Certifications group bar to edit or change the certifications of the employee.
-
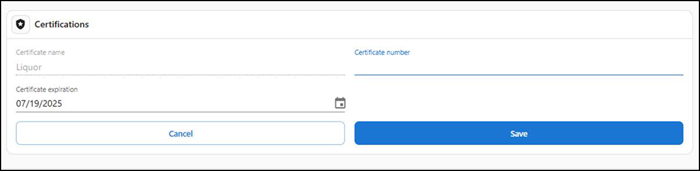
Enter the Certificate number of the license.
-
Type the date or select it from the calendar when the certification expires.
-
Click Save.
Return to "About labor management," or continue to "Working with schedules."