Onboarding a new employee
When a new employee is hired at a restaurant, a manager can invite the new hire to enter their details into Aloha Smart Manager. There are multiple steps required when adding a new employee and these steps must be performed in the following order:
Step 1: Hiring manager creates a new employee.
Step 2: Employee opens Welcome email and completes the new employee setup.
Step 3: Assigning a job to a new employee.
Step 1: Hiring manager creates a new employee
In the first step, a hiring manager accesses the 'Employees' screen in ASM and creates a new employee.
Reference: If you experience problems logging in, refer to the "NCR Identity Management Quickstart Guide" for more information.
-
Select Labor > Employees. The 'Employees' screen appears.

-
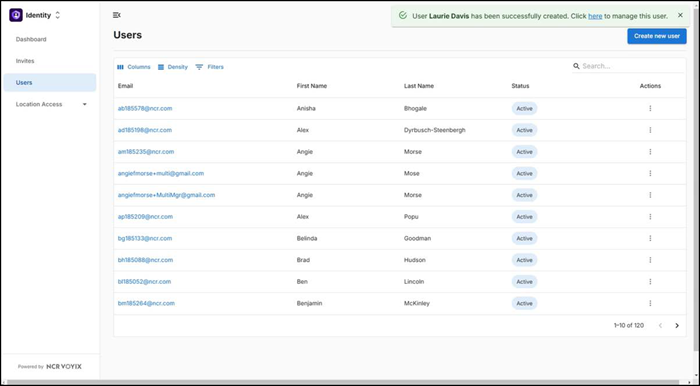
Click Create new user. You are redirected to NCR Identity.
-
Click Users in the left navigation pane to display the Users screen.
-
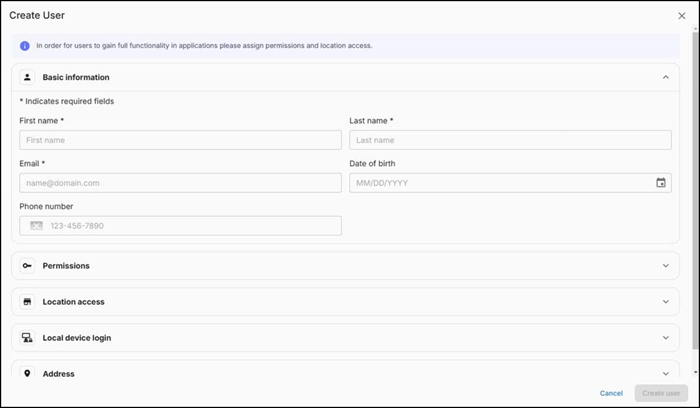
Click Create new user to display the 'Create User' screen with the 'Basic information' group bar expanded.
Reference: Refer to the "NCR Identity Management Quickstart Guide" for more information about creating new user accounts.
-
Type the first and last name of the new employee.
-
Type a valid email address for the new employee. ASM uses this email address to send a welcome email to the employee.
-
If the employee you are adding is an in-store employee only and does not require access to ASM for any reason, continue to step 10 to establish the PIN the employee is to use when logging in to the POS; otherwise, continue to the next step.
-
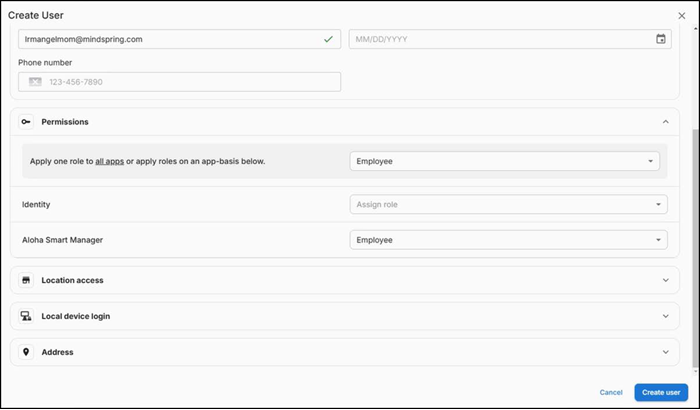
Expand the Permissions group bar. The hosted applications assigned to you appear. In the example below, you see Identify and Aloha Smart Manager. Use the Permissions group bar to establish the role for the user you are creating to perform for each of the hosted applications.
-
Select one role to apply to all hosted applications to which the employee is to have access, or assign a specific role the employee is to perform for each hosted application. If the employee is in-store only and you do not want them accessing the hosted application for any reason, do not make a selection; however, selecting Employee for Aloha Smart Manager allows the in-store employee to log in and view their schedule and change their personal information. Any employee for which you make a selection here receives a Welcome email to which they need to respond to complete their account creation.
Note: A user role called Above Store Manager is available in the Identity app for users who have permission to see it. This user role has permissions to add a manager, restaurant manager, assistant manager, and more. The role of Above Store Manager can access ASM by entering the user id, and password. The user role when navigates to Labor has edit access to view or edit the list of managers, assistant managers and more.
Important: ASM does not display the Above Store Manager user role in the Employee list or function as an ASM Employee. The user role will not have access to the POS.
-
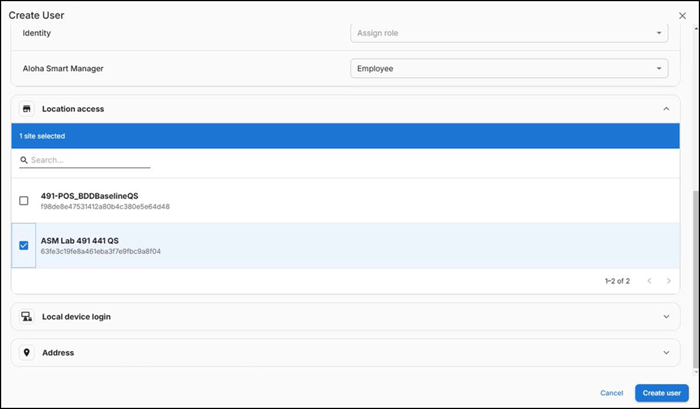
Expand Location access.
-
Select the sites to make available to the user account.
-
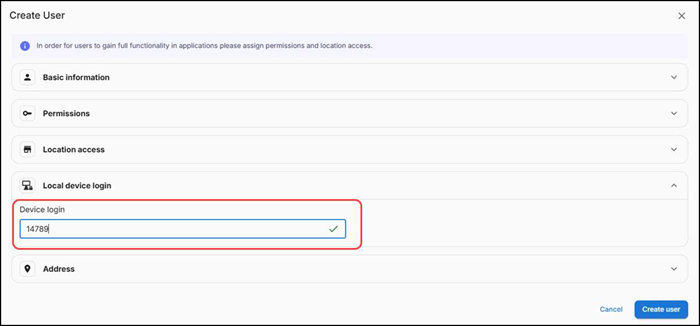
Expand Local device login.
-
Type the unique PIN for the employee to use when logging in to the POS into 'Device login.'
-
Click Create user. A success message appears.
Note: If there is an existing employee with the same first and last name, a warning message appears when you attempt to save the new employee record.
-
If you click the link in the success message, the following screen appears.
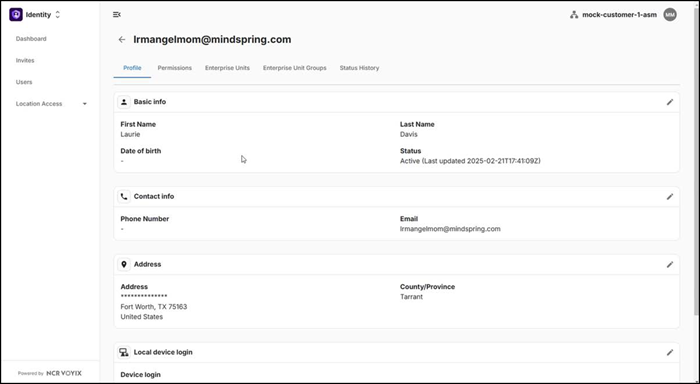
Upon submission, an email is sent to the provided email address with a link for the employee to enter their personal information and emergency contact details.
Step 2: Employee opens Welcome email and completes the new employee setup
When the hiring manager creates a new employee record for which the employee is being given access to the Aloha Smart Manager hosted application, the new hire receives a welcome email with a link to access the specific organization in ASM.
- Open the Welcome email.
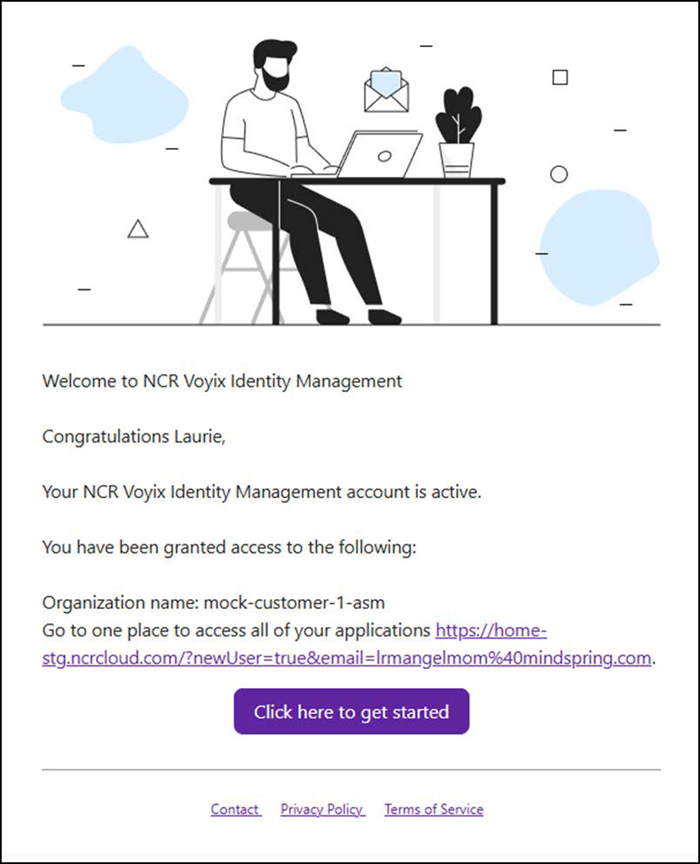
- Within the email text, click Click here to get started. The 'Create your NCR account' screen appears.
Reference: Refer to the "NCR Identity Management Quickstart Guide" for more information.
Step 3: Assigning a job to a new employee
The hiring manager must assign at least one job to the employee before they can be placed on a schedule. Once this occurs, their status changes to hired.
To assign a job to an employee:
- Select Labor > Employees. The 'Employees' screen appears.
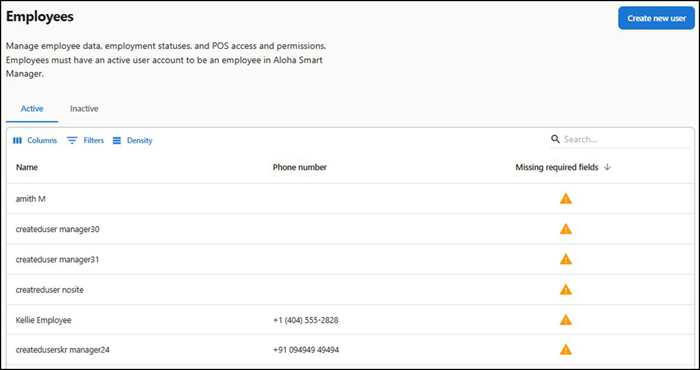
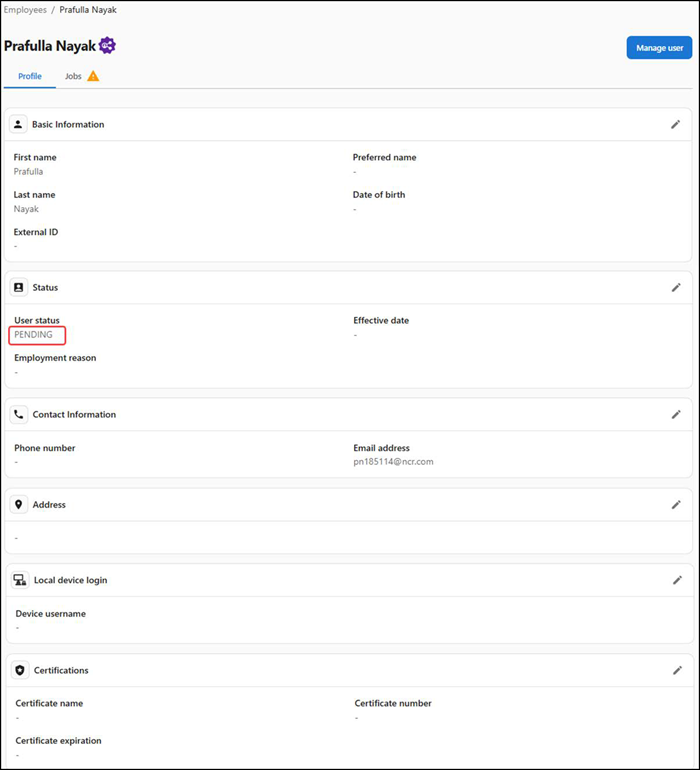
- Click the Caution icon next to the employee in the list to display the 'Employees profile' screen. Under the 'Status' group bar, you can see the User status of the employee as PENDING.
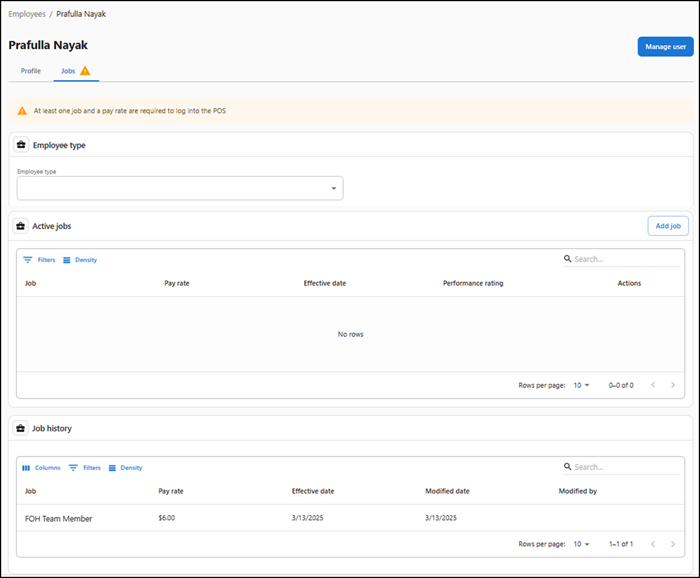
- Select the Jobs tab under the employee's name. The Jobs screen appears.

- Select the Employee type from the drop-down list. Choose from Full-time, Part-time. A message confirming the employee type selection appears and automatically dismisses.
- Click Add job. The Active jobs table appears with attributes like Job, Pay rate, Effective date, Performance rating, and Actions.
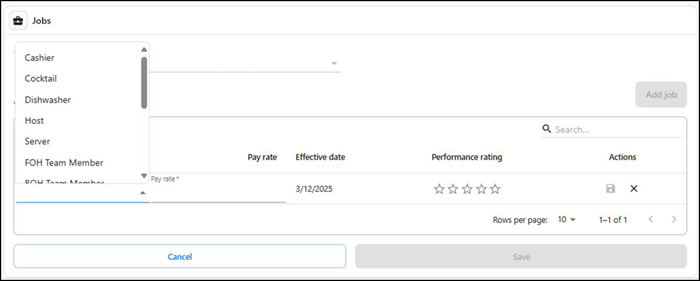
- Select a job to assign the employee from the drop-down list.
- Type the Pay rate the employee will receive when logged in under that job.
- Select a Performance rating, if required, and click Save icon in Actions. You cannot change the Effective date for an employee.
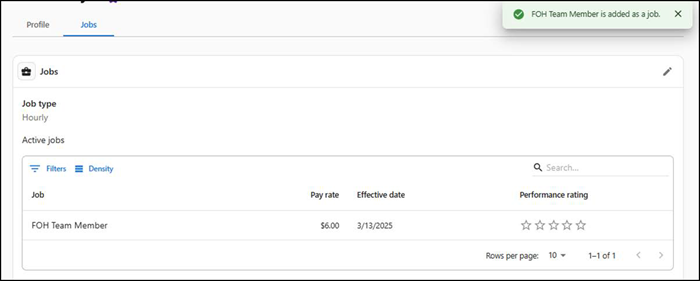
- Click the Save icon to the right. A message confirming the added job appears and the screen updates with the job details.
- Select the Profile tab again after adding the job. The User status changes to Active and the caution symbol is no longer visible.
- Click Employees to view the employee list. The caution symbol is removed from the Missing required fields, and the employee appears in the Active employees list. The employee is now available for scheduling.
Continue to "Removing a job from an employee."