Using the Configuration Utility (wizard)
With the introduction of Configuration Utility in Aloha Configuration Center (CFC), getting started with Aloha Takeout (ATO) just got easier. This utility is available on the ATO menu in CFC, is wizard-based, and walks you through much of the configuration required to get up and running with ATO. This utility is ideal for fresh ATO installs or if you want to just start over on your configuration.
Reference: Refer to Using Configuration Utility - HKS1761 for complete information on using the Configuration Utility.
The Configuration Utility performs the following for you:
-
Creates one 'ATO INT' and one 'ATO INT tr' training job code.
-
Creates one 'ATO acc' access level, with all options selected.
-
Creates one employee for each order entry terminal with 'ATO INT n' as the first, last, and nick name, where n is the interface terminal ID that the employee will use. The utility also creates one training employee for each order entry terminal, with 'ATO INT n' as the first, last, and nick name, where n is the interface terminal ID that the employee will use.
-
Sets 'Display delivery' to True in Additional Features.
-
Sets 'Enable Aloha Delivery' to True and associates the delivery order queue in Store Settings.
-
Creates an 'ATO' order entry queue each for Aloha Quick Service and Aloha Table Service.
-
Creates one 'ATOD #n interface terminal for each order entry terminal, where n is the sequential number of the interface terminal.
-
Creates one 'Int Server' interface server.
-
Creates one 'Future' void reason and one 'Cancel' void reason.
-
Creates a Takeout Settings record with default settings.
-
Sets the store as active in the Activate Stores function.
Running Configuration Utility
You must close all open applets prior to running Configuration Utility.
To run the Configuration Utility:
-
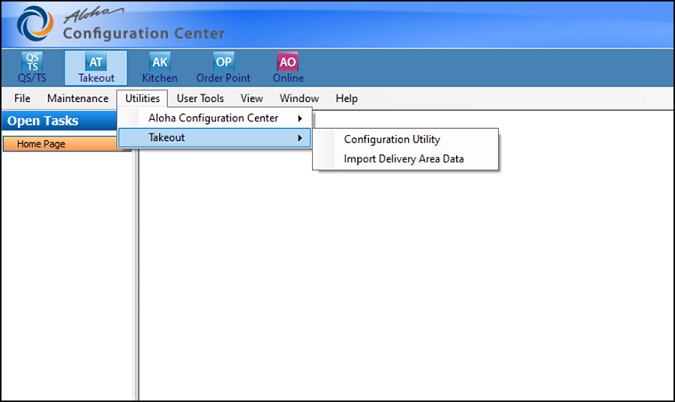
With Takeout selected in the product panel, select Utilities > Takeout > Configuration Utility.

-
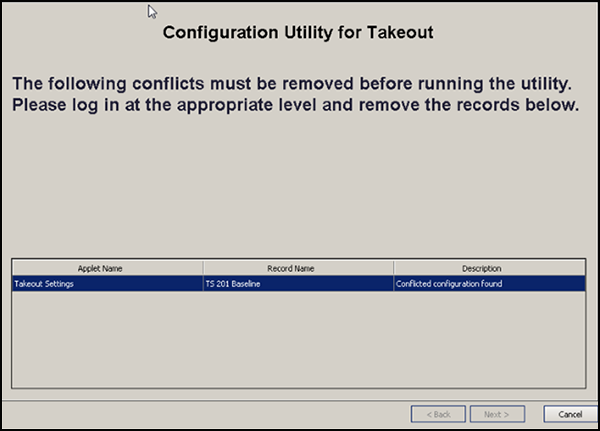
If you already have ATO installed, the utility stops and a screen appears indicating a conflicting configuration exists.

-
To resolve this conflict, click Cancel to exit the utility and then delete the Takeout Settings record.
Caution: Use extreme caution and only delete this record when you are ready to complete the configuration upgrade, as it will make your current ATO database inoperable.
-
After successfully deleting this record, run Configuration Utility again. When the conditions are right, the Configuration Utility for Takeout welcome screen appears.

-
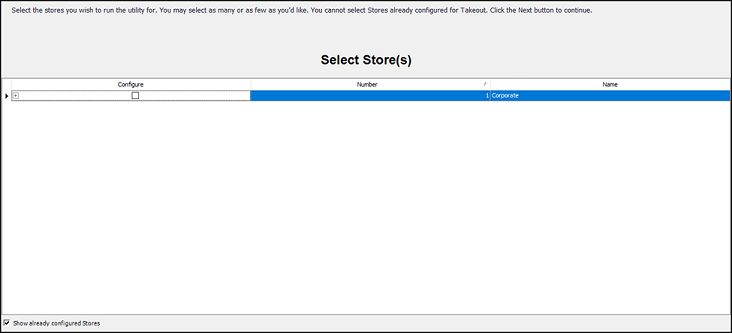
Click Next to continue or click Back or Cancel to opt out of the utility. The Select Store(s) screen appears. The screen is different for Aloha Configuration Center (shown first) and Aloha Manager (shown second).

-
Select the store or stores to configure for ATO, and click Next. A confirmation screen appears.

-
Review the data and records the utility creates, and, if satisfied, click Next. If the system detects any conflicts, a message identifying each conflict appears at the bottom of the screen.
Note: You must resolve each conflict and then run the utility again. The system creates the records necessary to get ATO up and running. When successful, a completion screen appears.
-
Click Next to exit Configuration Utility.
What the Configuration Utility creates
Configuration Utility creates the following records with 'out-of-the-box' selections in the configuration management tool to get ATO up and running:
Job Codes function
The utility creates one 'ATO INT' and one 'ATO INT tr' training job code.
-
Shift required for clock in/out=True
-
Exclude from Labor Scheduling=True
-
Training mode (unpaid)=True (for the training job code)
-
Order entry=True
-
Can get checks from other employees=True
-
Exclude Takeout employees from checkout restrictions=True
-
Order entry queue=order entry queue created in the Order Entry Queues Function section (QS only)
-
Delivery order taker=True
-
Uses cash drawers=True
-
Uses password=True
-
Used by Takeout=True
Access Levels function
The utility creates one 'ATO acc' access level. All options are selected.
Employees function
The utility creates one employee for each order entry terminal with 'ATO INT n' as the first, last, and nick name, where n is the interface terminal ID that the employee will use.
The utility also creates one training employee for each order entry terminal, with 'ATO INT n' as the first, last, and nick name, where n is the interface terminal ID that the employee will use.
-
Social Security Number=000000000
-
Employee status=Active
-
Job status=Full Time
-
Jobcode=ATO INT job code created in the Job Codes Function section
-
Access level:=ATO INT access level created in the Access Levels Function section.
-
Pay rate=0.00
Additional Features function
The utility enables the Aloha Delivery function in the Additional Features function.
- Display delivery=True
Store Settings function
The utility enables the use of Aloha Delivery in the Store Settings function.
-
Enable Aloha Delivery=True
-
Delivery order queue=order entry queue created in the Order Entry Queues Function section.
Order Entry Queues function
The utility creates an 'ATO' order entry queue each for Aloha Quick Service and Aloha Table Service.
-
Max open orders=255 (QS only)
-
Minimum order #=1 (QS only)
-
Maximum order number=255 (QS only)
Terminals function
The utility creates one 'ATOD #n' interface terminal for each order entry terminal, where n is the sequential number of the interface terminal. The utility also creates one 'Int Server' interface server.
Interface Server
-
Model=Radiant
-
Function=Interface server
Interface Terminal
-
Model=Radiant.
-
Function=Radiant interface terminal.
-
Interface host=Interface server created in the Interface Server section.
-
Interface employee=interface employee for the corresponding terminal created in the Employees Function section.
-
Terminal queue=order entry queue created in the Order Entry Queues Function section (QS only).
Void Reasons function
The utility creates one 'Future' void reason and one 'Cancel' void reason.
Future Void Reason
-
For Aloha Connect Use Only=True.
-
Do Not Report=True.
Cancel Void Reason
- For Aloha connect Use Only=True.
Takeout Settings function
The utility creates a Takeout Settings record with the following selections:
-
Queue=order entry queue created in the Order Entry Queues section.
-
Future order void reason=future order void reason created in the Void Reasons Function section.
-
Order cancel void reason=cancel order void reason created in the Void Reasons Function section.
-
Auto apply all order payments=True.
-
Auto release future orders=True.
-
Enable future day orders=True.
-
Activate orders via server=True.
-
Close check on apply payment=True.
Activate Stores function (CFC Only)
The utility sets the store as active in the Activate Stores function.
What to do next
After you run Configuration Utility, there are still store-specific options you must configure, as per your normal ATO configuration. You must also configure:
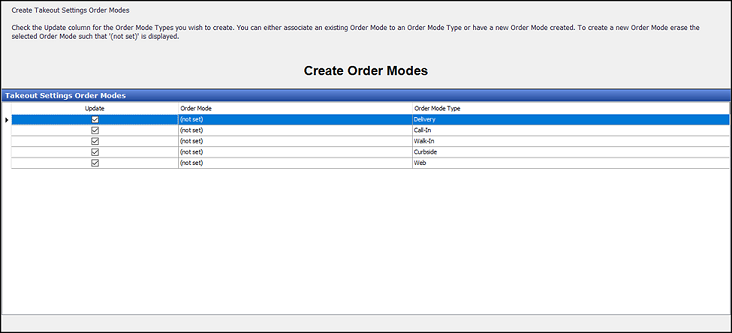
Create POS order modes for Aloha Takeout.
Create a 'Customer Credit for Aloha Takeout.
Create petty cash account for drivers in Petty Accounts.
Utilize house accounts with Aloha Takeout.
Create tenders for Aloha Takeout.
Create items for use with future orders.
Establish navigation between the Aloha POS and Aloha Takeout.
Set the IP address in Takeout System Parameters.
Specifying the POS Core Product.
Set Autofulfill orders to True in Takeout Settings.
Set Enable credit card storage to True in Takeout Settings.
Configure environment variables.
Configure additional store-specific Aloha Takeout features.
Reference: Refer to the Aloha Takeout Implementation Guide - HKS326 for more information.