Running Aloha Cloud with Mac mini server
Use Mac Mini server in your restaurants to register a device in your POS system. Before Mac Mini Installation, ensure there is no other instance of In-store server installed on the system.
Hardware Requirements:
Ensure the following hardware components are available and properly set up before beginning the installation.
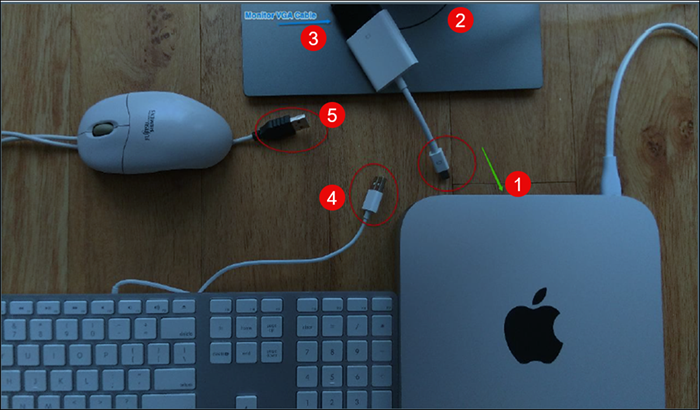
- Mac Mini
- Monitor
- HDMI or VGA Cable Converter (for connecting the monitor)
- USB Keyboard
- USB Mouse or Apple Mouse
- Mac Mini configured with NCR PRO (SPRE) or Aloha Cloud
NOTE: You may use a Mac Book instead of a Mac Mini; however, the Mac Book must remain in the store during operating hours. Removing it will disconnect devices and disrupt system functionality. Important: You cannot connect a Mac Book or any laptop to the Mac Mini. Please consult your Concierge Specialist or Support Team for further guidance.
Software Requirements:
Before you proceed with the installation, complete the initial setup of your Mac Mini by following these steps:
- Power on the Mac Mini and follow the on-screen instructions.
- Select your country (USA).
- Choose your keyboard settings.
- Create a login or sign in if one has already been set up for you.
- Wait for the Mac Mini to create your desktop environment.
Administrative Requirements:
Before you begin the installation, ensure you have the following administrative details readily available:
• Back Office User name and Password
• POS Pin
• Mac Mini Password (If setting up for the first time, you’ll be prompted to create one during setup)
• Mac Mini Network IP Address (Required if the server cannot be located post-installation)
• Access to the Back Office URL.
Downloading the Server Installation Package
When your Mac Mini reboots, you are logged in with the Apple Desktop visible.
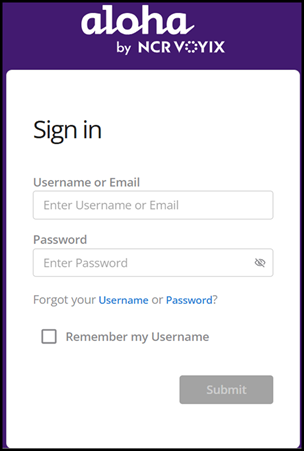
- Click the Safari icon (the internet browser).
- Type the Back Office URL in the browser’s address bar and enter your user name and password to log in.
- Download the Silver Server.
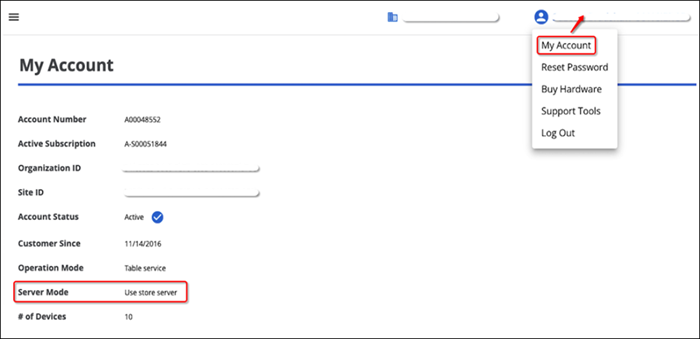
- Click on your name at the top-right corner of the screen.
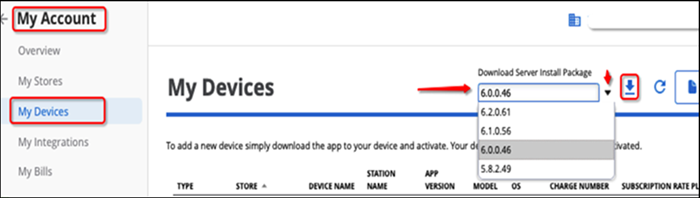
- Select My Account, then click 'My Devices' from the left-hand menu.
- Locate the 'Download Server Install Package' section. Always choose the latest version, unless instructed otherwise.
- Click the 'Download' button to the right of the latest package.
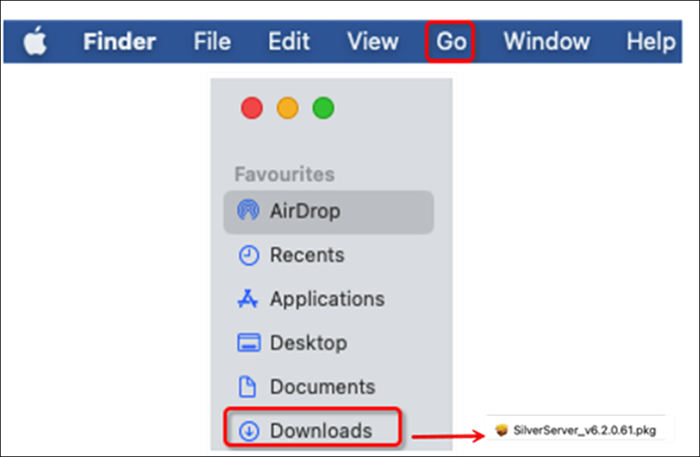
- Navigate to Downloads (or use Finder > Go > Downloads from the top toolbar) to locate the downloaded file. You can view a file with recognizable server package icon. Before you start the installation, ensure the server mode is properly configured.
- Enable the Server Mode function via the Back Office settings. This ensures the server is discoverable on the POS (register).
- You can verify this setting by navigating to 'My Account' and checking for 'Use Store Server' next to Server Mode. The Operation Mode is typically set to Table Service.
- If using Quick Service Mode with multiple registers and you want them to sync, a Mac Mini is required. In this case, the Operation Mode will be set to Quick Service.
- Double-click the downloaded file and follow the on screen instructions to complete the installation of the server package. A confirmation popup appears.
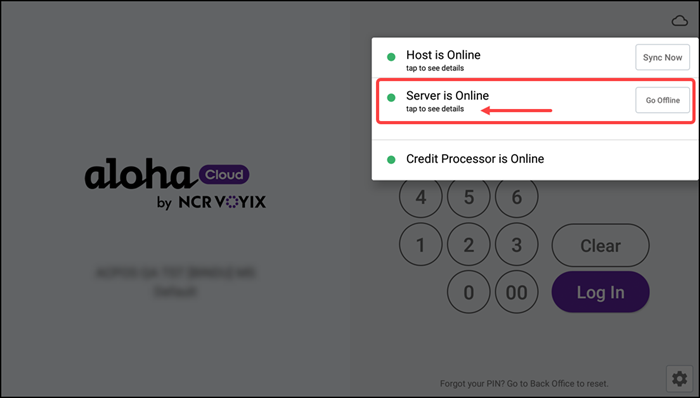
Registering the POS Device with In-store Server
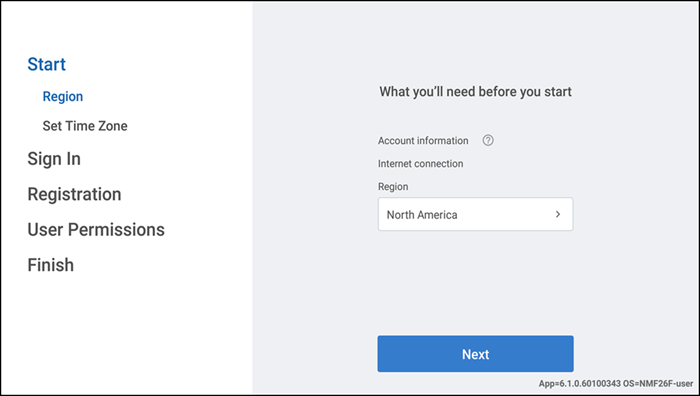
Once the POS hardware is connected to the network, printer, scanner, and server, and powered on, the Welcome Screen appears. Follow the on screen instructions, selecting Next after completing each section:
-
Region
-
Set Time Zone
-
Sign In
-
Registration
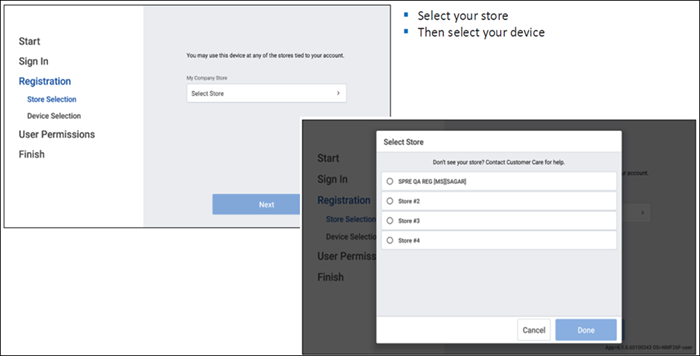
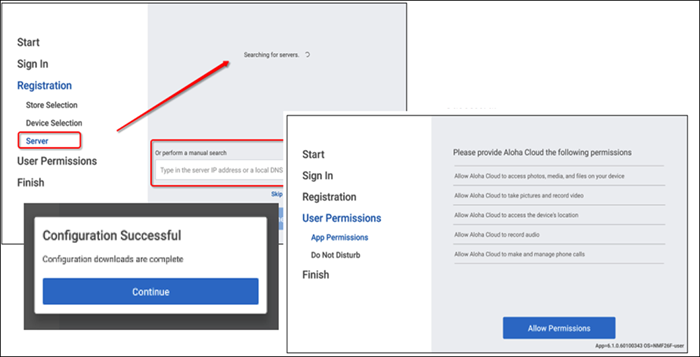
- In most cases, the server is automatically identified. Tap the server name to proceed.
- If not automatically detected, manually enter the server’s IP address.
- Enter the User name field and tap Login to display the server list.
- Follow the on-screen instructions and complete the registration process.
-
User Permissions
-
Finish
Locating the Mac Mini Server IP Address
To find the IP address of your Mac Mini server, follow these steps:
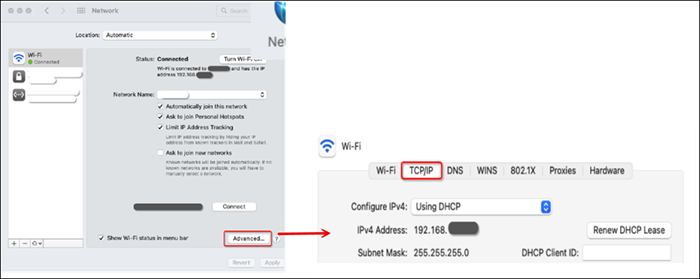
- Click the Apple logo located in the top-left corner of the screen.
- Navigate to System Preferences.
- Select Network.
- Click on Advanced.
- Select the TCP/IP tab. The IP address will be listed under the IPv4 Address section.
Checking Device Status in the Back Office
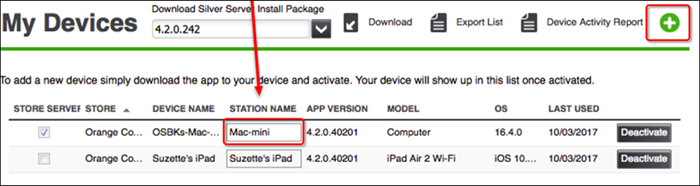
- To verify that your devices are properly registered in the back office. Log into the back office either from your computer or by selecting the Back Office button on the register screen.
- Navigate to My Account > My Devices. Your device should appear in the list. You should be able to view the Mac Mini Server in the device list.
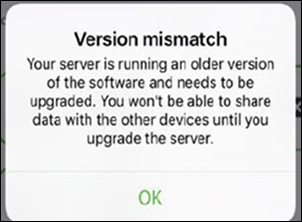
Troubleshooting
- Ensure the application and server are on the same version. In case of a version mismatch, you must complete the upgrade
and try again.
- In case of a register upgrade prompt, the POS application may prompt you to upgrade the register. You must follow the instructions provided.