Working with departments
Use Menu > Departments to help organize your categories and view report data by specified departments. You can create departments at the company level and assign them across all stores.
Adding a department
To add a new department:
- Log in to Back Office using Company View (All Stores).
- Select Menu > Departments.
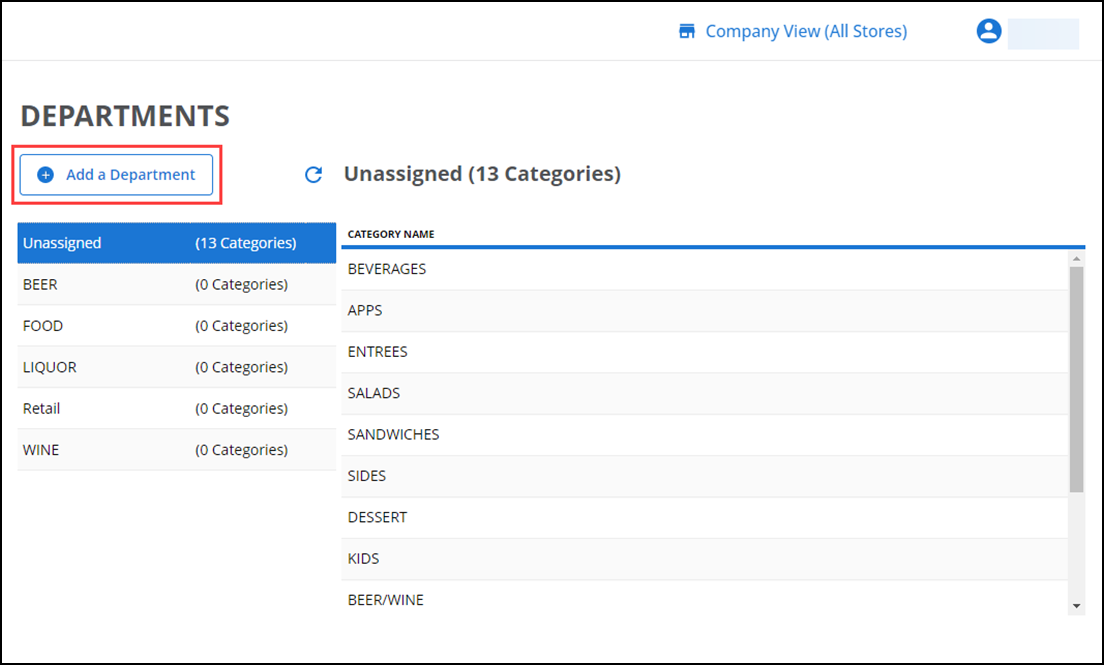
- Click Add a Department.
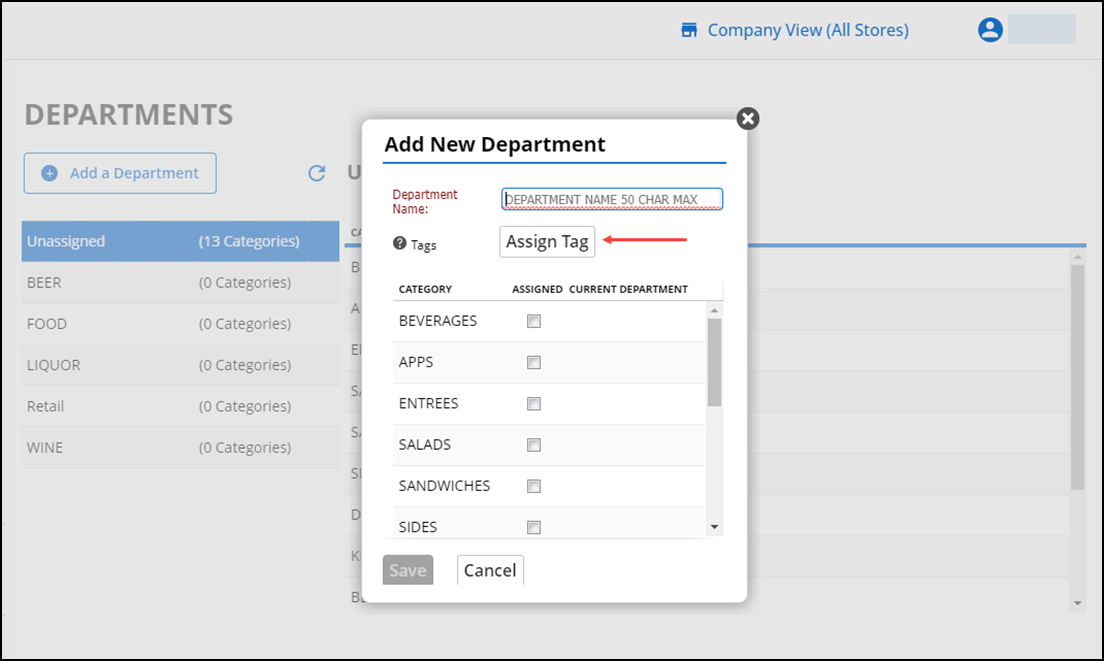
- Enter a name to the department.
- (Optional) Click Assign Tags, to assign tag(s) to the new department. The Assign Tag to This New Department screen appears.
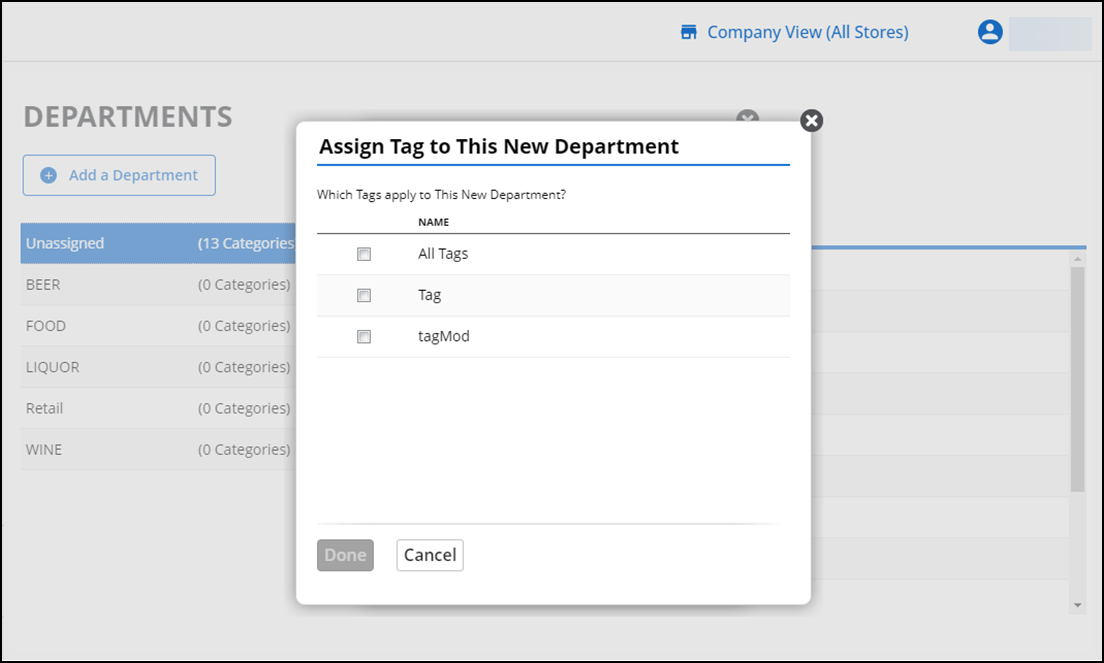
- Choose the required tag(s), and click Done.
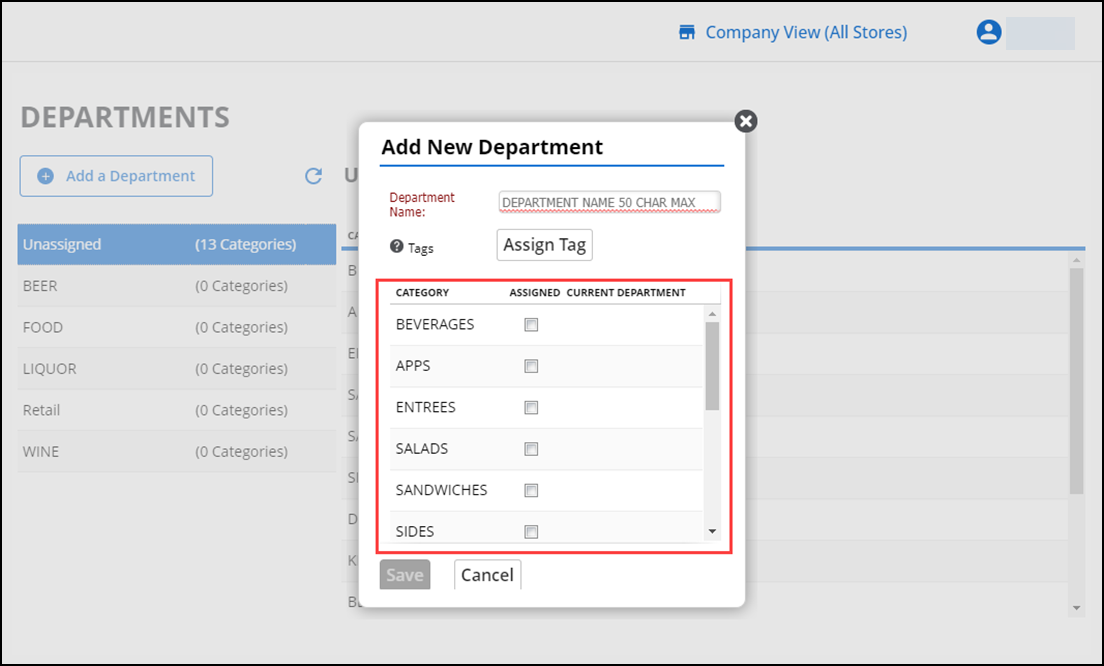
- (Optional) Choose the required Categories and assign them to the new department.
- Click Save to save the changes and to create a new department.
To edit or delete a department:
- Log in to Back Office using Company View (All Stores).
- Select Menu > Departments.
- Select the appropriate department and click the pencil icon that appears.
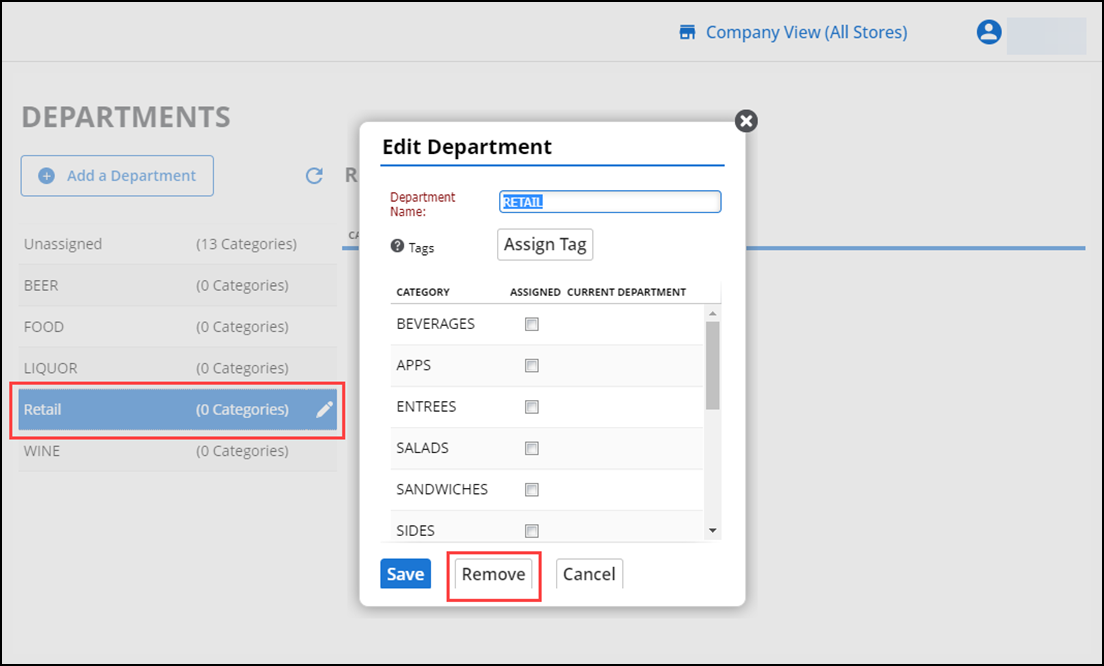
- Make the necessary changes to the department name, tag assignments, and category assignments, or click Remove.
- Click Save to return to the Departments screen.