Working with donations
Use Menu > Donations to add a donation campaign allowing guests to support local charities. The customer can donate pocket change by rounding up their purchases to the nearest dollar, a predefined amount, or an open amount suggested by the guest. Consumers write the amount they wish to donate on a designated line on the guest check or voucher. You can track the donation totals on the Donations report.
Donation campaigns are activated by an event and only one campaign can be active at a time. For more information on configuring events, refer to Working with event schedules.
Adding a donation
-
Log in to Back Office.
-
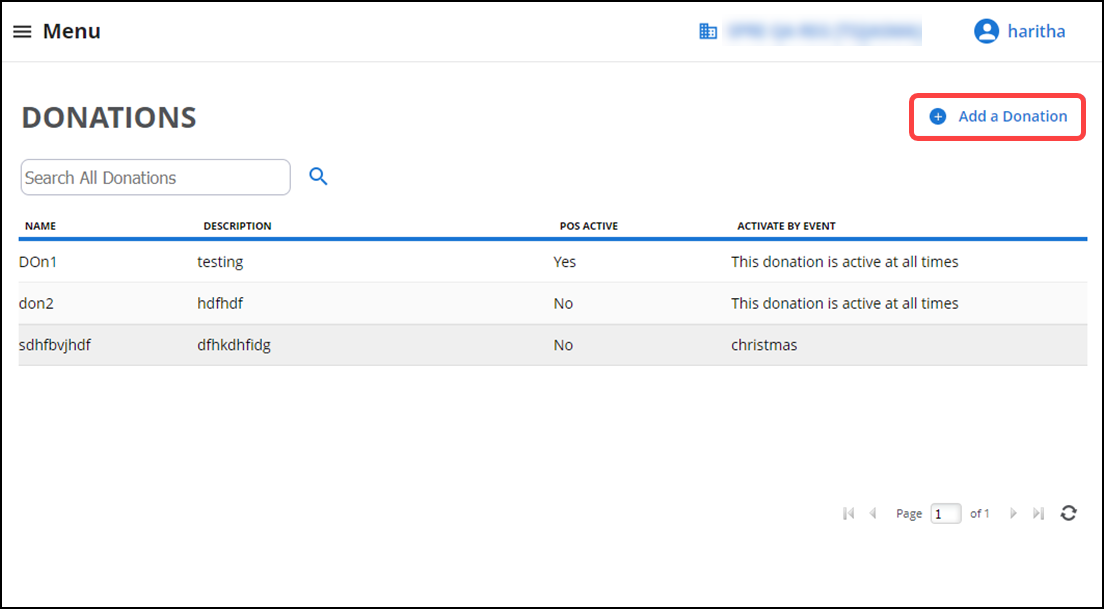
Select Menu > Donations. The Donations screen appears.
-
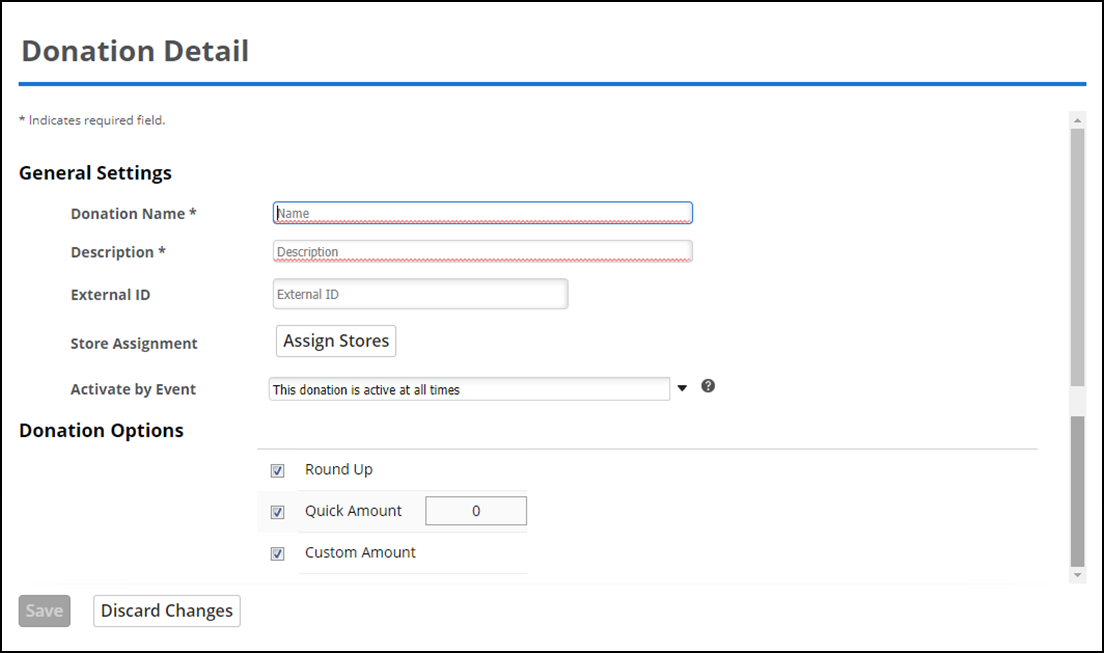
Click Add a Donation. The Donation Detail screen appears.
-
Enter a name for the donation.
-
Enter a donation description. Example: Help kids with getting toys.
-
(Optional) Type an External ID number (used in third-party solutions).
-
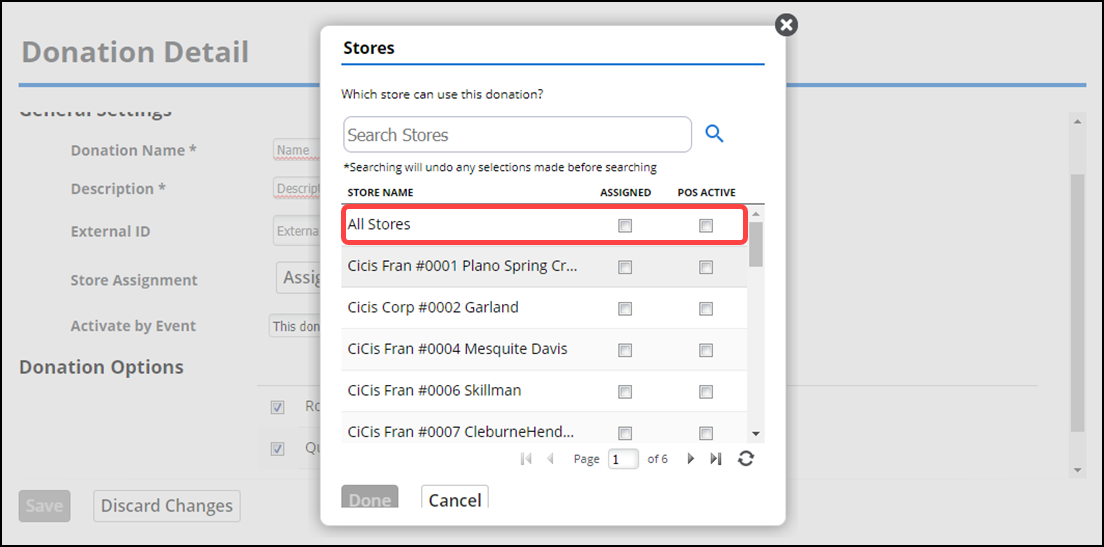
(Optional) Click Assign Stores (for multi-store environment) and select Assigned next to each store for which to make the donation campaign available for use. Select POS Active to indicate the donation is active on the POS device at the store. You can also select either or both of these options for All Stores.
Note: Only one donation campaign is "active" at a time. An error message appears if donation campaigns overlap, taking event start and end times and start and end dates into consideration.
-
(Optional) Select an event from the 'Activate by Event' drop-down list to specify when to activate the donation campaign or leave the default value of 'This donation is active at all times.'
-
(Optional) Under the Donation Options group bar, select from the following options:
- Round Up – Rounds up to the nearest dollar. If the check total is already a whole dollar amount, no donation is added to the check.
- Quick Amount – Specify a set dollar amount to add to the check, such as $1.00.
- Custom Amount – Allows guests to specify a custom amount.
-
Click Save to save the donation campaign.
Editing or deleting a donation
- Log in to Back Office.
- Select Menu > Donations. The Donations screen appears.
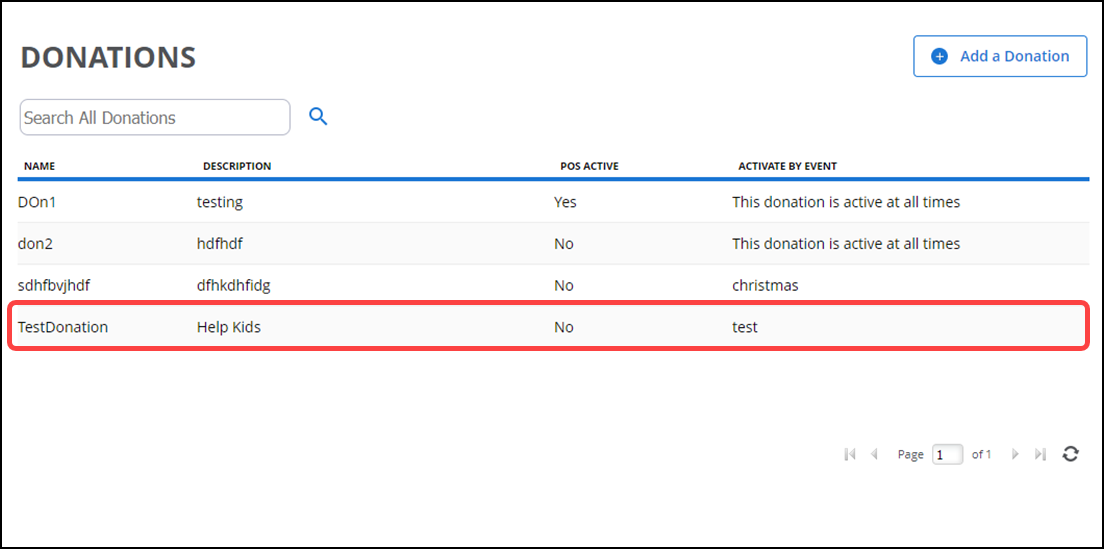
- Select the donation in the list. The Donation Detail screen appears.
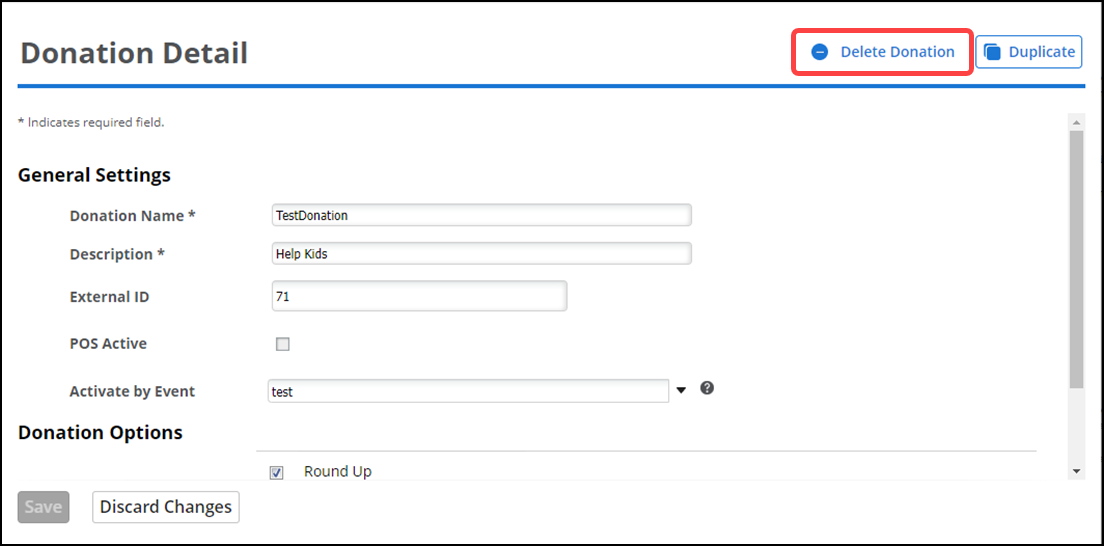
- Do one of the following:
- To remove the donation, select Delete Donation and confirm the removal -OR-
- Edit the details for the donation and click Save.
Duplicating a donation
You can quickly duplicate an existing donation campaign at the company or store level.
- Select Menu > Donations. The Donations screen appears.
- Select the donation to duplicate. The Donation Detail screen appears with a Duplicate option in the top right corner.
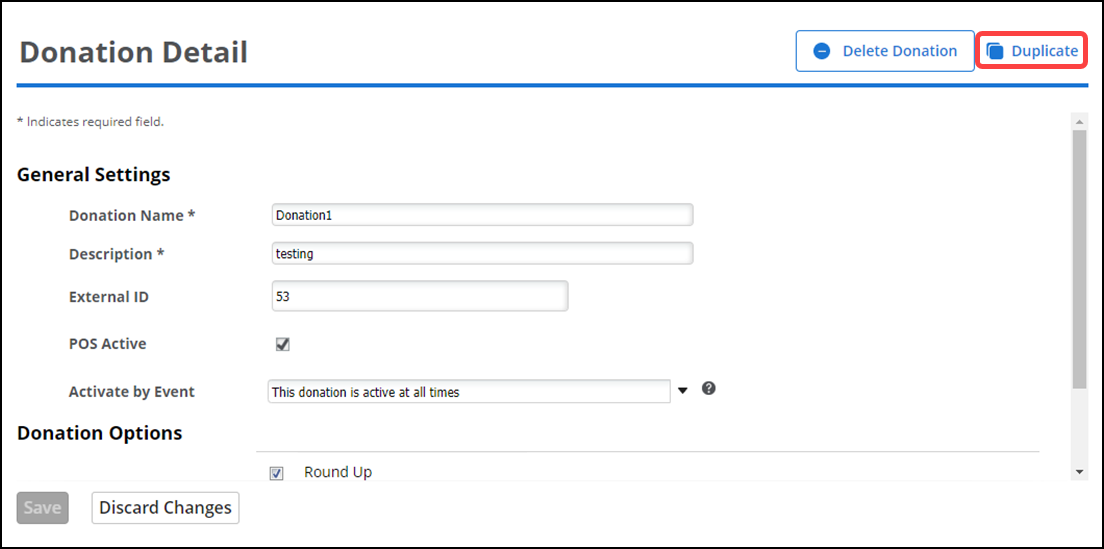
- Click Duplicate. A newly created donation record appears with everything pre-populated except for Donation Name and External ID.
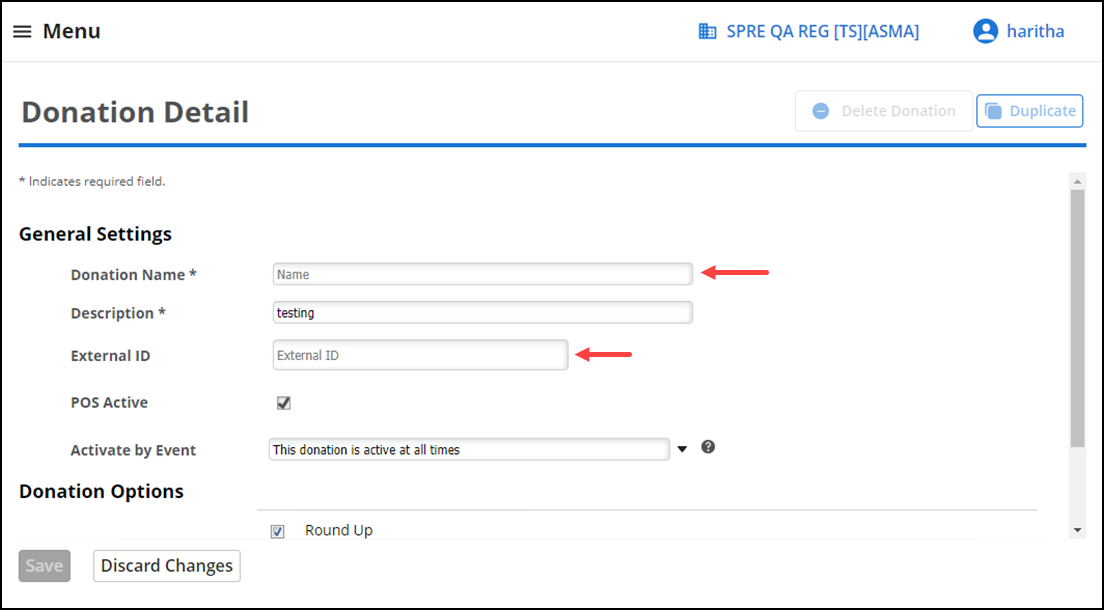
- Enter the details for the donation.
- Click Save.