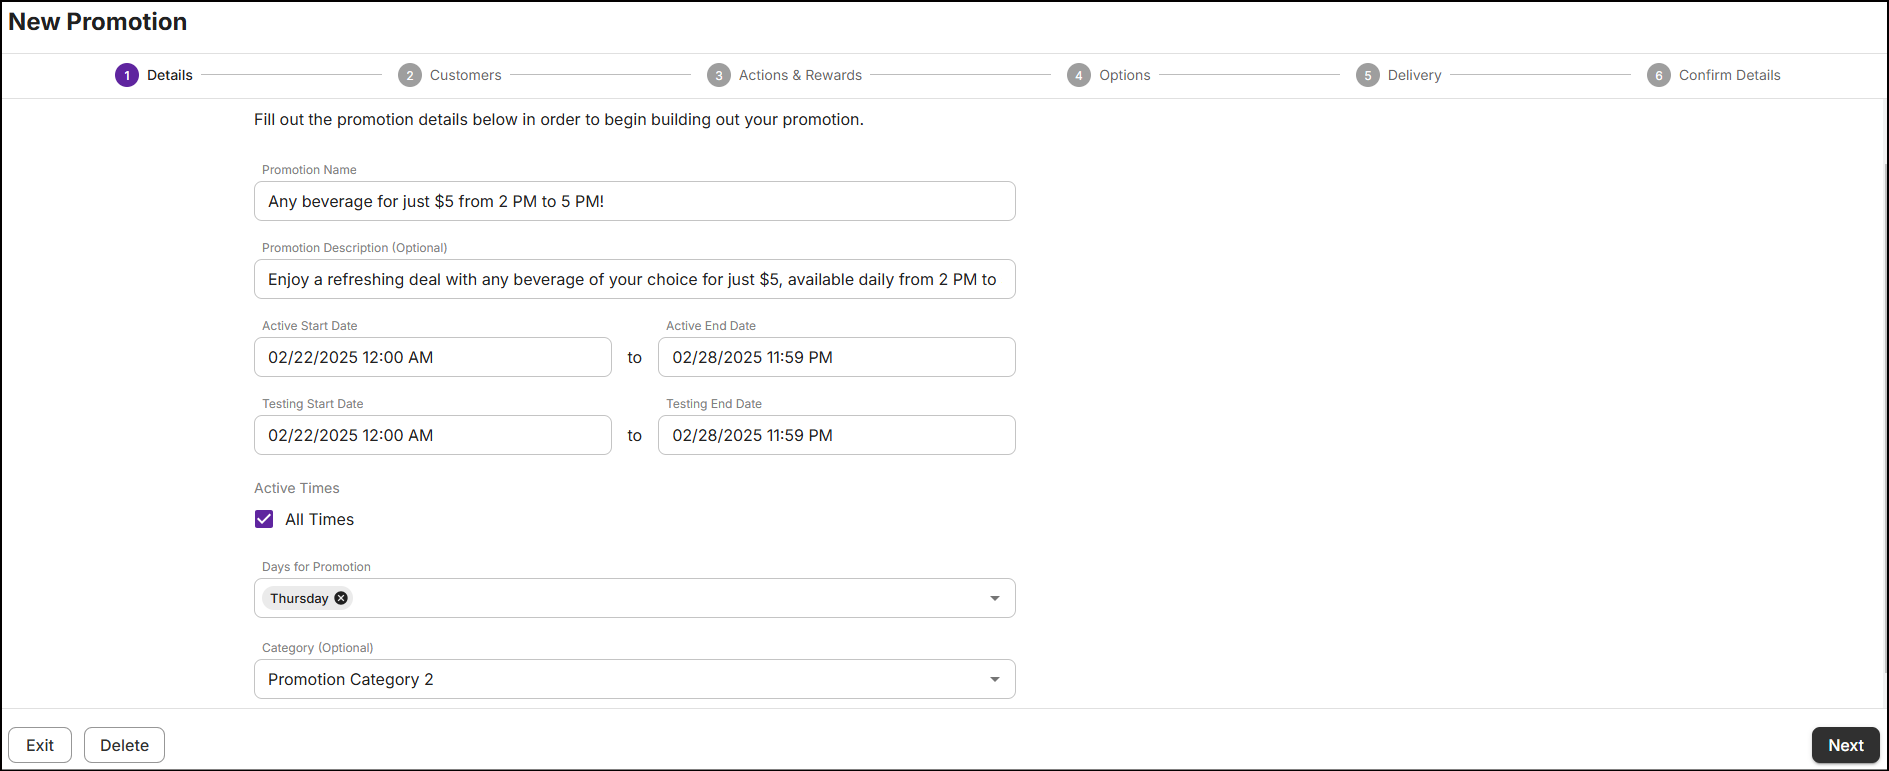
Details
Provide the basic information for the promotion, including its name, schedule, and categorization.
-
In the text box below Promotion Name, enter a name of the promotion.
-
Optionally, enter a Description for the promotion highlighting its features.

Note: Promotion name is limited to a 100 characters, including symbols. Description is limited to a 1000 characters.
-
Select the start date and start time for the promotion to begin, and the end date and end time for the promotion to end. Select the start and end times in 5-minute intervals (e.g., 12:05 PM, 12:10 PM, etc.) or type them manually for any other time (e.g., 10:44 AM).
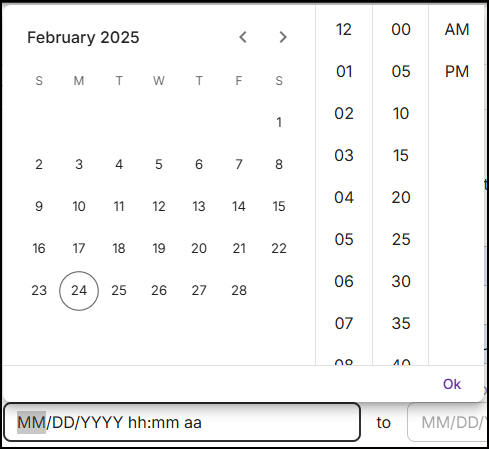
The default start and end times are 12:00 AM and 11.59 PM. However, the promotion actually ends at 11:59:59 PM if the end time is set to 11:59 PM. For other times (e.g., 9:30 PM), it ends at 9:30:00 PM.
Note: A promotion can be initiated with a date that is in the past. However, you cannot enter the active end date of the promotion to a date earlier than the current date.
-
Select the testing start date and start time, and the end date and end time to deploy the promotion to the test location for the selected duration. To set a store as a testing location, see Stores.
Note: Be sure that the store is selected as part of the delivery.
-
Active Times is auto-checked to 'All Times' by default, which makes your promotion always active. To schedule the promotion on specific times during the day, uncheck Active Times and enter the Start Time and End Time in Hours|Minutes, followed by AM/PM format.
For example, if the promotion is set to be active from 12 AM to 5 PM on Thursday, and you schedule to run it from 9 AM to 1 PM on the same day, the promotion will become active at 12 AM Thursday. However, it will only apply to transactions made between 9 AM and 1 PM. The promotion will then expire at 5 PM.
-
Click +Add Additional Times to schedule the promotion for multiple time slots during the day.

From the above example, the promotion is scheduled to be active during two seperate periods on the same day.
-
By default, the promotion is set to be active every day of the week. To customize it, clear 'All Days', and select the specific day(s) on which you want the promotion to be active.
-
You can group similar promotions together using promotion categories. To link a promotion to a specific category, select the category from the Category (Optional) dropdown. Click here to learn more.
When you fill up all the mandatory fields on the Details page, the Next button activates.
Button navigations
The buttons at the bottom of the screen perform the following functions:
-
To proceed to the next section, click Next.
-
To discard the information entered on this page, click Delete. A pop-up message will appear:
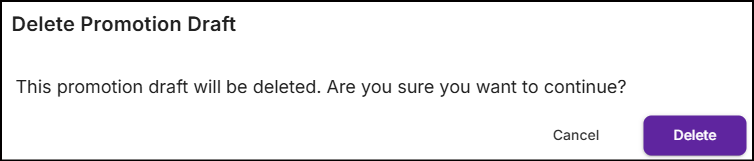
- Click Discard to exit the promotion flow, or click Cancel to continue creating the promotion. Upon deletion, a message "Successfully deleted promotion draft" is displayed on the All Promotions screen.
-
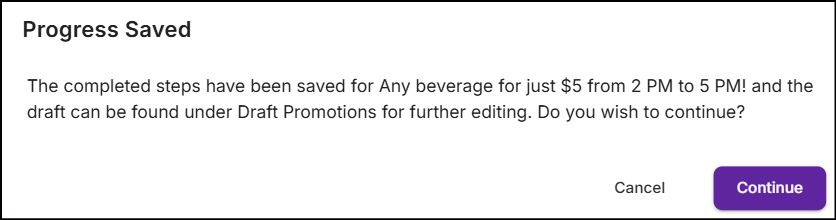
To exit the current promotion, click on Exit. The following pop-up message will appear:
-
Click Continue to exit the promotion. The promotion will auto-save and move to the Promotion drafts section.
-
Click Cancel to stay on the details page.
-