Configuring order modes for online ordering website
Use Online Ordering > Online Configuration > Order Settings to configure specific order modes for your online ordering website. Currently, Aloha Order Direct only supports future orders, curbside orders and dine in orders.
- Future order settings tab — Allows you to configure the number of days in advance a consumer can place an online order. This tab helps you manage order volume and business resources. You can also use this tab to turn on or turn off the future ordering feature for a site.
- Curbside settings tab — Allows you to configure a site so that a guest can receive their order at their car without stepping into the restaurant/store. You can also use this tab to turn on or turn off the curbside ordering feature for a site.
- Dine in settings tab — Allows you to configure a site so that consumers can order and pay from their table. Consumers scan the QR code available on the table to access the ordering site and enter and pay for their order. The server delivers the food to the table.
- Delivery settings tab — Allows you to configure a site to accept orders for delivery and select the delivery fee to charge for the delivery service.
To configure future order settings:
- Log in to Aloha Cloud Back Office using a specific store.
- Select Online Ordering > Online Configuration > Order Settings. The Future order settings tab is selected as default.
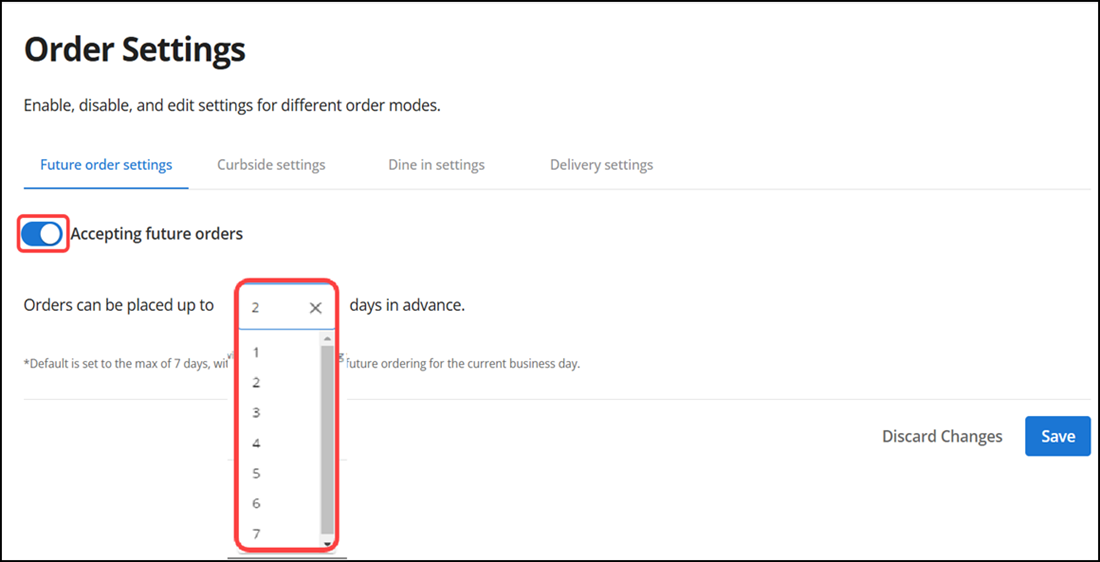
- Click Accepting future orders to establish this site accepts online orders. The entry in number of days determines if the site only accepts orders for the current day or up to seven days in the future.
- Select the number of days in advance a consumer can place an online order from the drop-down list. By default, a site can accept an online order for up to seven days in advance. If you change this to one day in advance, the site accepts orders for the current business day only.
- Click Save in the bottom right corner to confirm the changes.
To configure curbside settings:
- Log in to Aloha Cloud Back Office using a specific store.
- Select Online Ordering > Online Configuration > Order Settings.
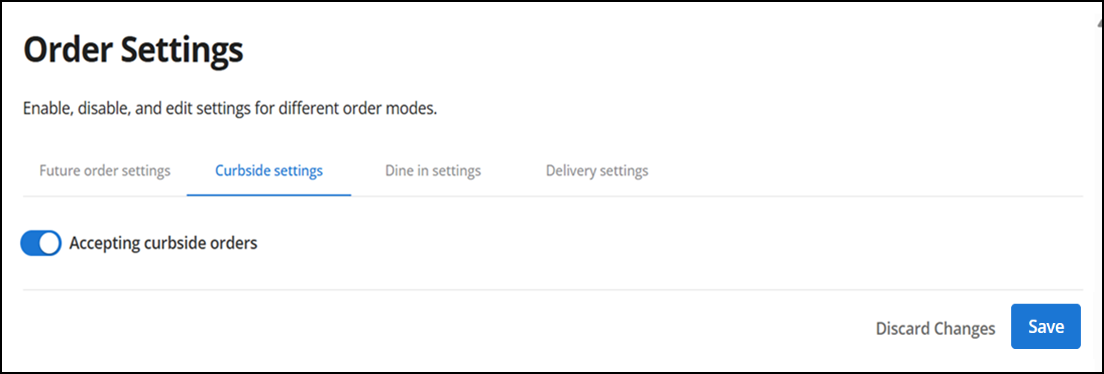
- Select the Curbside settings tab.
- Click Accepting curbside orders to establish this site accepts curbside orders.
- Click Save in the bottom right corner to confirm the changes.
To configure dine-in settings:
-
Log in to Aloha Cloud Back Office using a specific store.
-
Select Online Ordering > Online Configuration > Order Settings.
-
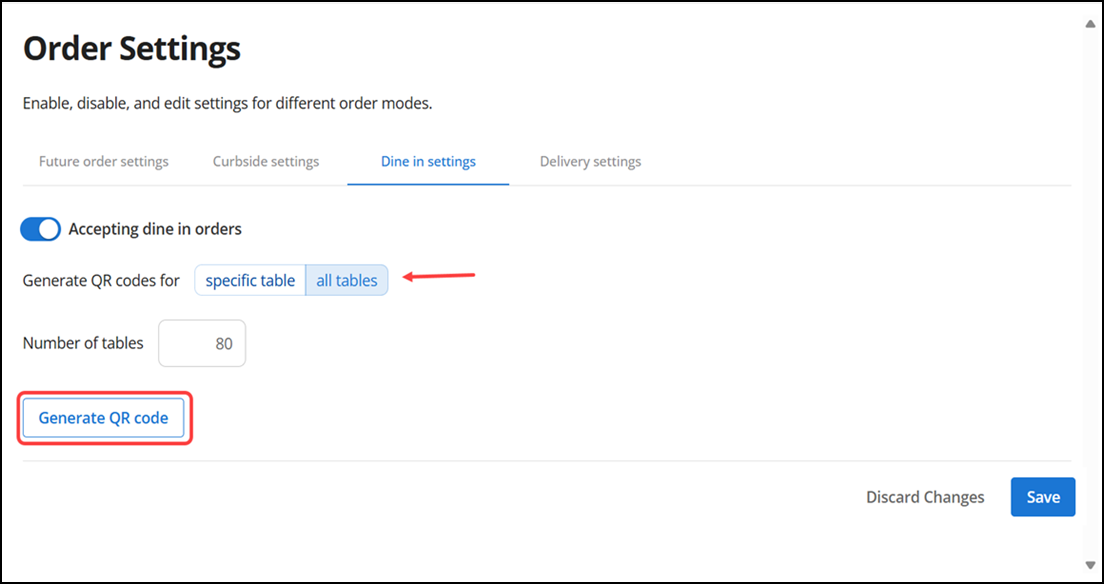
Select the Dine in settings tab.
-
Click Accepting dine in orders to establish this site accepts dine-in orders.
-
Select specific table and then designate the table for which to generate a QR code.
-OR-
Select all tables and then type the number of tables for which to generate a QR code.
-
Click Generate QR code to generate/download the QR code for a specific table or all tables.
-
Click Save in the bottom right corner to confirm the changes.
To configure delivery order settings:
Note: You can view and access the Delivery settings tab if you enable the delivery add-on in order mode.
- Log in to Aloha Cloud Back Office using a specific store.
- Select Online Ordering > Online Configuration > Order Settings.
- Select the Delivery settings tab.
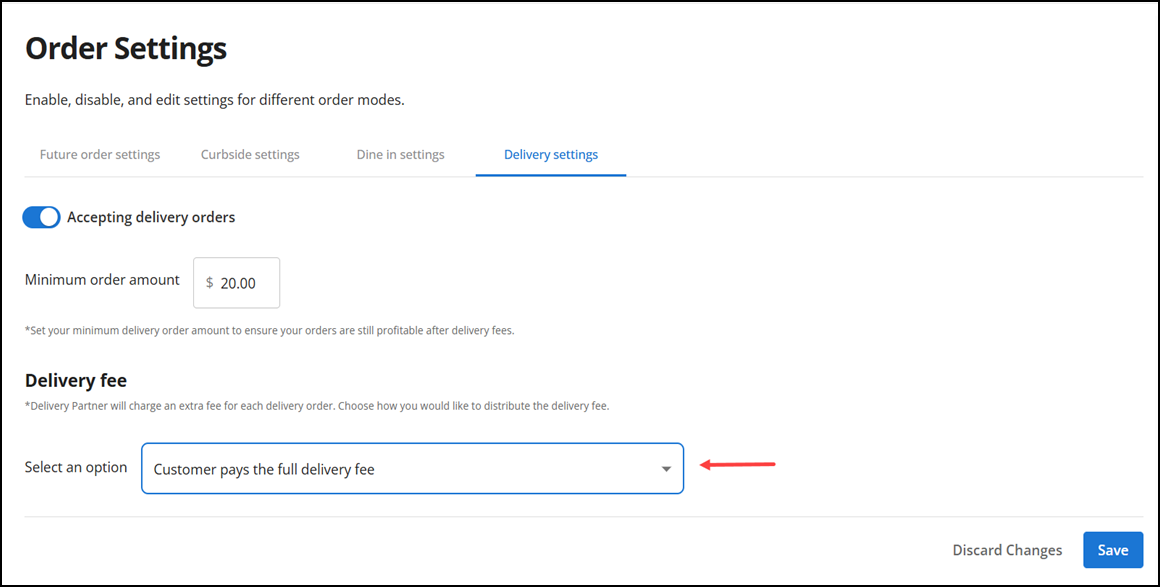
- Slide Accepting delivery orders to the right to establish this site accepts delivery orders.
- Enter the Minimum order amount a guest must order to ensure you are profitable. This is apart and separate from the delivery fees. For example, a minimum dollar amount of $20.
- Click the 'Select an option' drop-down list to search for and select the type of delivery fee to apply to delivery orders.
Note: You can split the delivery fees with the customer, if needed. For example, you can divide the fees by a total amount, a specific amount, or by a percentage.
- Click Save to confirm the changes.
Continue to "Configuring store branding and privacy policy"
Continue to "Managing your store branding" or return to "Implementing Order Direct."