Starting and ending a shift
There are two types of shifts, Labor and Financial. All employees clock in at the beginning of a shift, but only employees who enter orders or accept payments must start a financial shift. For restaurants with breaks configured, you can also start and end unpaid breaks.
Labor Shift: — A labor shift in the POS system records a clock in and out time for employees. An employee can have multiple labor shifts within a single business date.
Financial Shift: — Employees who take payments for orders are responsible for the money they receive from customers. In Quick Service, we typically refer to these employees as cashiers. In Table Service, these employees are typically servers and bartenders. A Financial Shift must be started before an employee can access the POS. An employee can have multiple Financial Shifts within a single Labor Shift.
This document discusses the following:
Clocking in
- Log in to the POS.

- At the beginning of your shift, from the POS home screen, tap Clock In. The Select Job Code screen appears.
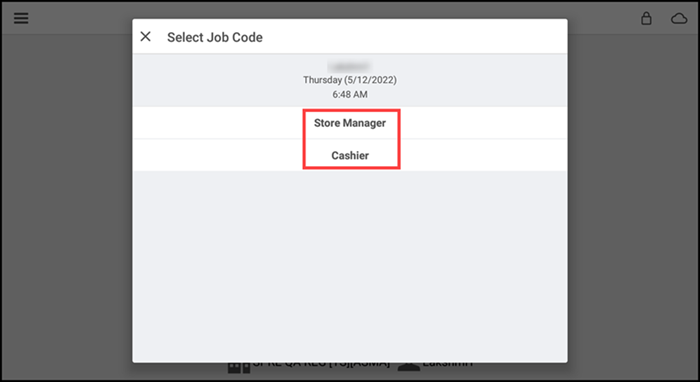
- Tap the job code for the job you will perform during this shift. The POS home screen re-appears. Additional options may appear based on the job code you select.

- Tap the lock icon to logout, if you are not performing order entry, or continue to Starting a financial shift.
Clocking out
- At the POS home screen, tap Clock Out. The Clock Out prompt appears.
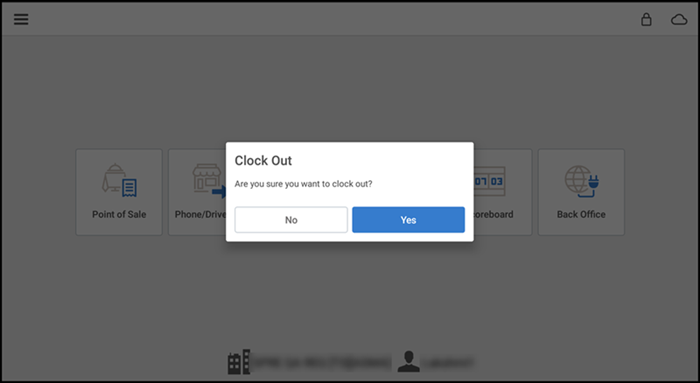
- Tap Yes to return to the PIN entry screen.
Starting a financial shift
It is necessary to start a financial shift prior to entering orders or accepting payments. When you start a financial shift, End Shift replaces 'Clock Out' on the POS home screen.
-
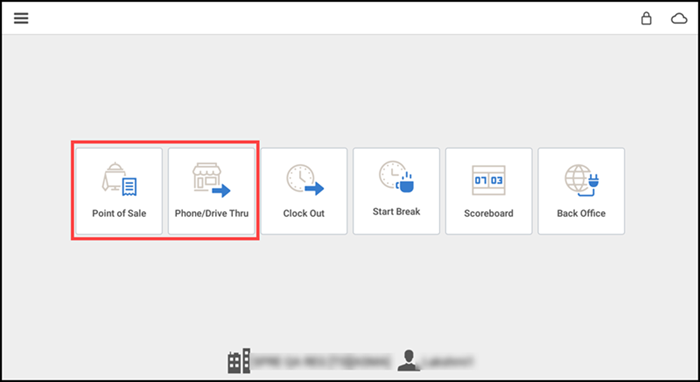
Log in to the POS.
-
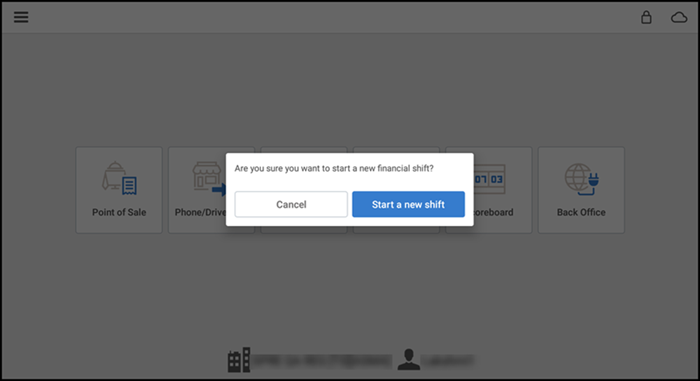
Tap Point of Sale or Phone/Drive Thru. A confirmation prompt appears.
-
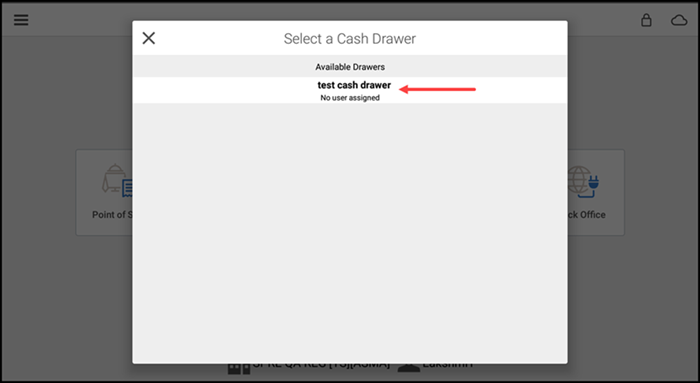
Tap Start a new shift. The POS floor plan or Takeout/Delivery appears, depending on your selection, unless you are required to select a cash drawer, in which case the Select a Cash Drawer screen appears..
-
(Drawer Checkout Only) Select the cash drawer to use.
Note: If the maximum number of users are already assigned to the cash drawer, the drawer is grayed out and you cannot assign yourself to the cash drawer. If you are the first user assigned to the drawer and the system requires you to enter a starting bank amount, an open cash drawer prompt appears and you must enter a cash amount. If you are the second user assigned to the drawer, the Tabs screen appears.

-
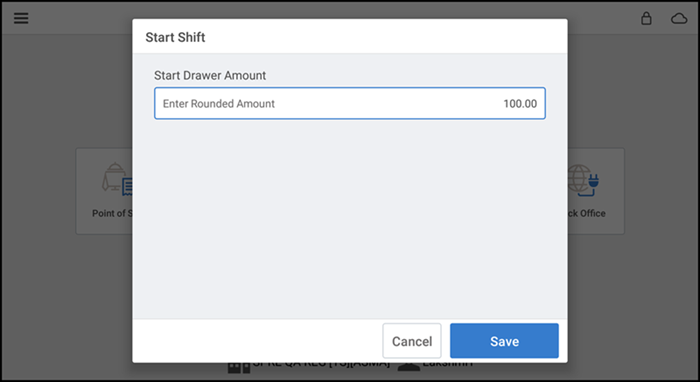
(Drawer Checkout Only) Tap OPEN to open the cash drawer so you can count the cash in the drawer.
-
(Drawer Checkout Only) Enter the cash amount in the drawer and tap Save.
Ending a financial shift
Prior to clocking out, you must first end your financial shift. The system does not allow you to end your financial shift if you have open orders. Close the orders or have another POS user assume ownership of your tables.
Note: Once you end a financial shift, if you tap Point of Sale or Phone/Drive Thru, the POS application prompts you to begin another financial shift.
Ending a financial shift without cash drawer
To end a financial shift without cash drawer:
-
Log in to the POS.
-
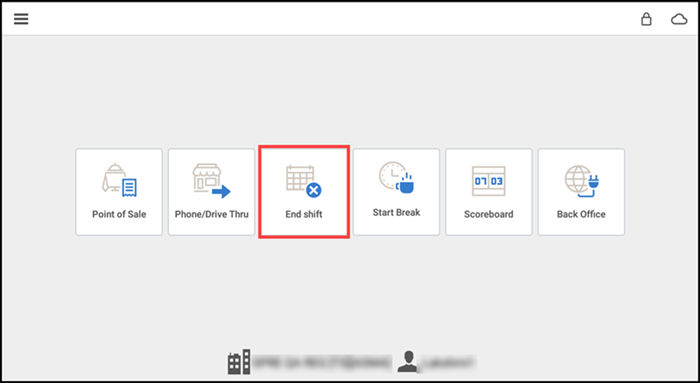
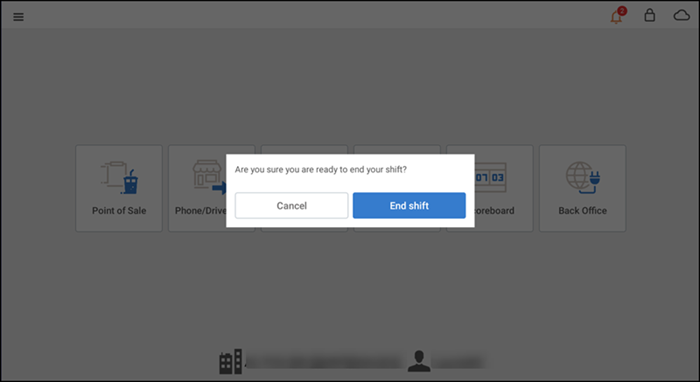
Tap End shift. A confirmation message appears.
-
Tap End shift. The Declare Tips screen appears.
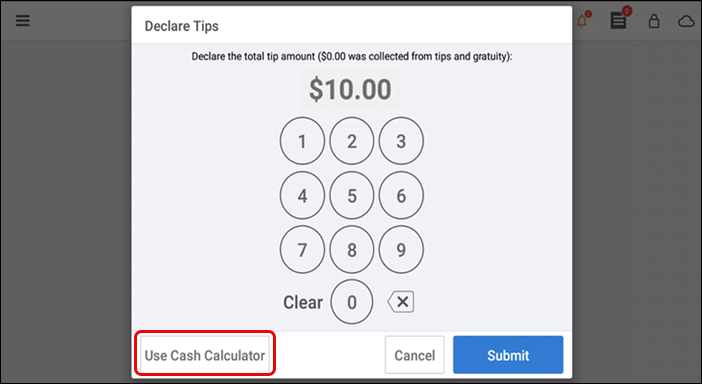
Note: Tips to be declared at the end of the day/before closing the day (for all the payment types).
-
Enter the amount of tips collected and tap Submit.
-OR-
Tap Cancel to exit the Declare Tips screen.
-
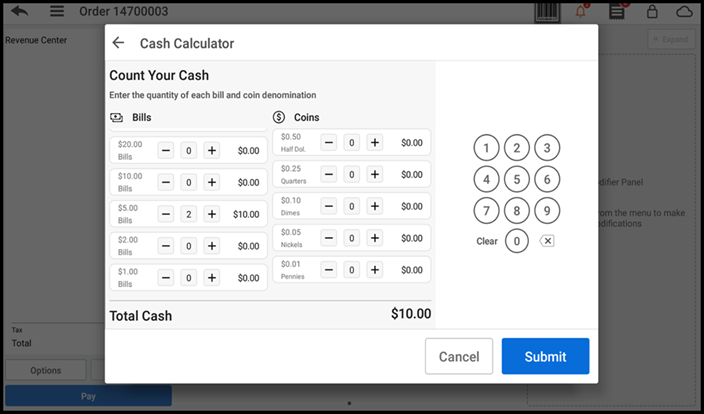
Tap Use Calculator. The 'Cash Calculator' screen appears.
-
Enter bills and coins. The system automatically calculates and displays the total dollar amount.
-
Tap Submit. The 'Declare Tip' screen appears displaying the total amount.
-
Continue to clock out.
Ending a financial shift with a cash drawer
To end a financial shift with a cash drawer:
If you assigned yourself to a cash drawer, when you tap End Shift, you have the option to close the cash drawer or to un-assign yourself from the cash drawer.
- At the POS home screen, tap End Shift. If you have open orders, a prompt to transfer the open orders appears.
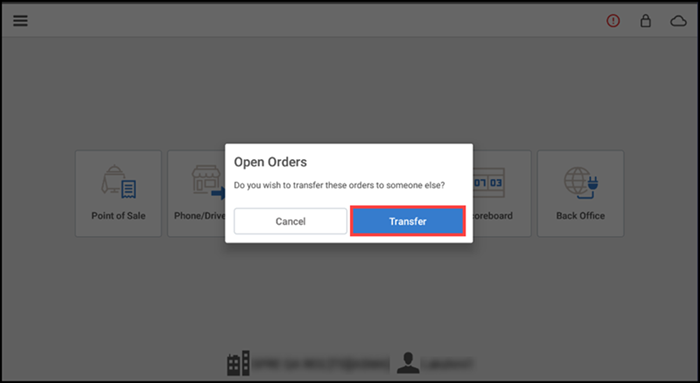
- Tap Transfer to transfer the open orders. The Select user screen appears.
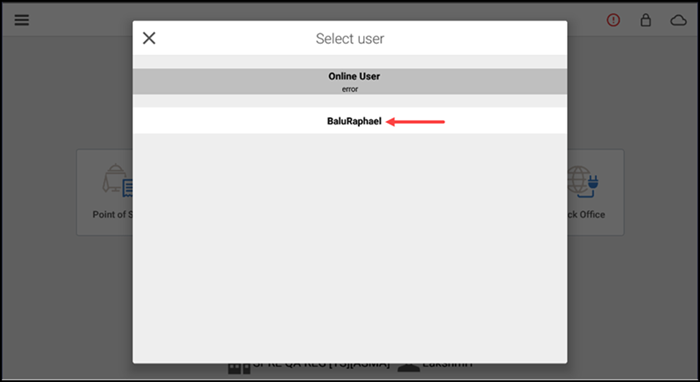
- Select the user to which to transfer the open orders. A confirmation message appears.
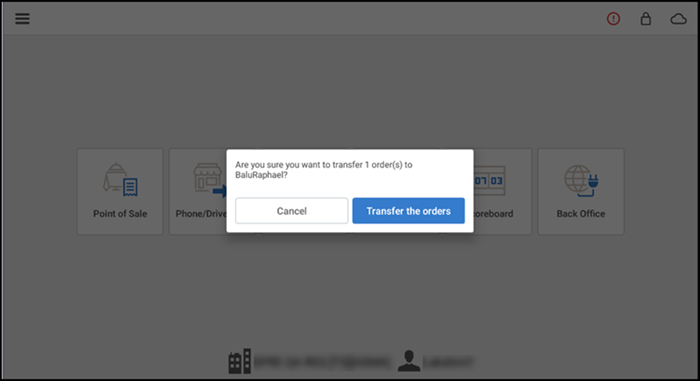
- Tap Transfer the orders.
- Tap De-assign yourself from drawer.
- Continue to the next procedure (closing cash drawer).
Closing a cash drawer
-
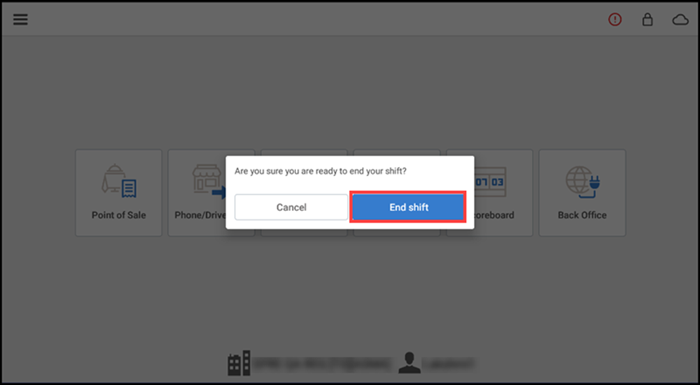
At the POS home screen, tap End shift. A confirmation message appears.
-
Tap End shift. The Open Cash Drawer prompt appears.
-
Tap OPEN to open the cash drawer or tap SKIP to not open the cash drawer.
-
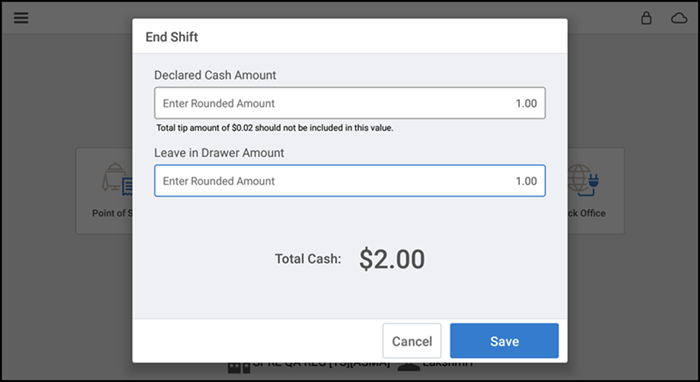
(Drawer Checkout Only) Enter the Declared Cash (total cash counted) you are turning in. Do not include total tip amounts.
-
Enter the Cash Amount you are leaving in the drawer.
-
(Drawer Checkout Only) the Total Cash displays the amount you will be removing from the drawer.
-
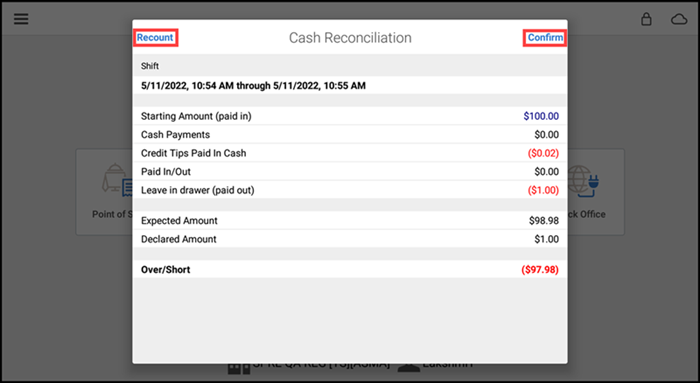
(Drawer Checkout Only) Tap Save. The cash reconciliation screen appears with an over/short amount.
Note: All stores with Drawer Shifts enabled must declare a cash amount at the end of a financial shift.
-
Tap Confirm.
-
Tap Clock out. The Declare Tips screen appears.
-
Tap Submit to review and adjust tips. Refer to 'Adjusting a Tip After Closing a Check' for instructions on how to adjust the tips on guest checks. After you close the Adjust Tips screen, you can no longer adjust the tips for guest checks.
-OR-
Tap Cancel to not review and adjust tips.
-OR-
Tap No (Don't show me this again) to no longer receive the Adjust Tips prompt at the end of a financial shift. Your manager can reactivate the Adjust Tips prompt in Aloha Cloud Back Office.
Note: At POS, tips are configured for the Credit Card payments. If payment made through credit card, then if required, we need to adjust the tips before closing the financial shifts.
-
Tap Use Calculator. The 'Cash Calculator' screen appears.
-
Enter bills and coins. The system automatically calculates and displays the total dollar amount.
-
Tap Submit. The 'Declare Tip' screen appears displaying the total amount.
View video
Please allow time for the "Clocking In and Out in Aloha Cloud" video to load.