Starting and ending a shift
You must be assigned to a user role with permissions to open and close shifts in the POS.
This document discusses the following:
- Clocking in
- Clocking out
- Opening a shift
- Closing a shift
- Enabling cash drawer count in Back Office
- Closing a shift once count in Back Office is active
Clocking in
You must be assigned to a user role with time clock enabled to clock in and out of a POS device. You can clock in/out even if the POS device is offline. The system stores the time clock activities and sends them to the host when the POS device is online.
Note: Once a user role includes the time clock feature, all users assigned to the user role see the Clock In and Clock Out buttons on the POS app login screen.
-
Access the PIN entry screen on the POS device.
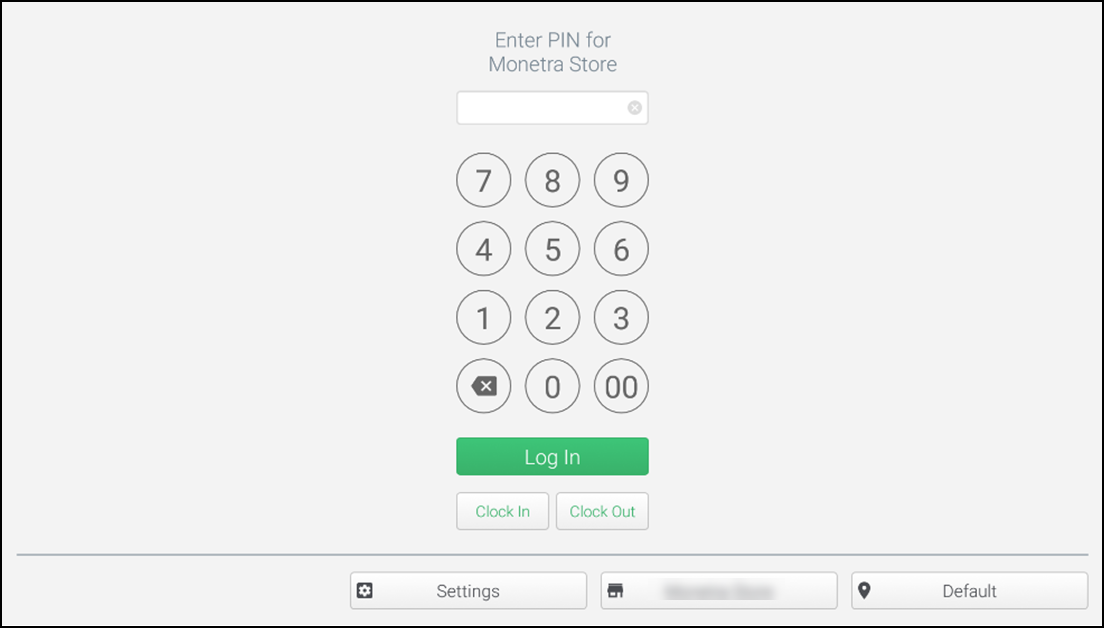
-
Enter your POS PIN.
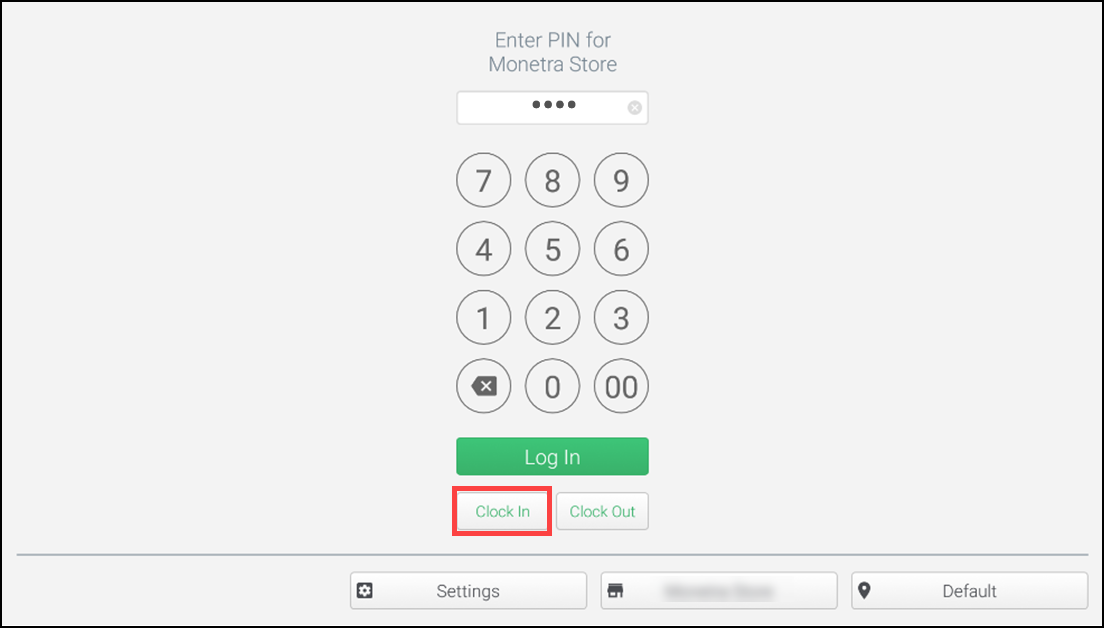
-
Tap Clock In.
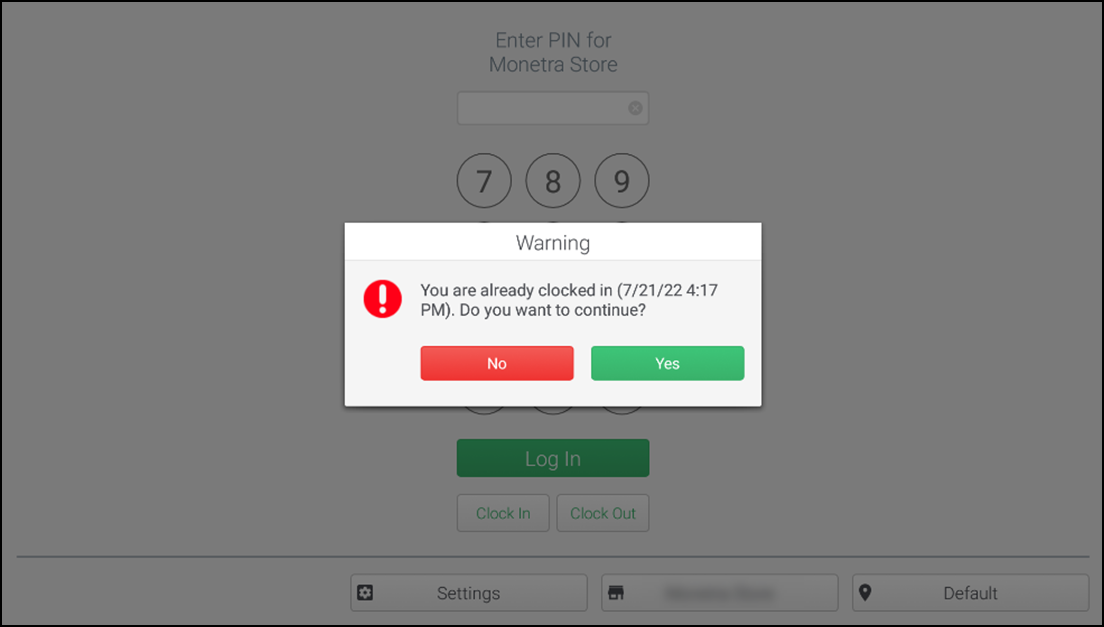
If you are already clocked in, a warning message appears letting you know you are already clocked in, along with the date and time of the initial clock in. You will be asked if you want to continue.
- Tap Yes to create a new clock in date and time. This results in an unpaired punch in Back Office.
- Tap No to use your original clock in date and time.
-
Do one of the following based on your user role:
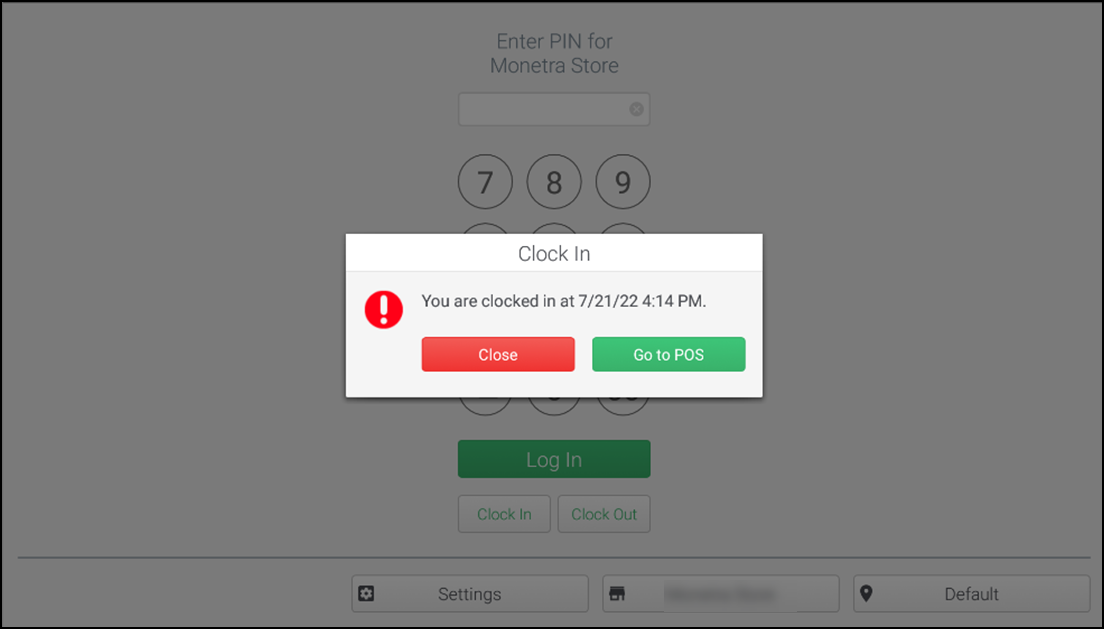
- Tap Go to POS within 10 seconds to proceed to the POS. After 10 seconds, you need to enter your PIN and tap Log In again to gain access to the POS.
- Tap Close within 10 seconds if you do not want to go straight to the POS. After 10 seconds, you need to enter your PIN and tap Log In again to gain access to the POS.
- Tap OK. This is for users who use the POS device to clock in/out only. (No other POS access.)
Clocking out
-
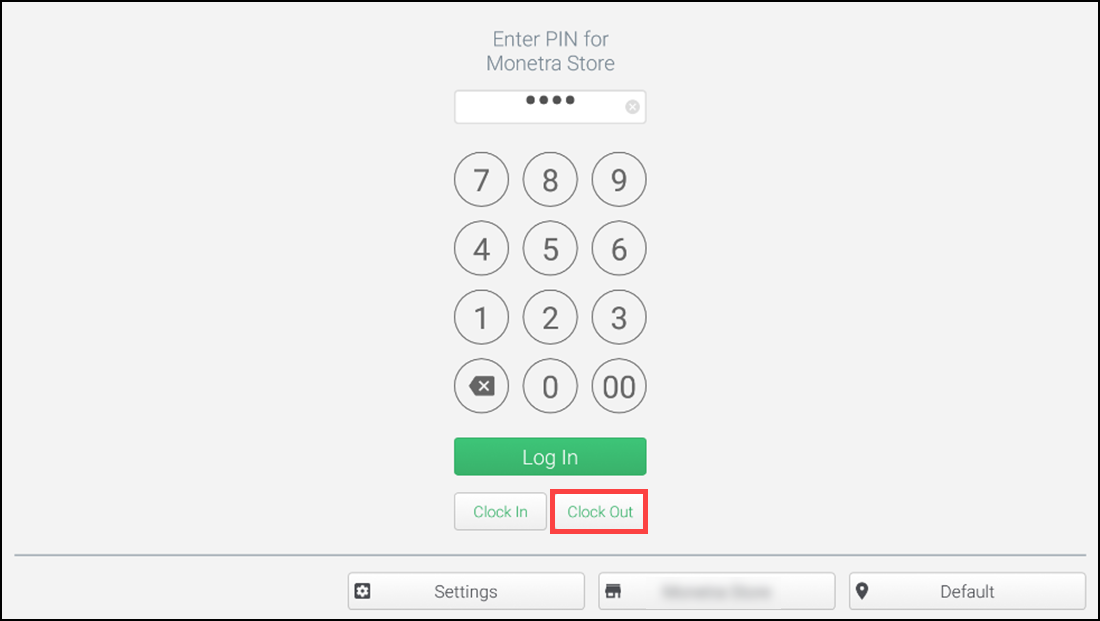
Access the PIN entry screen on the POS device.
-
Enter your POS PIN.
-
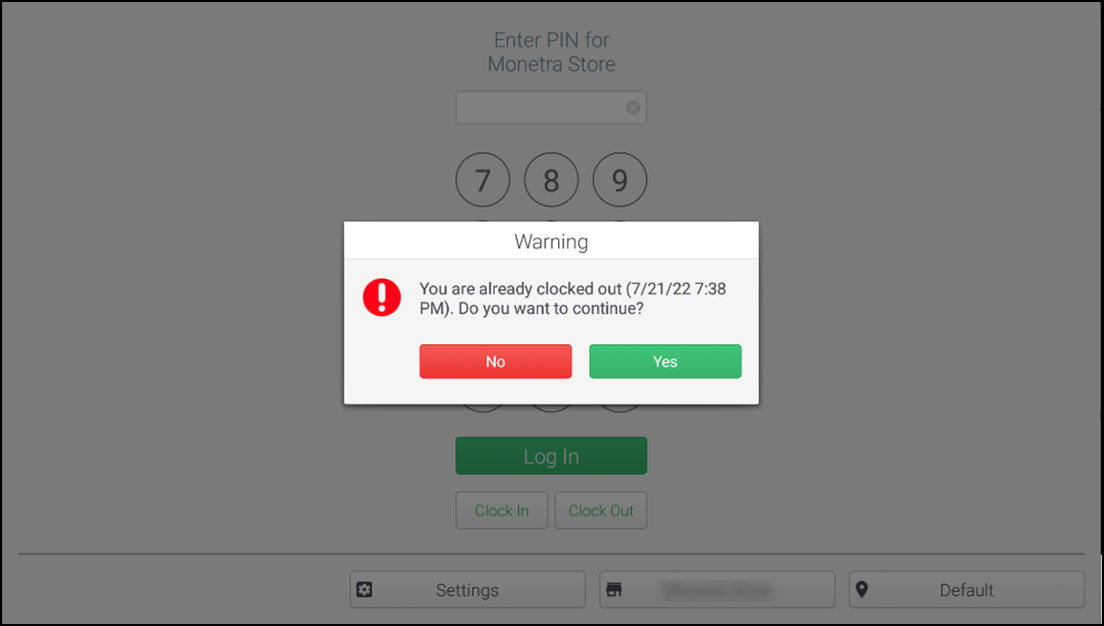
Tap Clock Out. If you are already clocked out, you receive a warning message letting you know you are already clocked out, along with the date and time of the initial clock out. A prompt appears asking if you want to continue.
- Tap Yes is you want to create a new clock out date and time. This will result in an unpaired punch in the Back Office.
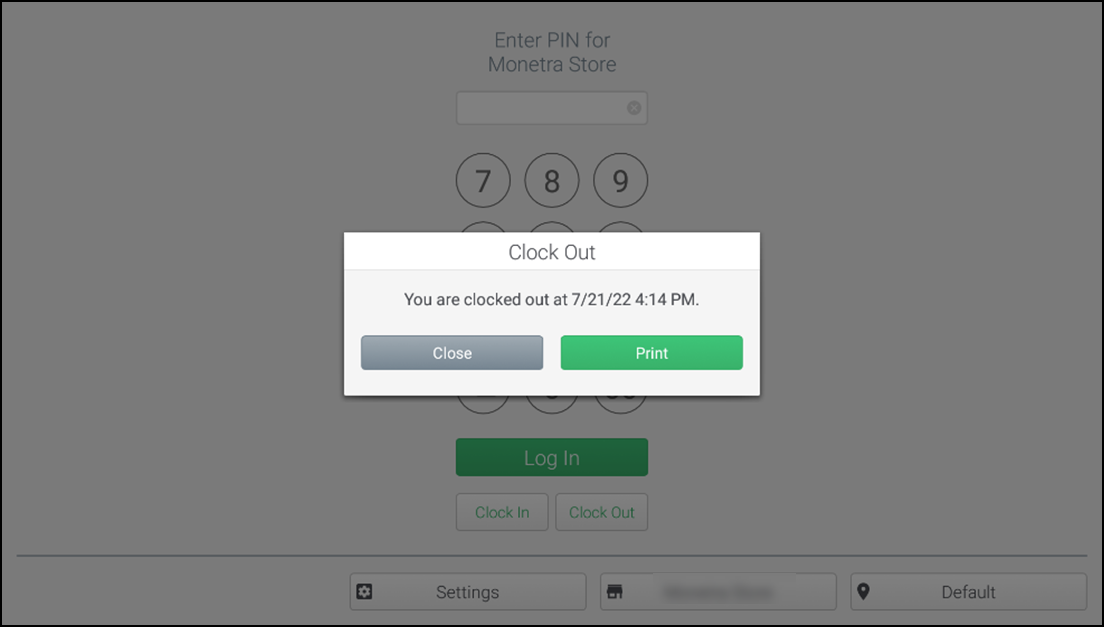
- Tap No if you want to use your original clock out date and time. The system will show your clock out time.
-
Tap Close to close the Clock Out confirmation popup.
-
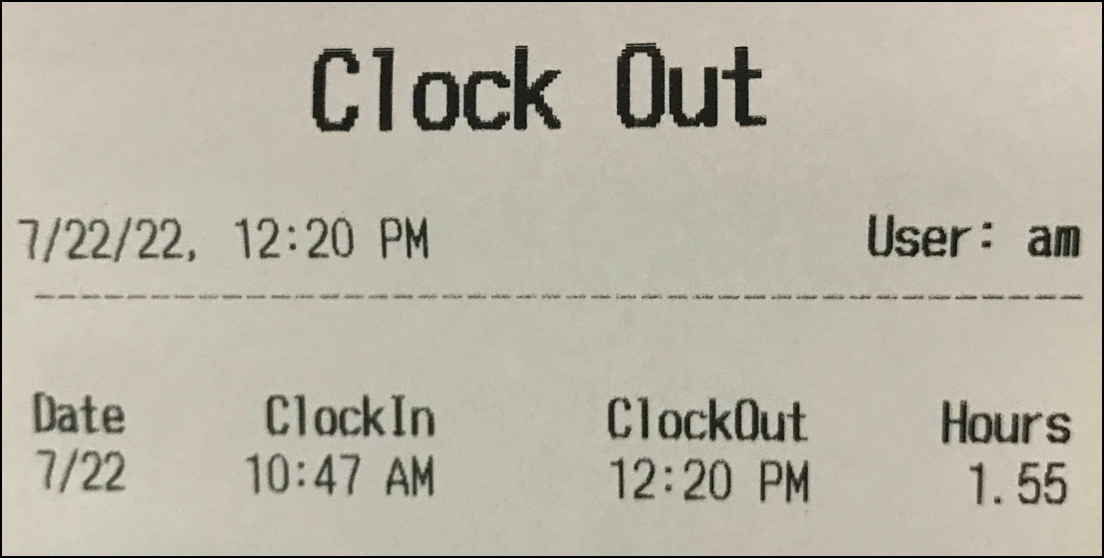
To print hours worked, tap Print and a receipt will print to the default receipt printer showing all clock in and clock out times and the total hours worked by the user on that business day.
Opening a shift
Before you can ring up sales, you must open a shift. Opening a shift creates a starting point for your business to track sales and other operations. For flexibility, you can open and close a shift as many times as needed during the day.
Note: We do not suggest having a shift open across multiple days as this can create challenges for your sales tracking and reporting.
-
Log in to the POS.
-
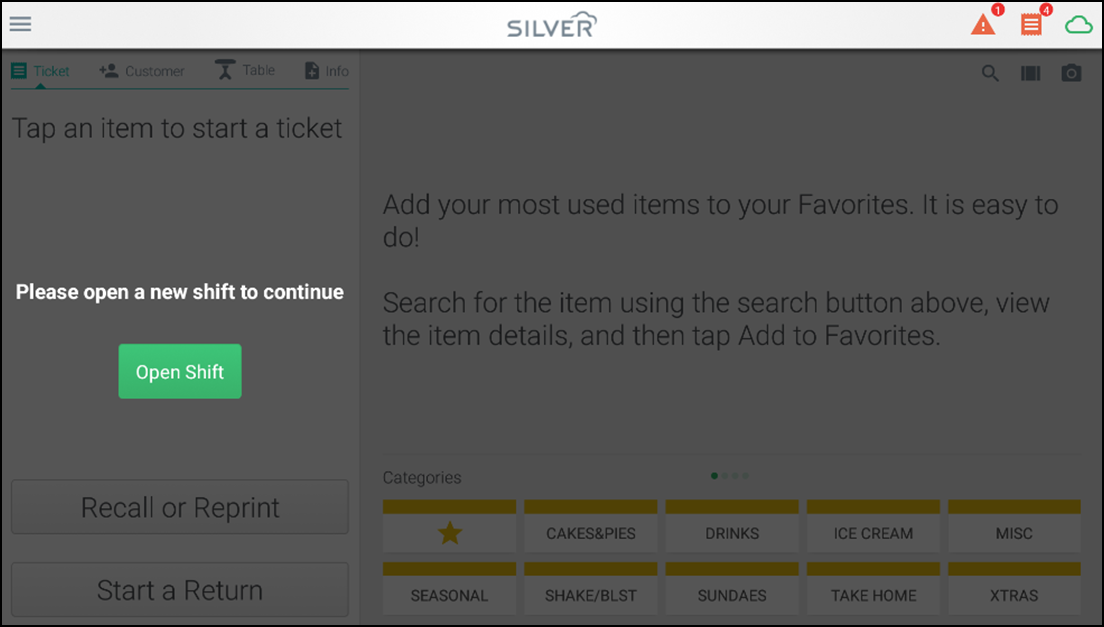
Tap Open Shift.
Note: If you do not see this option, a shift is already open. Confirm that the shift should be open, or close the shift if you deem it necessary.
-
If this is the first time you are opening a shift on the device, you are required to enter the Starting Drawer Amount. This is the amount of cash in the cash drawer that is associated with the device.
-
If this is not your first shift, the system remembers the amount of cash left in the drawer when the previous shift was closed. Once the shift is open, you can start selling.
Closing a shift
You can close a shift and count your drawer immediately on the POS, or you can close your shift and count the drawer later in Back office.
-
Log in to POS.
-
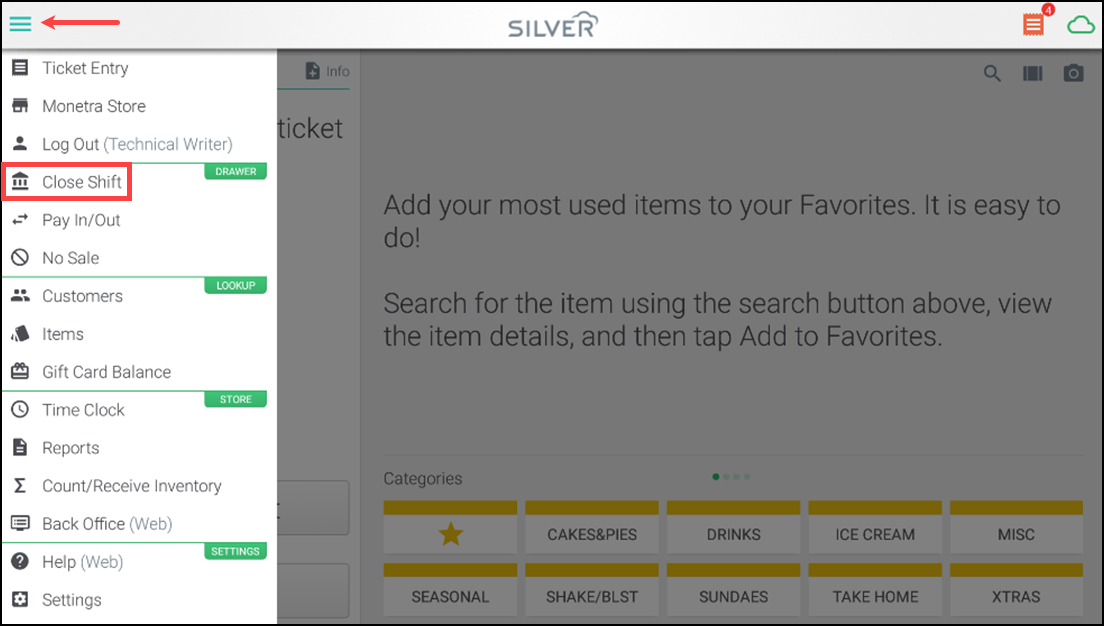
Tap the hamburger menu icon to view the slide out menu.
-
Tap Close Shift. If you have a cash drawer, the cash drawer opens.
-
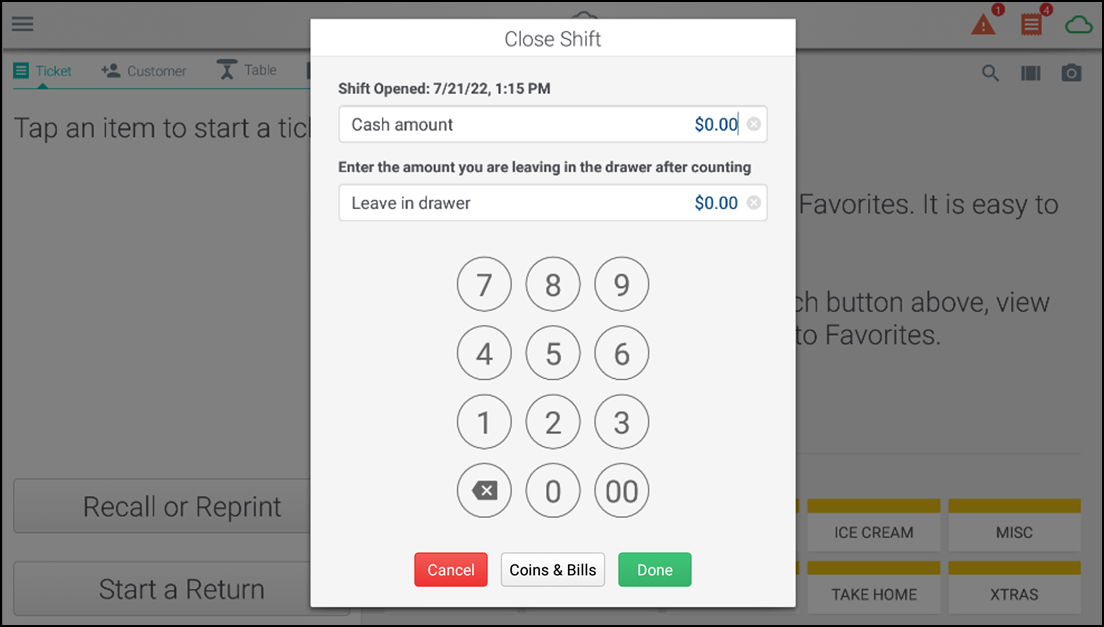
Count the cash in the cash drawer. You can count up all your cash and enter it in Cash amount, or you can use the Coin and Bill counter to assist you.
Tap Coins and Bills. From this screen, you can enter the quantity or amount you have of each coin and bill denomination. When you tap Done, the total cash amount from this screen automatically transfers to Cash Amount.
-
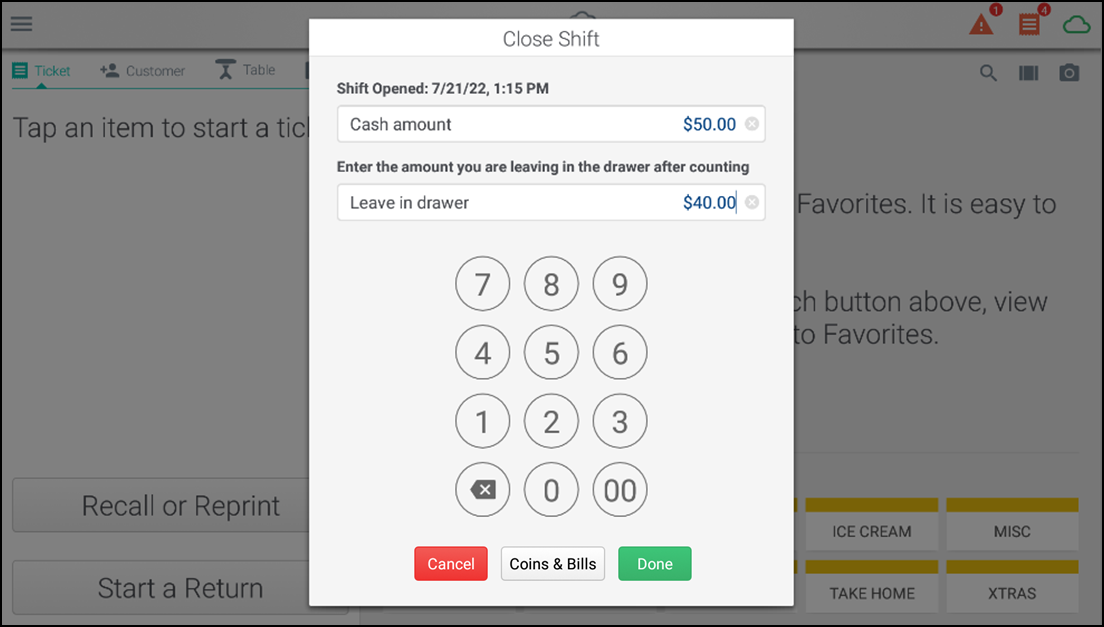
Tap Next, to enter the amount of cash you are going to leave in the drawer. Enter the amount in Leave in drawer field.
-
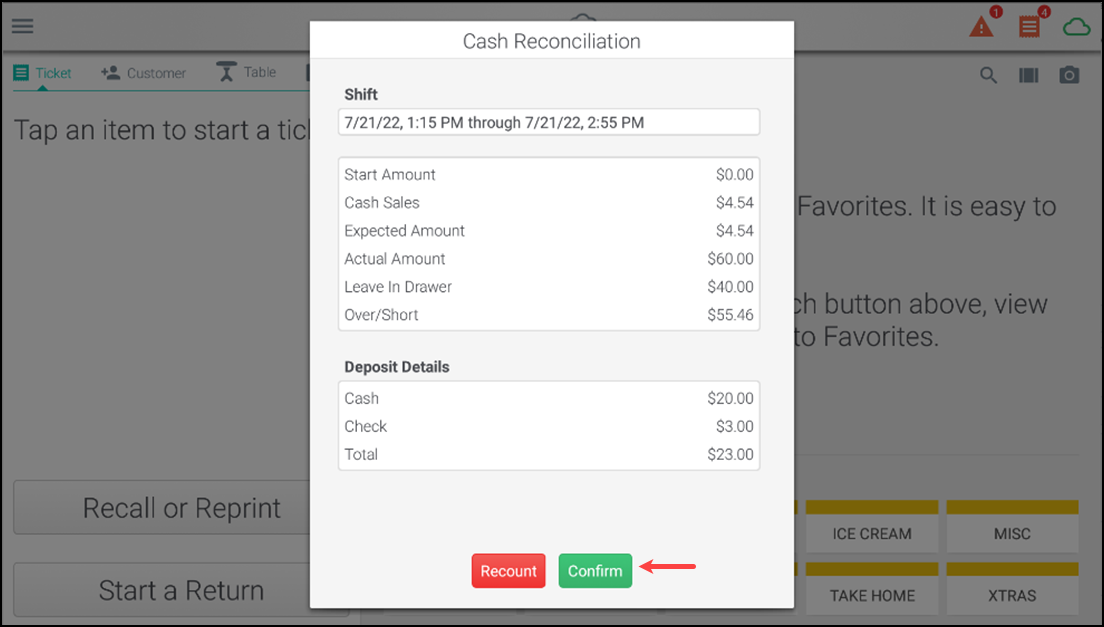
Tap Done. A detailed view of the cash reconciliation information window appears.
-
If the over/short information looks to be incorrect, tap Recount to edit the cash and leave in drawer amounts.
Note: If you do not have a user role that has permission to access the Recount feature, when you tap Recount a prompt to enter the PIN of a user who does appears.
-
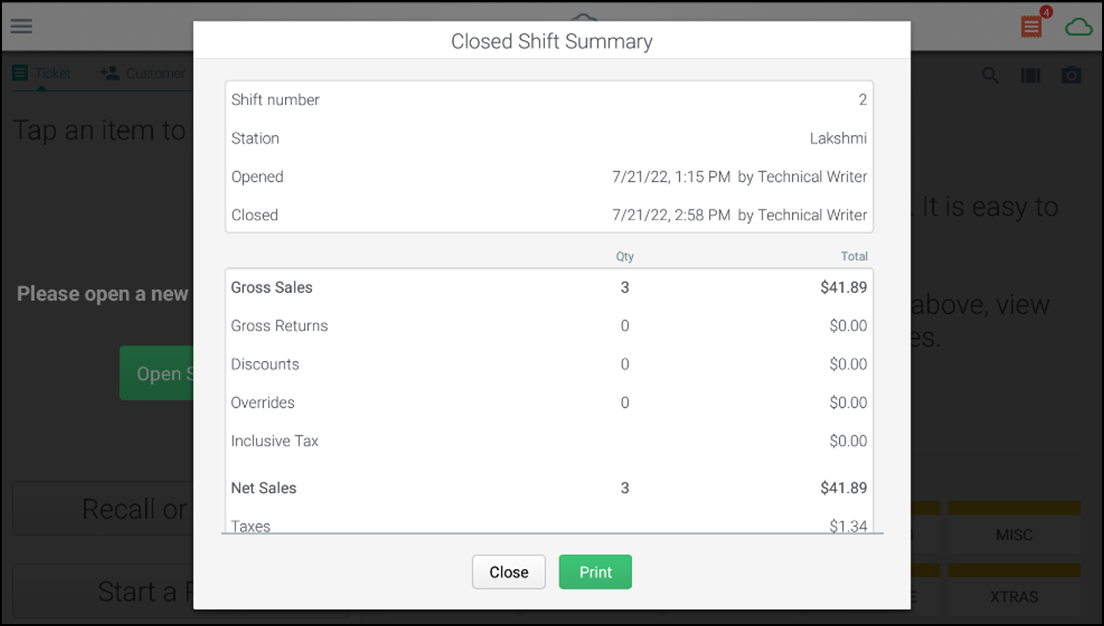
Once you are sure your drawer count is correct, tap Confirm. The Shift Summary report appears. The system also prints a Pay Out receipt for the amount of cash you are removing from the drawer to be deposited or put in the safe.
-
Tap Print to print the shift summary.
Note: If you are not assigned to a user role that has permission to view/print the Shift Summary, the report does not appear, and instead you are returned to the ticket entry screen.
-
Tap Close to open a new shift.
Enabling cash drawer count in Back Office
Silver Essentials allows you to close a shift and count your drawer later in Back Office. Counting in Back Office provides increased security. Some merchants also keep a second set of cash counted and ready to go so that when they close a shift and do the counting in back office, another employee can start a new shift with the second cash set.
- Log in to POS.
- Tap the hamburger menu icon to view the slide out menu.
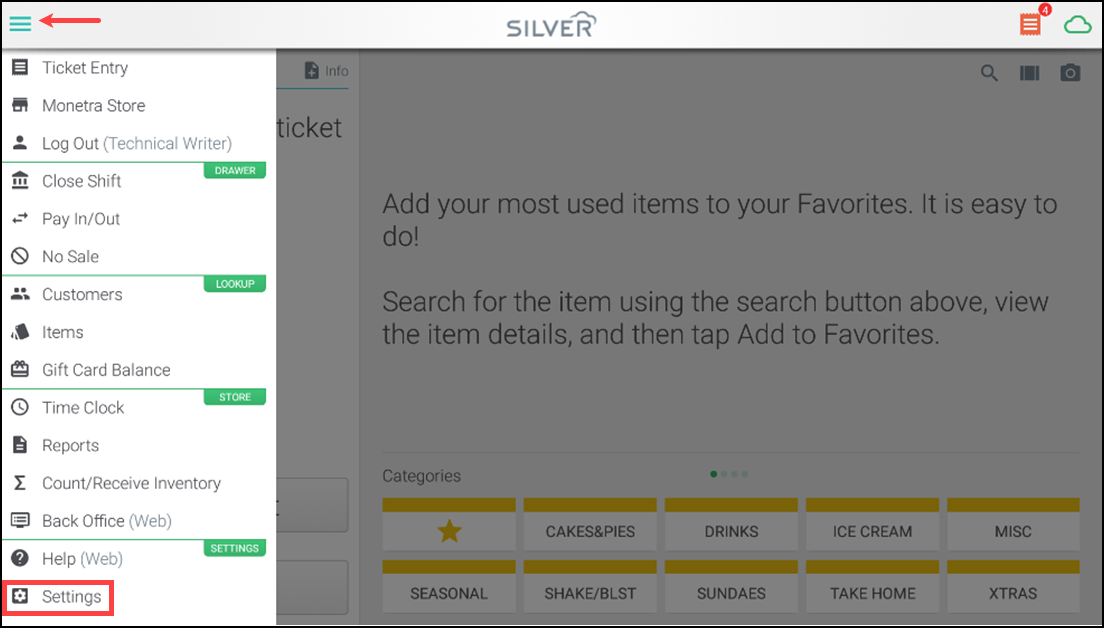
- Tap Settings.
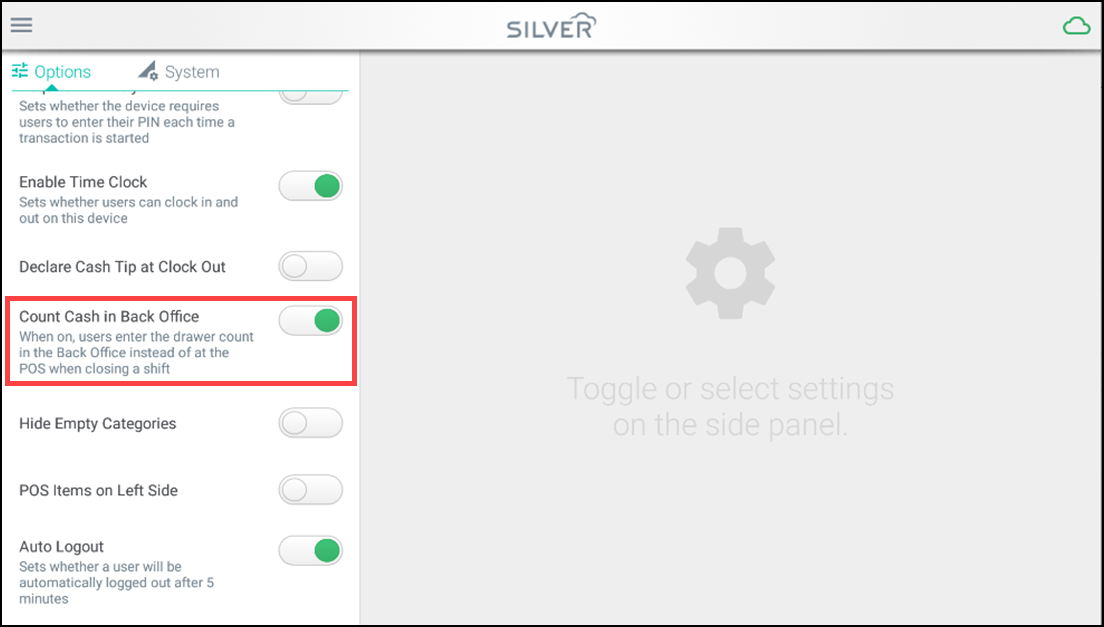
- The Count in Back Office switch is defaulted to OFF. Toggle switch ON to activate the setting.
Closing a shift once count in Back Office is active
- Log in to POS.

- Tap the hamburger menu icon to view the slide out menu.
- Tap Close Shift.The Close Shift screen appears.
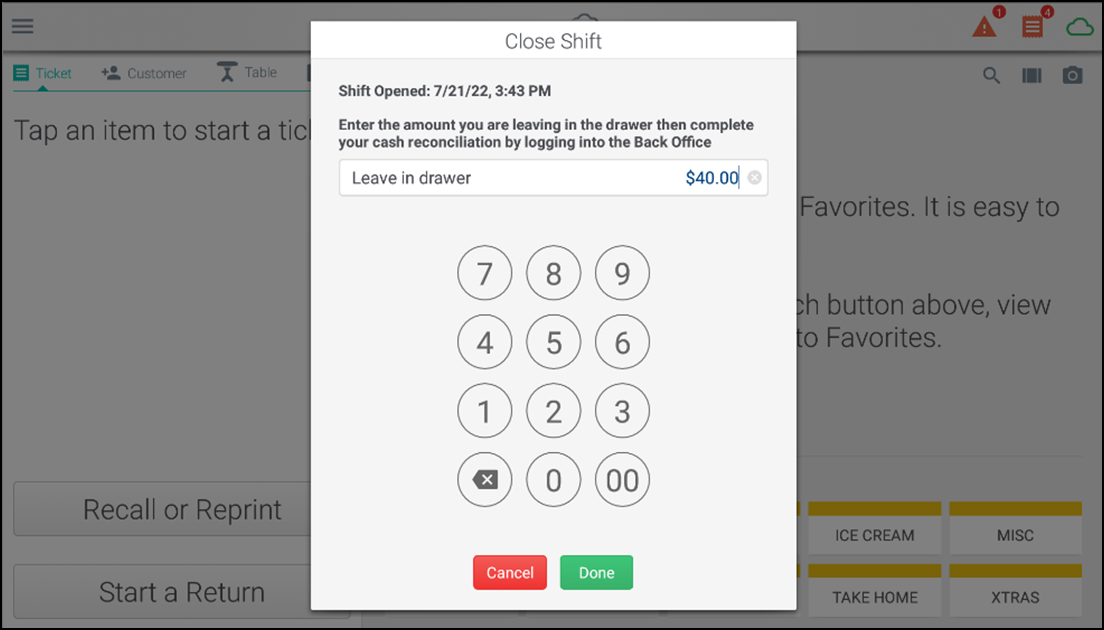
- Enter the amount in Leave in Drawer. The amount cannot be edited later.
- Tap Done. The Closed Shift Summary report appears, but the over/short amount will be pending.
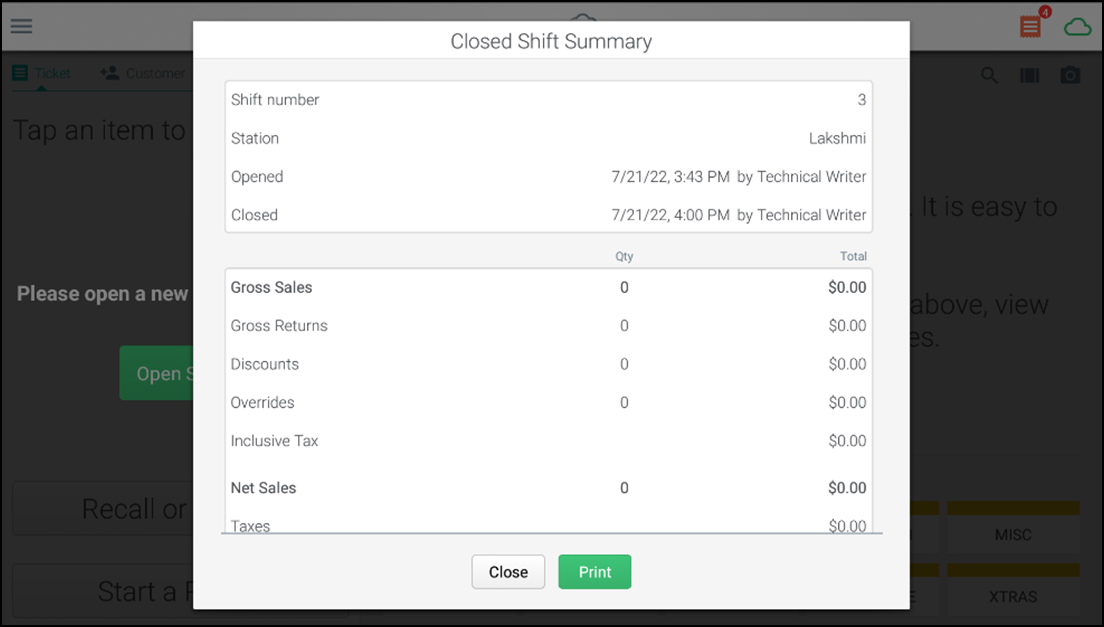
- Tap Print to print the report to the receipt printer or tap Close to close the screen. The Open Shift screen appears to start the new shift.
Reference: To view the report details at Back Office, refer to Shift Report.
See also:
Looking for resources or help with Silver? Click here.