Working with Modifiers for Axium handheld device
Modifiers exist to allow a server or cashier to provide specific instructions for how to prepare an item. This includes special requests, such as 'Lite Mustard' and 'No Mayo,' a requirement such as meat temperature, 'Steak - Medium Rare,' or an option on a side, such as 'Salad - Ranch Dressing.' Modifiers also allow you to charge extra for additional ingredients, such as 'Add Bacon.' Modifier groups enable you to easily locate modifier items on the Point-of-Sale (POS).
Effective with POS v6.18, you can select the menu and modifier items on the same screen, reducing multiple screen transitions. The available modifiers for the selected item appear by tapping the edit button or the item header, making order entry more efficient and increasing speed of service.
Note: Currently, this version does not support variations. If you attempt to add an item or a modifier with configured variations, the system prevents you from adding it to the guest check.
-
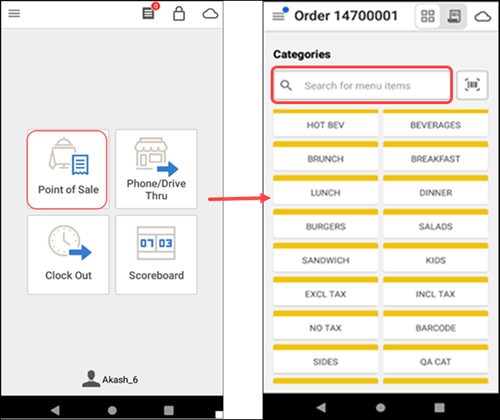
Log in to the POS and start a new guest check.
-
Tap Point of Sale (POS).
-
Select a category from the list or search for menu items using the search bar at the top.
The submenu screen appears based on the category. As you tap an item, the selected item with its quantity appears at the bottom and is added to the ticket. A toast message appears when the item is added. The ticket access point icon at the top shows the number of items added to the ticket.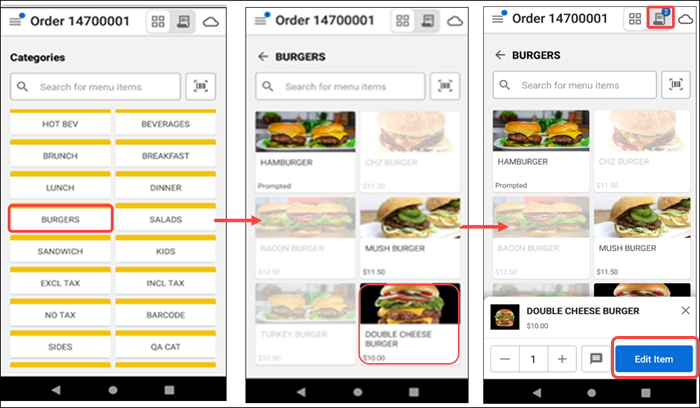
-
Tap Edit Item or the item header to expose modifiers available for the item.
-
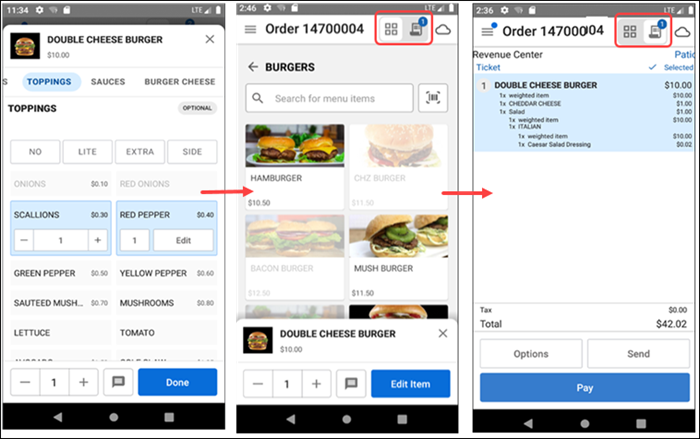
Add any optional, required, and nested modifiers if necessary, and tap Done. Tap the toggle button or swipe left across the screen to view the selections appearing in the ticket preview screen under the respective item. Tap the toggle button or swipe right across the screen to navigate to the submenu screen and add more items if necessary.

If there is a required modifier for the selected category, red warning icon appears. Tap Edit Item to view the list of modifiers. A red dot appears next to the required modifier group name. As you scroll down the list of modifier groups, a red badge appears with a bullet next to the modifier group name. Swipe left on the listed modifier groups at the top of the screen to navigate to a specific modifier group or scroll down the list of modifier groups, and make your selections.
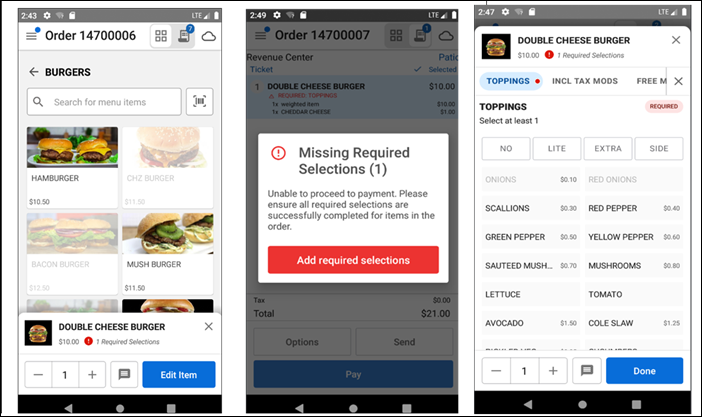
If you attempt to pay for the order without selecting a required modifier, a warning message appears, prompting you to make the required selections. Add the required modifiers, and tap Done to proceed to the payment.
If there are nested modifiers for the selected category, such as when you select a Salad item under the Sides modifier group, additional modifier groups like Dressings and Sauces appear.
Tap a dressing option, such as Italian—this reveals further nested modifier group like Appetizers. Next, choose an appetizer option, such as Caesar Salad Dressing, and tap Done.
To make changes, tap the pencil icon to edit a modifier item, or use the close icon to remove it, if needed. On the check, a nested modifier appears indented under the parent modifier for easy identification.

-
Continue making selections until the item is fulfilled and all modifier needs are met.
-
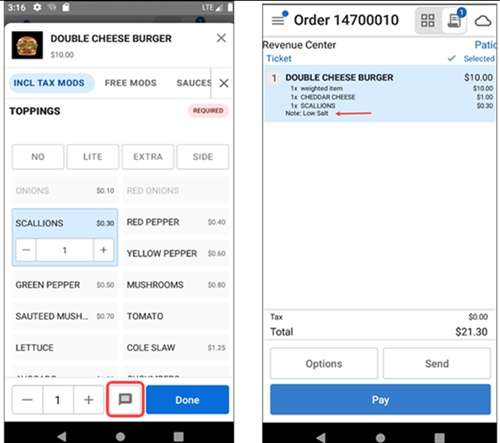
Change the modifier quantity by tapping the +/- buttons that appear when you select the modifier. -OR- Tap the quantity to display the Change Quantity screen, enter a specific number, and tap Save Changes.
-
Use predefined modifier descriptions (NO, EXTRA, LITE and SIDE) to provide additional instructions to the kitchen regarding modifier selections.
-
Tap Notes icon to add any special instructions, which appear as a line item on the ticket preview screen.
-
Once you add all required, nested, and optional modifiers, tap Pay and close the check as normal.
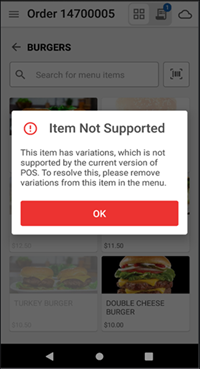
Note: If you attempt to add an item or a modifier with configured variations, a warning popup appears, and prevents you from adding it to the guest check as below.