Custom Table Service Order Entry Screen
Core Product: Aloha Table Service
Complimentary Products: No
Separate License Required? No
Other References: Aloha Table Service Reference Guide, Aloha Table Service Report Guide, Aloha Table Service Screen Designer Guide
View/Download/Print: Custom Table Service Order Entry Screen - HKS349
About Custom Table Service Order Entry Screen
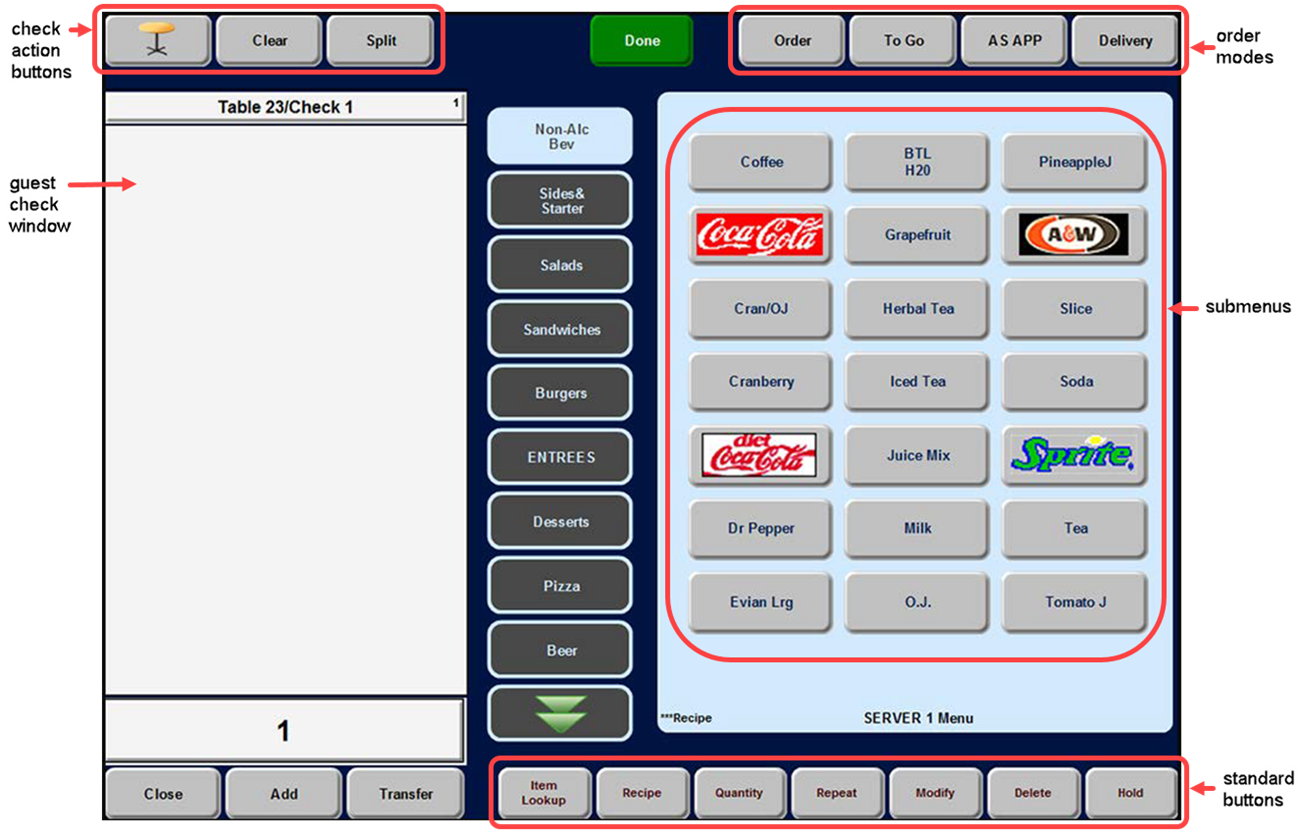
The Aloha® Table Service product uses hard-coded screens to maintain familiarity and a consistent screen flow. The hard-coded design of the Table Service order entry screen includes the following areas:

The area located in the lower right portion of the order entry screen, labeled ‘standard buttons’ in Figure 1, typically contains the following buttons: Item Lookup, Recipe, Quantity, Repeat, Modify, Delete, and Hold; however, it is possible to have an optional fifth order mode in place of the Hold button. Some of these buttons are available at all times, and some depend on the configuration of the Back-of-House (BOH).
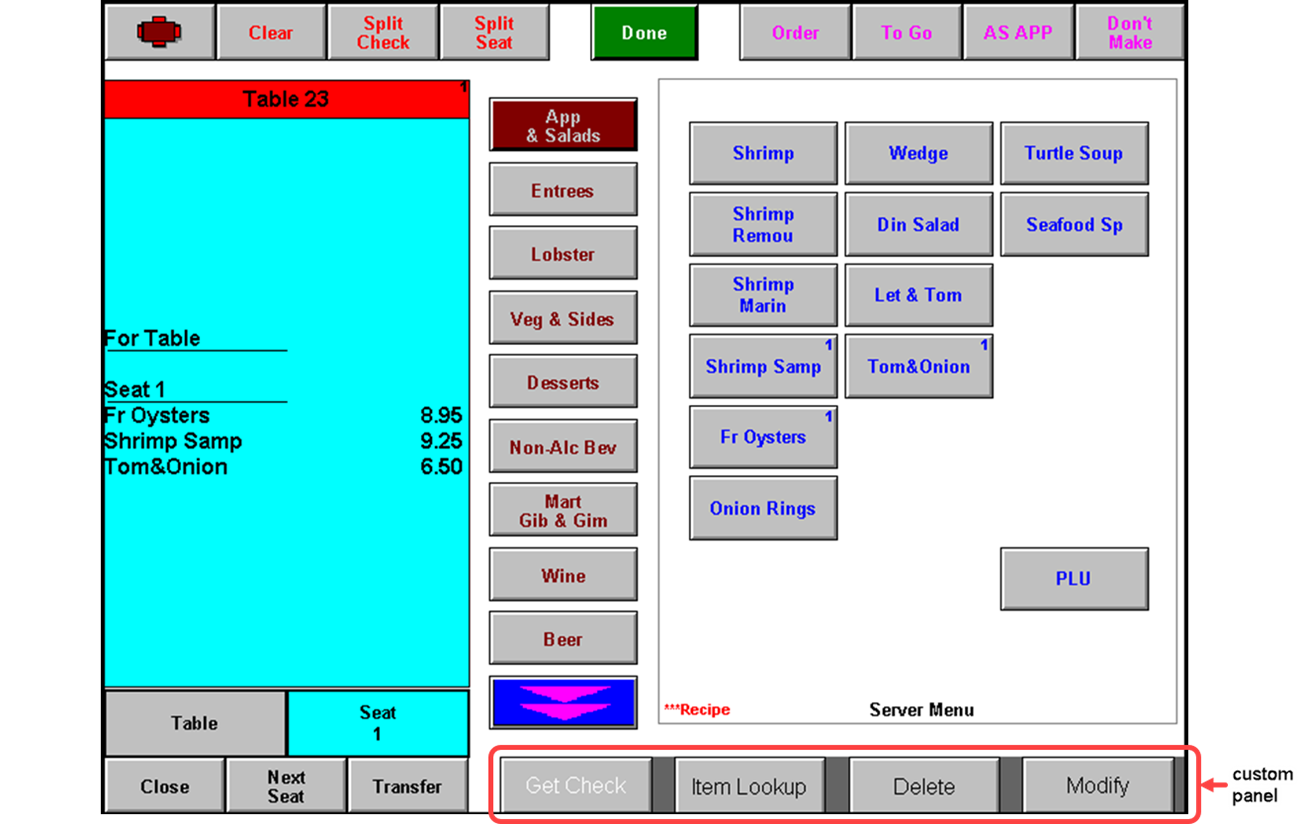
You can now create one or more custom panels to replace the buttons that usually appear in this area. You can add any number of buttons to a custom panel, but you cannot control the size of the panel or move it to another location on the screen; a custom panel always appears in the lower right portion of the screen.

When you replace this area of the screen with a custom panel, you can use ‘Chain’ buttons to link multiple custom panels together. By linking panels together, you essentially have access to more functions. You also have the ability to disable certain buttons by job code. For example, if you want to add the Get Check button to the panel for your cashiers, but you do not want your servers to use this function, clear the ‘Can get checks from other employees’ check box for the server job code in Maintenance > Labor > Jobcodes. The Get Check button is visible for both cashiers and servers, but does not work for servers.
You can also create several custom panels with different button functions and control the panel that appears for an employee based on the job code of the person using the order entry screen. For example, create a custom panel that has functions a server would use, such as Item Lookup, Quantity, Hold, Modify, Delete, and Repeat. Create another custom panel that contains functions a cashier would use, such as Get Check, Reprint Check, and Print Receipt. When you create the event required to display the custom panel, the event allows you to link a specific job code to the custom panel.
Configuring Custom Table Service Order Entry Screen
- Determining buttons to include on custom panel
- Creating a custom panel
- Activating a custom panel
- Refreshing POS data
Using Custom Table Service Order Entry Screen
Learn how to use the custom Table Service order entry screen.
Revision History
View the development history of the Custom Table Service Order Entry Screen feature.