Closing a guest ticket
You can quickly close a guest ticket to cash, credit card, or gift card. You can also save a credit card to a guest ticket to allow a customer to run a tab, as you might do in a bar environment.
To check out a customer:
- On the ticket entry screen, tap Pay.
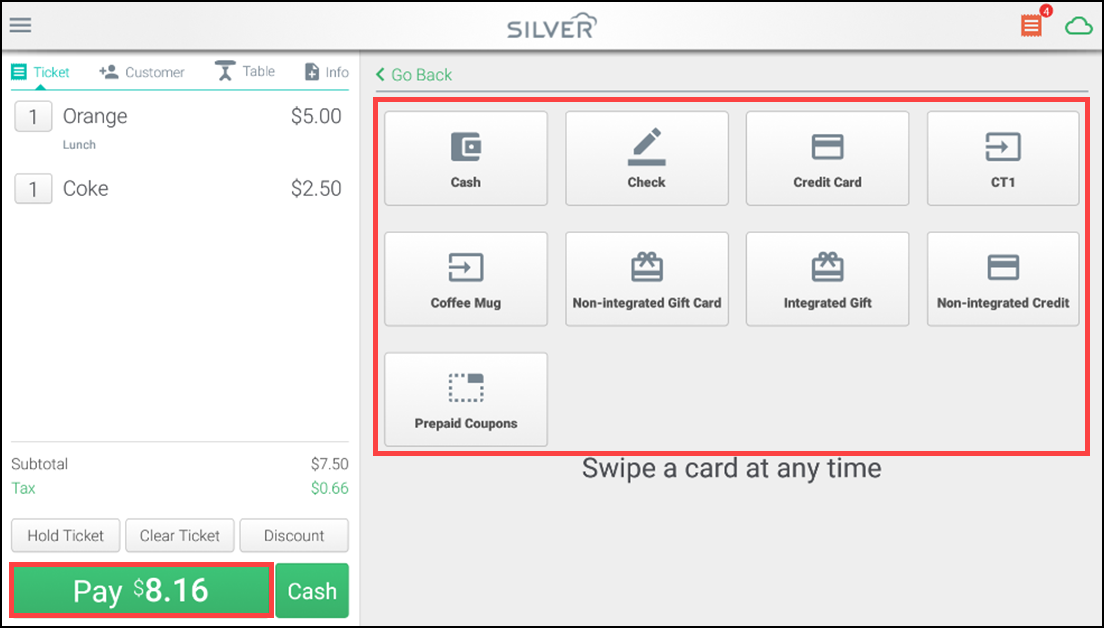
- Tap the desired payment method from the screen. Payment options must be set up in Back Office ahead of time and include:
- Cash
- Integrated credit and EMV
- Integrated gift cards
- Non-integrated credit (a payment type used to record payments on a stand-alone terminal, separate from the POS)
- Non-integrated gift (a payment type to record payments taken on a stand-alone terminal, separate from the POS)
- Check
- Prepaid coupon (a payment type to record payment redeemed through a prepaid coupon)
This document discusses the following:
- Closing a ticket to cash.
- Closing a ticket to a credit card.
- Closing a ticket to a gift card.
- Closing a ticket to a check.
- Collecting Email addresses during signature capture
Closing a ticket to cash
- With the guest ticket active, tap Pay.
- Tap Cash in the payment types area. The Cash Amount screen appears.
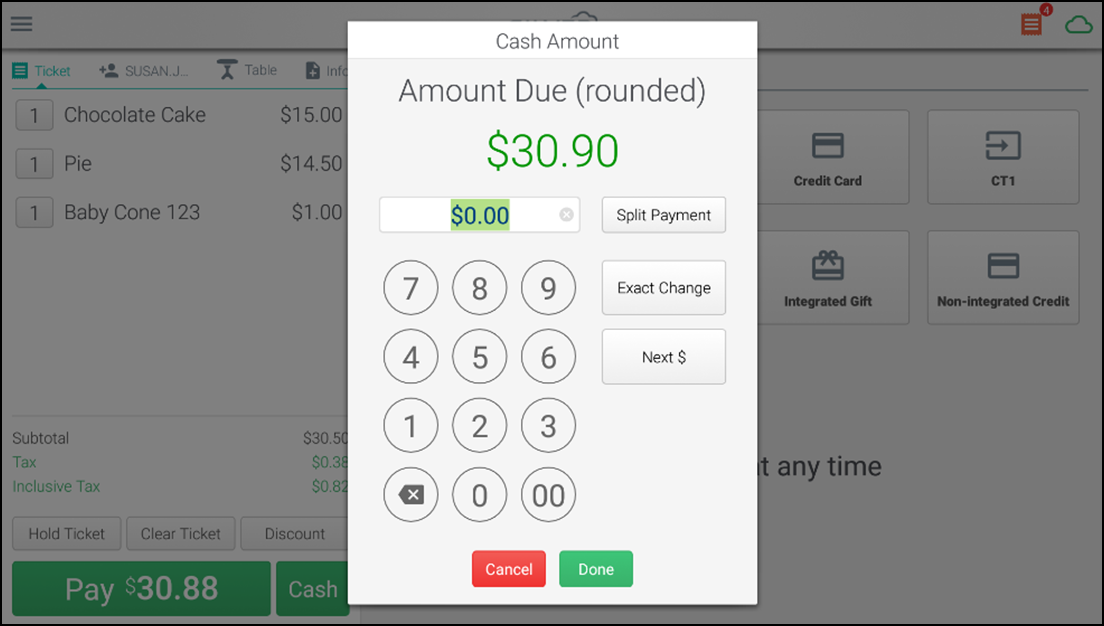
- Enter the amount of cash the customer is tendering using one of the following methods:
- Use the numeric keypad to enter the amount manually.
- Tap Split Payment to split the payment among multiple payers.
- Use the numeric keypad to tap the dollar amount and add the corresponding value to the Amount (i.e., $1, $5, $10, or $20).
- Tap Exact Change to set the amount value to the amount due value.
- Tap Next $ to set the amount value to the amount due value, rounded to the next whole dollar.
- Tap Done to add the payment. If the ticket is fully paid, the Receipt screen appears allowing you to send a receipt to the customer using email, print a receipt, or open the cash drawer without printing a receipt. This screen also shows any change due to the customer.
Tip: If the ticket is not fully paid, enter additional payments to fulfill the balance due.
Closing a ticket to a credit card
If you are using integrated credit card processing and your POS device is equipped with the NCR credit card reader, follow these steps to enter a credit card payment.
-
With the guest ticket active, tap Pay.
-
Tap Credit Card.
Note: Alternatively, you can just swipe the card as soon as you are done adding items to the ticket and the checkout process automatically starts without having to tap Checkout and select the payment method.
-
Swipe the customer credit card through the card reader. The payment amount is automatically set to the Balance Due. The system then sends the credit card transaction to the processor and authorizes the amount.
-
If digital signature capture is enabled on your POS device, have the customer sign the signature screen with his or her finger (or you can use a stylus). To always require a customer signature, enter $0.00 in the Require signature for purchases greater than option. To enable faster checkouts, you can enter a minimum dollar amount that requires a customer signature. For more information, refer to Payment Methods. If the Accept Tips option is enabled for your store in Back Office, the customer can add a tip to the transaction.
-
Tap Done.
To enter the credit card details manually:
If you need to enter credit cards manually, ensure you configure the system to enable Accept Manual Card Entry in Back Office, then follow these steps to manually enter a credit card payment:
-
With the guest ticket active, tap Pay.
-
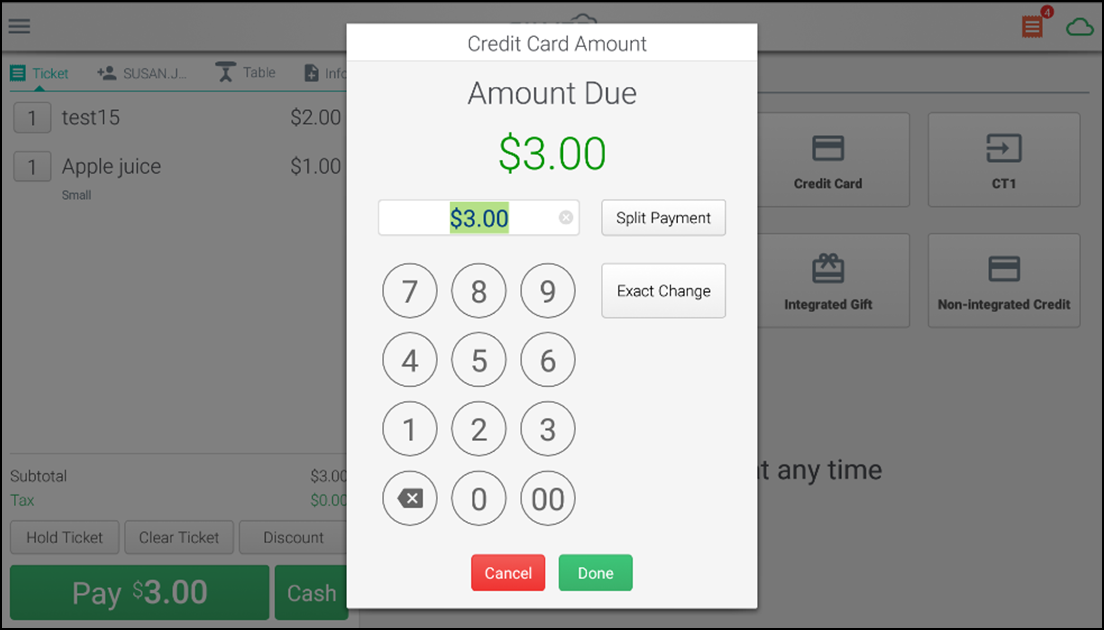
Tap Credit Card in the payment types. The Credit Card Amount window appears.
-
Enter the amount the customer is tendering.
-
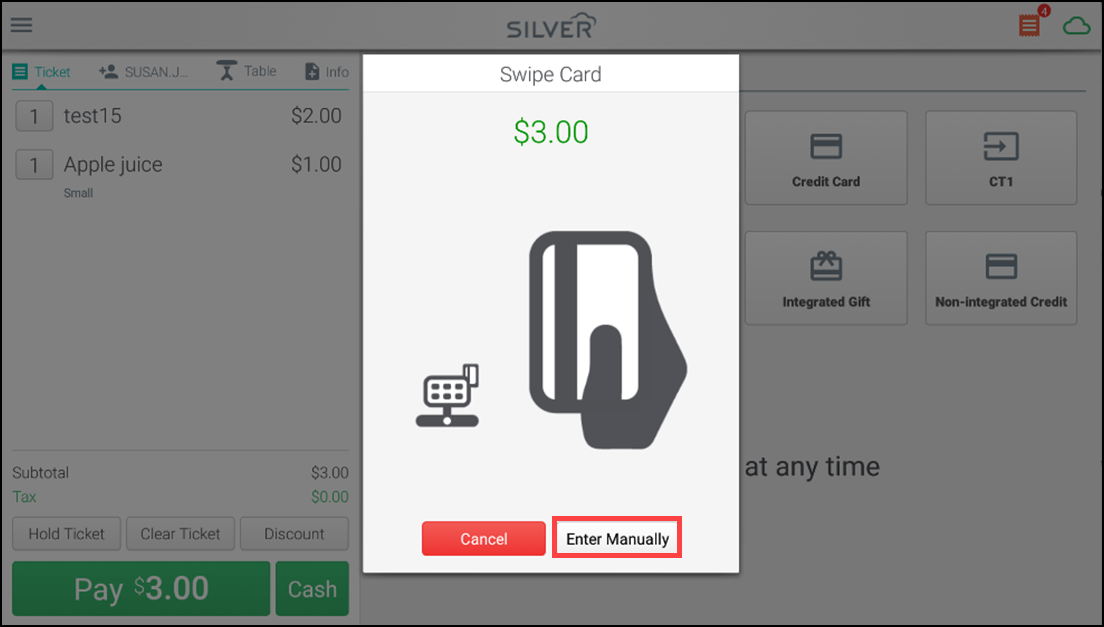
Tap Enter Manually on the swipe card. The Manual Card Entry screen appears.
-
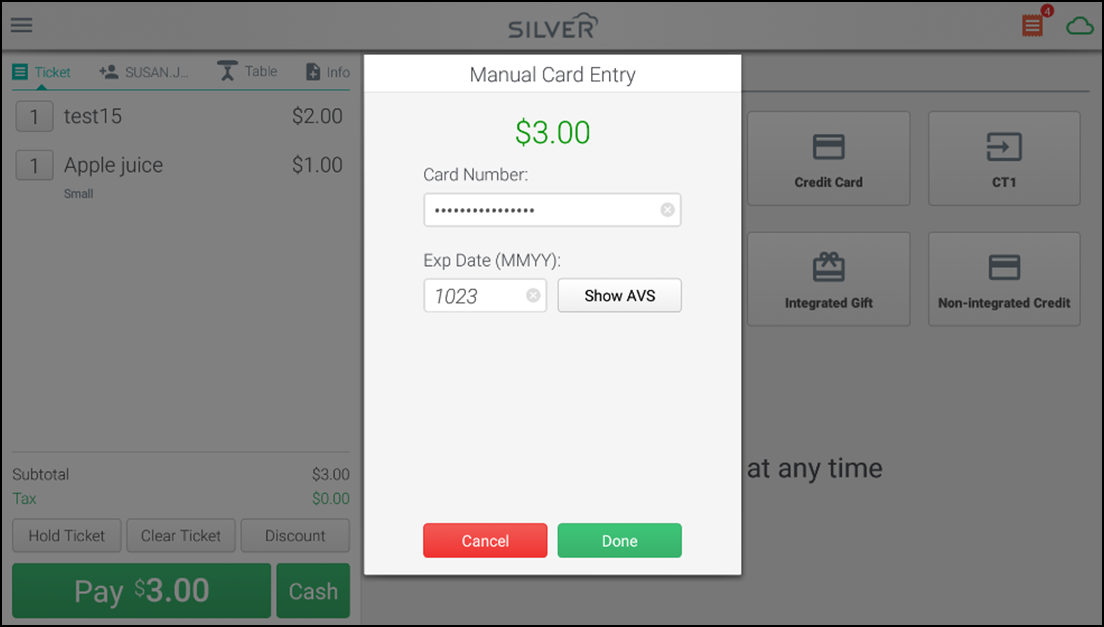
Enter the credit card number and expiration date and tap Done.
Note: If your POS device is not connected to the Internet via a wireless or cellular network, you can still take credit card payments using our offline credit feature.
-
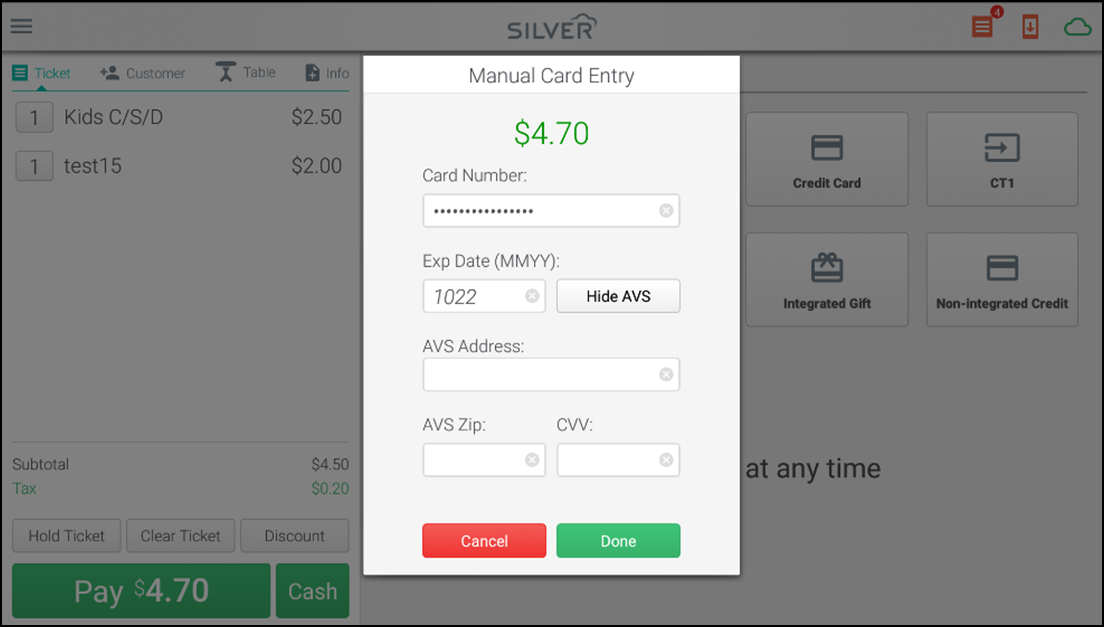
(Optional) Tap Show AVS (Address Verification Service), to provide the AVS Address, AVS Zip, and CVV number of the card.
Note: For the Monetra payment gateway, the Show AVS option is not available; whereas, the card entry screen appears with the details, such as AVS Address, AVS Zip, and CVV number along with the Card Number and Expiration date.
Closing a ticket to a gift card
If you have gift cards set up in your Back Office, you will see a Gift Card payment option when you tap Checkout. To accept payment using a gift card, tap the Gift Card payment type or simply swipe the card. If the gift card balance is not sufficient to cover the entire ticket amount, you are returned to the Checkout screen to select another method of payment. If there is a remaining balance on the gift card, it appears on the customer receipt.
With an Internet connection, you can apply a gift card as payment for a guest ticket. If you lack an Internet connection, or if the payment host is offline or unreachable, the POS cannot process gift cards for payments on guest tickets. The app must be able to connect to the payment host to verify the gift card and the funds available. Credit card payments, if you use Offline Credit, are available to use without an Internet connection, but gift cards are not. When you attempt to apply the gift card, you receive a ‘No connection’ error message.
When a gift card no longer contains any funds to apply to a guest ticket, the system displays an error message (related to insufficient funds) and does not allow the use of the gift card. Additionally, when the system does not recognize the gift card number, system displays an authorization error and does not allow the use of the gift card.
-
On the ticket entry screen, tap Pay to access the ‘tender’ screen.
-
Slide the gift card through the MSR, confirm the amount to apply to the gift card or enter a different amount, and tap Done.
-OR-
Tap Integarted Gift, confirm the amount to apply to the gift card or enter a different amount, and tap Done. Slide the gift card through the MSR, or tap Enter manually, type the gift card number, and tap Submit.
The system authorizes the card for payment.
-
If the system authorizes the gift card for the selected amount, you are directed to the receipt selection screen.
-OR-
If the gift card lacks sufficient funds to cover the selected amount, an authorization message appears with the funds available on the gift card to apply for payment. Tap OK, and receive an additional form of payment or remove items from the guest ticket.
You have the option to use the iPad device camera to scan QR-coded gift cards (like from a third party loyalty application). Press Camera on the gift card payment screen, and scan the QR code with the camera. The gift card number populates and you can proceed.
Closing a ticket to a check
- With the guest ticket active, tap Pay.
- Tap Check in the payment types area. The Check Amount screen appears.
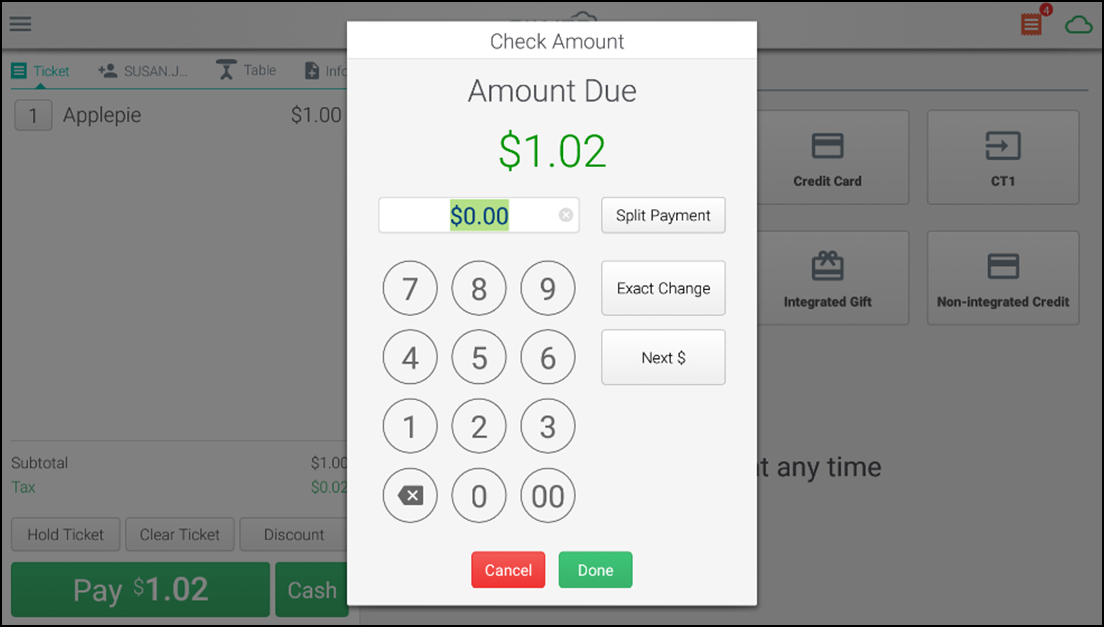
- Enter the amount on the check that the customer is tendering using one of the following methods:
- Use the numeric keypad to enter the amount manually.
- Tap Split Payment to split the payment among multiple payers.
- Use the numeric keypad to tap the dollar amount to add the corresponding value to the Amount (i.e., $1, $5, $10, or $20).
- Tap Exact Change to set the amount to the amount due.
- Tap Next $ to set the amount to the amount due, rounded to the next whole dollar.
- Tap Done to add the payment. If the ticket is fully paid, the Receipt screen appears, allowing you to send a receipt to the customer via email, print a receipt, or open the cash drawer without printing a receipt. This screen also shows any change due to the customer.
Tip: If the ticket is not fully paid, enter additional payments to fulfill the Balance due.
Collecting Email addresses during signature capture
The signature capture screen allows you to collect a customer email address during a sale.
If you have not assigned a customer to the sale, when you present the POS device to the customer for his or her signature, the customer can tap Enter e-mail address, and then type the email address to which the receipt should be sent. In addition, the customer can specify whether he or she wants to receive email marketing messages by tapping the Opt Out of Marketing on/off switch.
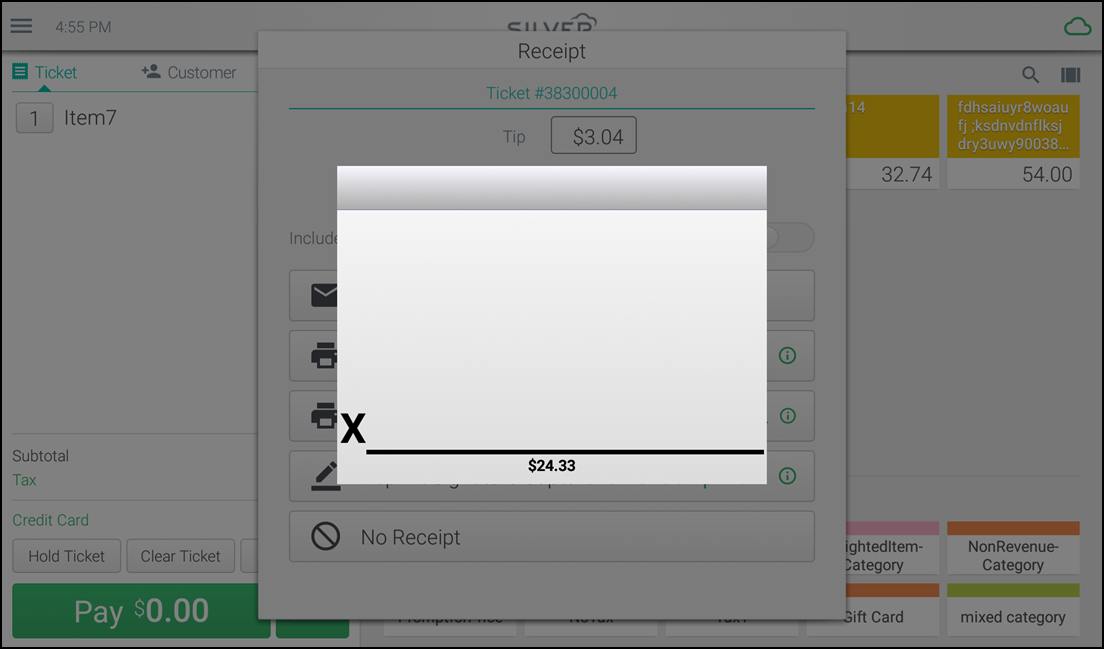
If the customer specifies an email address that is associated with an existing customer record, that customer will be assigned to the sale automatically. If the email address the customer specifies is not associated with an existing customer record, the system will create a new customer record for the customer automatically.
If you have already assigned a customer to the sale, the signature capture screen displays the email address you have on file for the customer.
The customer can:
- Tap the existing e-mail address and change it, if necessary.
- Choose to have the receipt sent via email by tapping the Email receipt on/off switch.
- If the customer changes his or her email address, the system will update the customer record automatically.
Looking for resources or help with Silver? Click here.