Working with loyalty rewards
Rewarding customers for coming to your store will build loyalty and increase customer purchases. Make sure the reward is of value and easy for customers to understand. All rewards are at the ticket level and can be for a specific amount or percent off the total ticket. A minimum purchase amount can be set for redeeming a reward in Back Office.
Assigning customers and viewing their loyalty rewards in the POS app
Turn on the prompt to assign customers to a ticket in the POS app. Encourage employees to always assign the customer to every ticket. They can do this by searching for the customer's name, email address, phone number, and/or by swiping the customer's credit card. Multiple credit cards can be associated with a single customer. Once you assign a customer to a ticket, you can tap the customer's name to view their loyalty reward status.
To assign customers for loyalty rewards in the POS app:
- Tap hamburger menu icon to display the slide out menu and access customer tab or from a tab on the Ticket Entry screen.
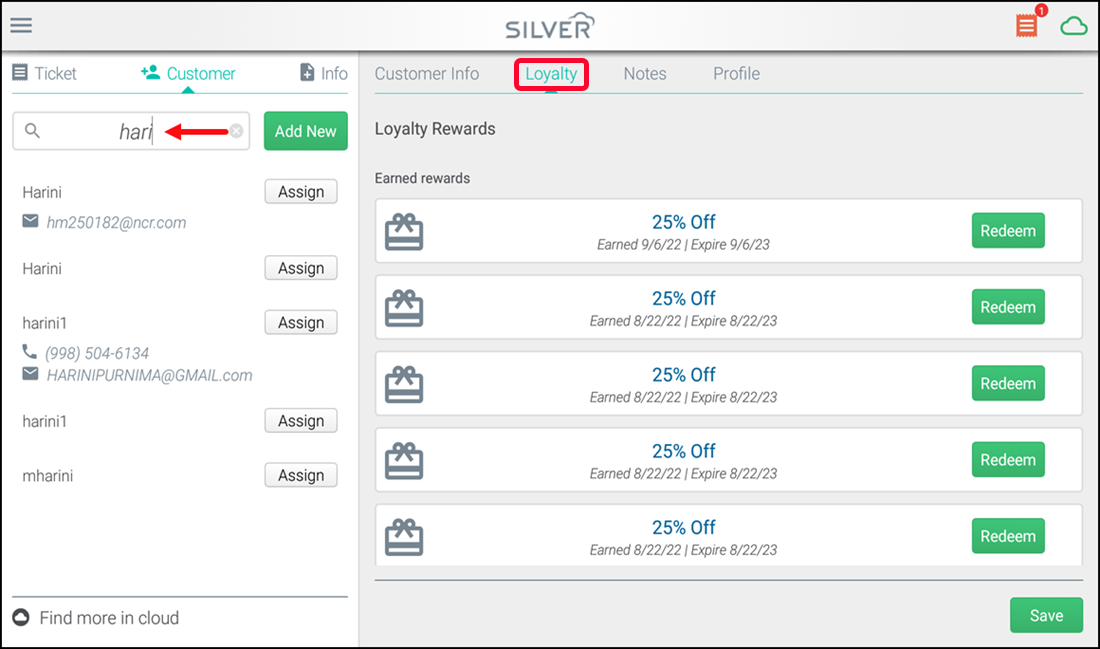
- Enter a name, address, phone number or email into the search bar.
- Tap on the customer's name to view the customer's detailed record in the right panel. Here, you can view customer’s history and recent sales. The Customer Info displays by default, but you can use the additional tabs to view customer profile, notes and loyalty. The loyalty tab shows the rewards that are available and can be redeemed.
Redeeming loyalty rewards
If the employee begins by adding items to a ticket and then assigns the customer to the ticket and that customer has a reward available, the system will alert your employee by displaying a pop up window to redeem the same.
To redeem rewards:
- Log in to the POS. The Ticket Entry screen appears and add items to the ticket.
- Tap Assign to assign a customer to the ticket.The system alerts the user by displaying a pop up window to redeem the same, if the customer has a reward available.
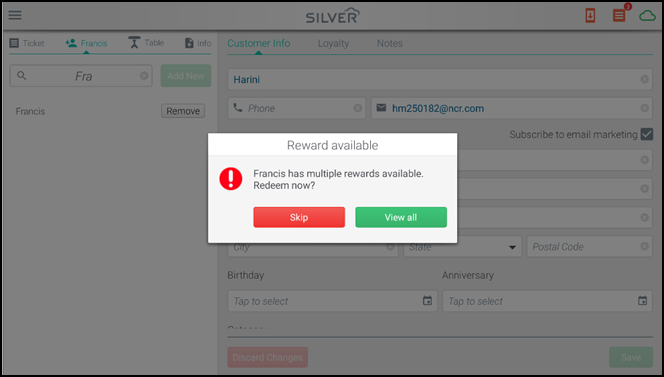
- Tap View all to view all the loyalty rewards available to redeem.
- Tap Skip, if the customer does not want to redeem.
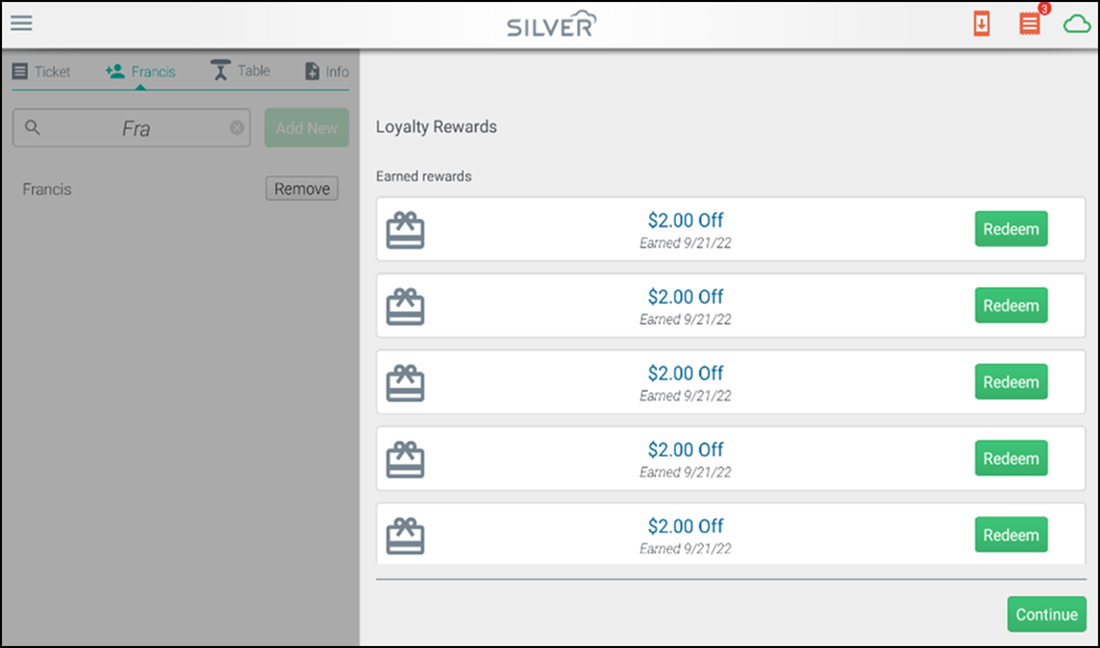
- Tap Redeem to redeem a reward or else tap Continue, if you do not wish to redeem.The system will apply the loyalty discount to the ticket and the Ticket Entry screen appears.
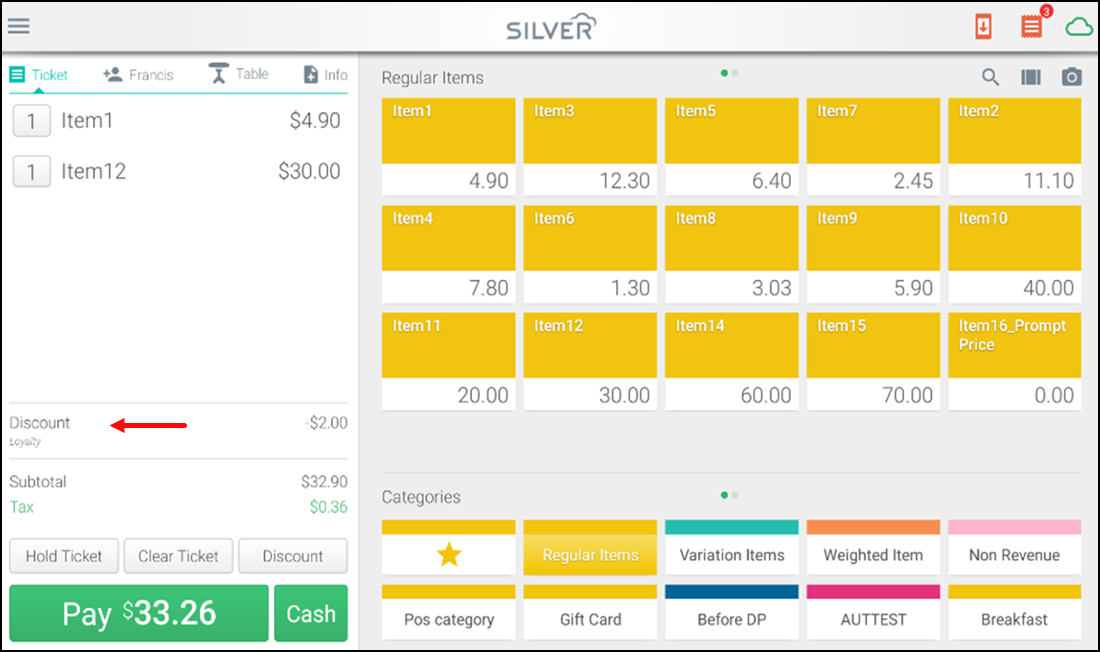
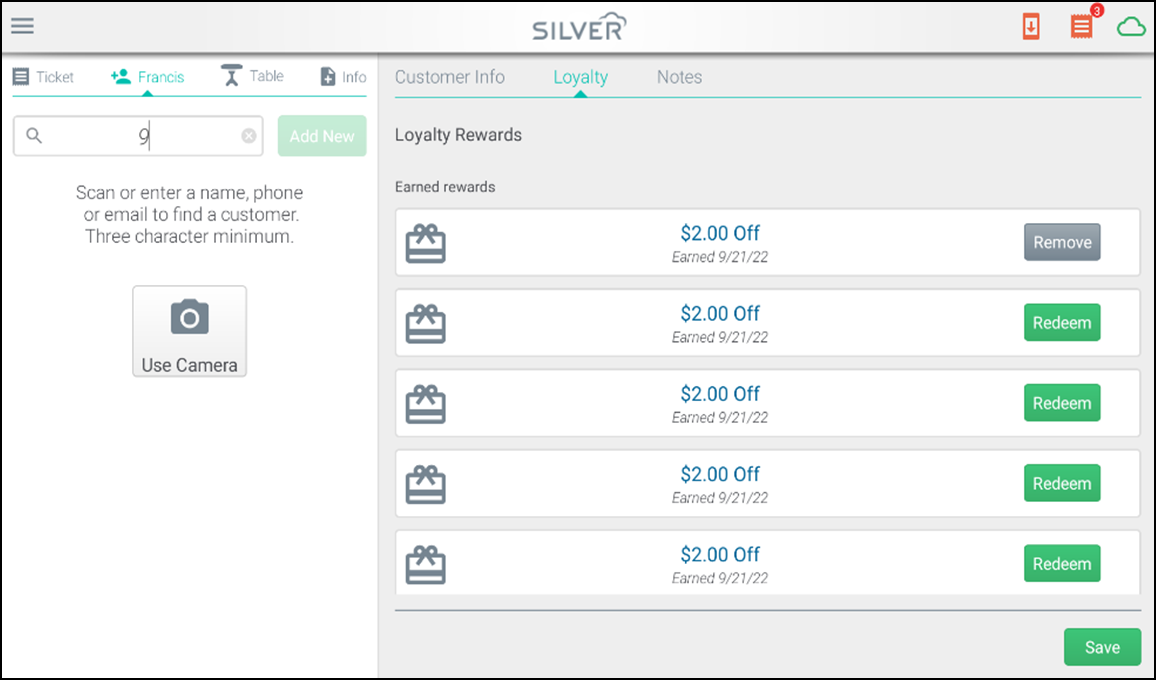
- Tap on the loyalty discount line and then tap Remove to remove the loyalty discount added to ticket, if required. Tap continue. The system removes the loyalty discount added to the ticket and the Ticket Entry screen appears.
- Complete the checkout process. The customer's reward status is shown on their receipt (printed and or emailed).
Tip: When paying by credit card, there are some additional loyal features available. To take advantage of these, make sure you have digital signature capture turned on and the customer has not selected the Email Receipt option on the signature screen. When these conditions are met, when you present the POS device for the customer to sign on the screen, they will sign and tap Accept. The system will then display a screen to the customer that looks like the one shown below. The customer can view the loyalty reward status and select their receipt option - None, Print, or email.
Looking for resources or help with Silver? Click here.